Basement Drain Clogged? Your Stress-Free DIY Guide to Clearing It Safely
Staring at standing water in your basement? Learn proven methods to clear a clogged basement drain yourself without chemicals. Step-by-step instructions, safety tips, and prevention strategies included.
Your basement drain is the unsung hero of your home – until it's not. Suddenly, you're facing standing water, foul smells, or even backup during heavy rain. This usually happens because debris, grease, or sediment builds up in the trap or pipe. Worse, it often strikes when you least expect it, turning your basement into a swampy nightmare. I've seen too many homeowners panic and make costly mistakes, but understanding what's happening is half the battle.
That gurgling sound and rising water in your basement drain is enough to ruin anyone's day. As a DIY plumber who's been in your soggy shoes, I know the panic – but take a deep breath. Most basement drain clogs are fixable with basic tools and the right approach. This guide walks you through every step safely, turning frustration into confidence.
Tools Needed
- Heavy-duty plunger (with flange for better seal)
- Drain snake/auger (25-50 ft manual cable auger)
- Wet/dry vacuum (with blower function if possible)
- Adjustable pliers (for opening cleanout plugs)
- Bucket and old towels (for water containment)
- Flashlight (for inspecting drain pipe)
Materials Needed
- Heavy-duty rubber gloves (chemical-resistant)
- Safety goggles (splash protection)
- White vinegar (1 gallon for maintenance flush)
- Baking soda (large box for maintenance)
- Plumber's grease (tube for lubricating cleanout plugs)
Solution (Intermediate - 45-90 minutes (depending on clog severity))
Step 1: Safety First & Prep Your Battle Station
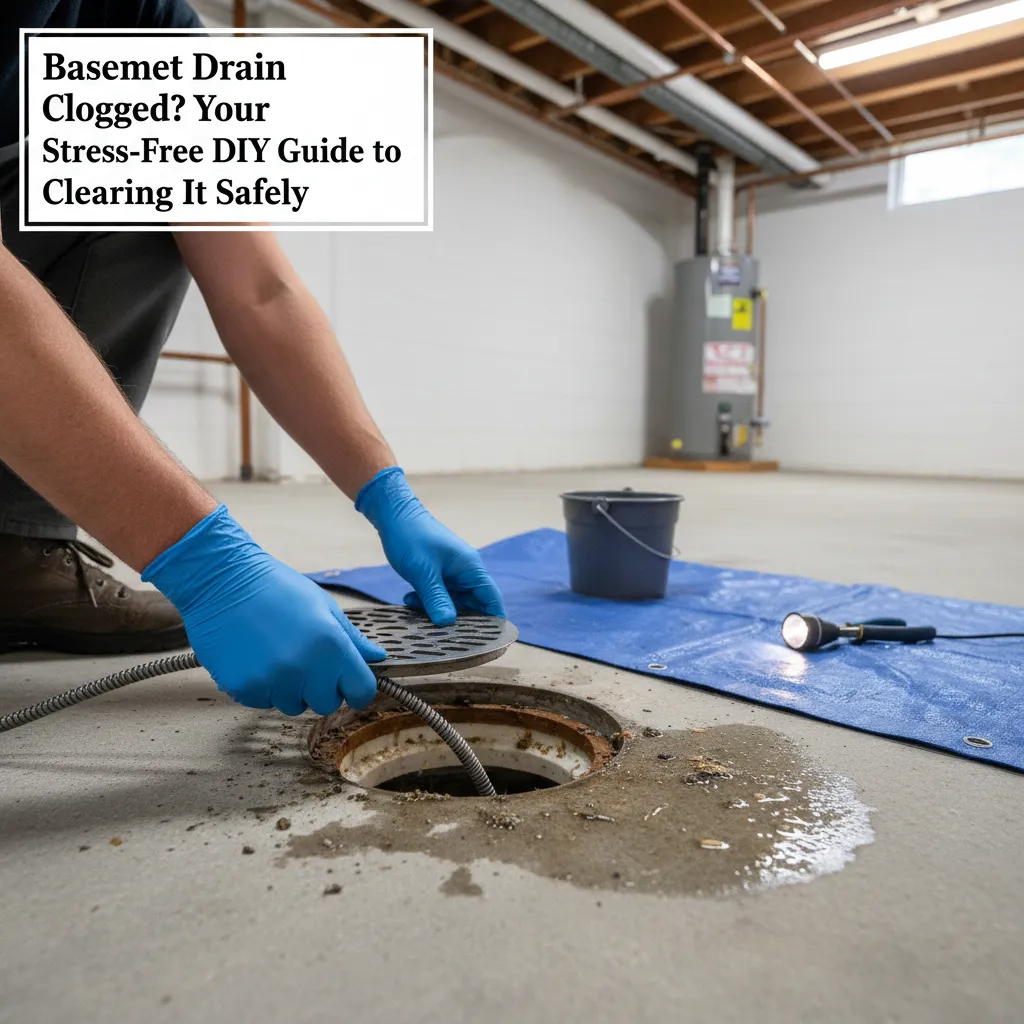
Clear the area around the drain and put on gloves/goggles. Place towels strategically. Remove the drain cover (often lifts out or unscrews). Probe gently with a flashlight – can you see the clog? If water is present, use a wet vac to remove it. Never skip PPE – drain gunk contains nasty bacteria.
⚠️ Warning: NEVER mix chemical cleaners with mechanical methods. Chemical reactions can cause dangerous fumes or pipe damage.
Step 2: Plunge Like a Pro
Seal the plunger completely over the drain. Add 1-2 inches of water to create pressure. Use forceful, vertical pumps (10-15 strong thrusts). The secret? Maintain the seal on the upstroke. This often clears shallow clogs caused by hair or sludge near the trap.
⚠️ Warning: Avoid aggressive side-to-side motion – it breaks the seal. Stop if water rises dangerously.
Step 3: Snake the Drain Strategically
Feed the snake cable slowly into the drain until you meet resistance. Rotate clockwise while applying gentle pressure – this hooks debris. When you hit the clog, crank steadily (don't force). Feel for a 'give,' then retract slowly. Pro tip: Clean the cable with rags between attempts to avoid re-clogging.
⚠️ Warning: Never rotate counter-clockwise – this can unscrew the cable head inside the pipe.
Step 4: Flush & Test
Run hot water for 5+ minutes to clear residue. For maintenance, pour 1 cup baking soda followed by 2 cups vinegar – let fizz for 15 mins before flushing. Test drainage with a 5-gallon bucket of water. Listen for smooth flow – gurgling means residual blockage.
⚠️ Warning: Use hot but NOT boiling water – extreme heat can crack PVC pipes.
Pro Tips
- Pre-lube your snake cable with dish soap for easier insertion
- Tie a bright cloth to your snake cable – instantly shows rotation
- After heavy rain? Wait 1 hour before snaking – storm surges can temporarily overwhelm drains
- Use a shop vac in 'blow mode' to dislodge shallow clogs if plunging fails
When to Call a Professional
Call a pro if: 1) Water backs up from multiple drains (indicates main line blockage), 2) Snaking hits immovable resistance (possible collapsed pipe or roots), 3) You detect sewage smells (vent stack issues), or 4) The cleanout plug won't budge. Forcing it can break cast iron pipes. Most pros charge $150-$350 – cheaper than flood damage!
Understanding the Problem in Detail
Basement drains connect to your main sewer line or storm system. Clogs usually form in the P-trap (that U-shaped pipe holding water to block gases) or from debris accumulation further down. Common culprits: laundry lint, sediment from floor runoff, hair/oil, or tree roots invading older pipes. During heavy rain, overwhelmed municipal systems can even push water BACK through your drain.
Tools and Materials Guide
• Plunger: Choose a flange-style (looks like a rubber cone) for better seal. $15-$25 at hardware stores.
• Drain Snake: Manual 25-50ft augers ($30-$60) handle most homes. Avoid cheap plastic 'drain sticks' – they snap.
• Wet/Dry Vac: Must have sealed motor (sucking water kills regular vacuums). Rent for $25/day if needed.
• Alternatives: Coat hanger (for hair clogs near surface), garden hose with pressure nozzle (caution – can blow apart weak joints).
Safety Considerations
- Bacteria Alert: Assume drain water contains E.coli. Wear gloves/goggles and disinfect tools afterward.
2) Chemical Dangers: Store-bought drain cleaners corrode pipes over time and can cause severe burns.
3) Mold Risk: Dry the area thoroughly after clearing to prevent mold.
4) Gas Protection: If you smell sulfur (rotten eggs), leave immediately – sewer gas is flammable and toxic.
Troubleshooting Common Issues
• Snake Won't Feed? The cable might be coiled inside the drum. Fully retract and re-feed slowly.
• Water Returns After Clearing? Likely a deeper main line clog. Check other drains for backup.
• Persistent Odors? The P-trap may be dry (common in unused basements). Pour water down monthly to maintain the seal.
• Gurgling Sounds? Your vent stack might be blocked – this requires roof access.
Maintenance and Prevention
- Monthly: Pour 4L hot water + 1 cup baking soda down drain
2) Quarterly: Vinegar/baking soda treatment (Step 4)
3) Install a drain screen ($3) to catch debris
4) Never pour grease, paint, or laundry starch down drains
5) Run water in unused basement drains quarterly
Cost Analysis: DIY vs Professional
• DIY: Snake rental $20/day, plunger $20, supplies $15 = $55 avg
• Professional: $150-$350 depending on severity
• Ignored Clog: Water damage remediation $1,500-$5,000+
Save money by buying a snake – it pays for itself in 2 uses.
Related Plumbing Problems
• Sump Pump Failure: Often mistaken for drain clogs during floods
• Sewer Line Backup: Toilet gurgling when basement drain is used
• Foundation Cracks: Water seepage through walls (not drain-related)
• Frozen Drain Pipes: In winter, pipes below frost line can freeze solid
Frequently Asked Questions
Can I use chemical drain cleaners as a first resort?
Strongly discouraged. They rarely work on serious clogs, can damage older metal/pvc pipes, create toxic fumes, and make mechanical clearing dangerous. Try plunging/snaking first – it's safer and more effective.
Why does my basement drain smell like sewage even when it's dry?
This usually means the P-trap has evaporated. All drains have this U-shaped pipe that holds water to block gases. Pour 4L of water down the drain to refill the trap. If smell persists, you may have a crack in the pipe or vent stack issue.
Water backs up ONLY during heavy rain. Is this a clog?
Possibly not. This often indicates overwhelmed municipal storm lines pushing water back through your drain. Install a backwater valve ($300-$500) – it's a one-way flap that blocks reverse flow. Clear any existing clog first though!