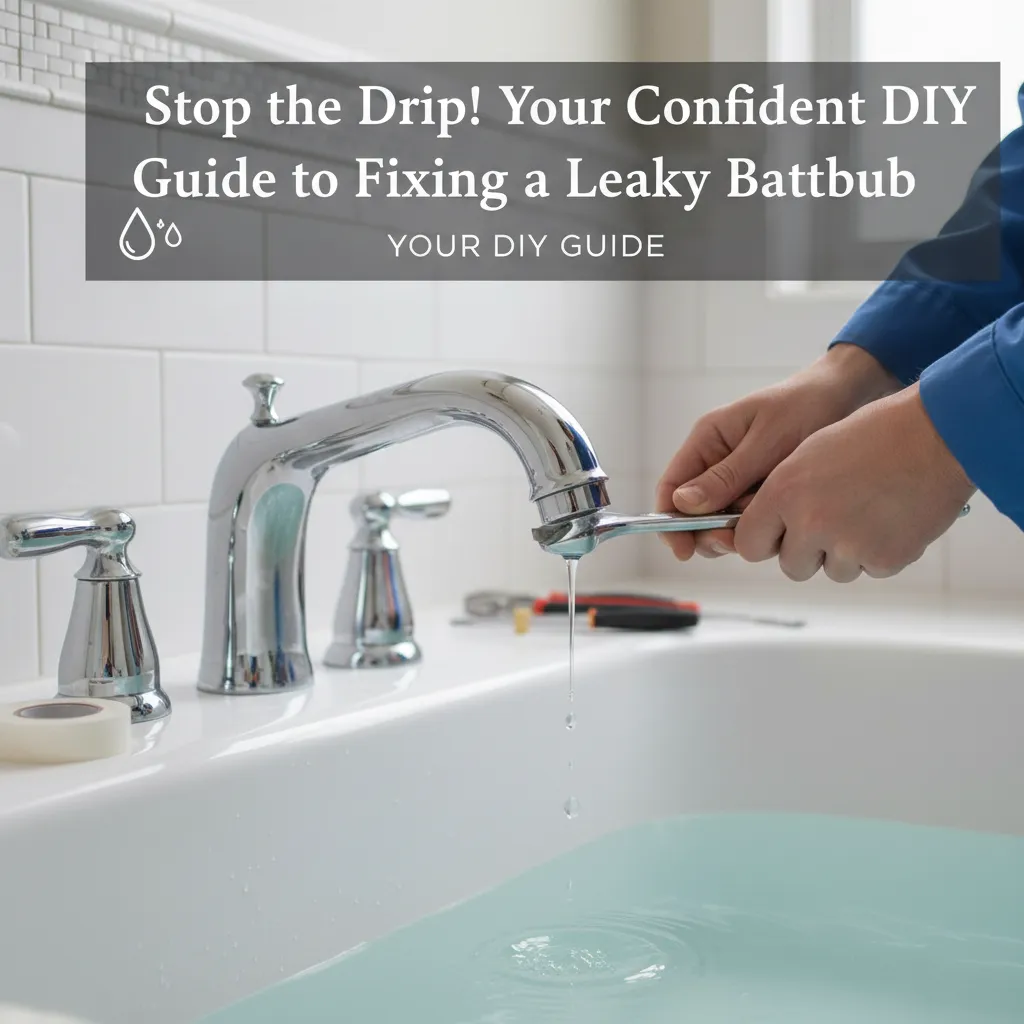
You hear the drip, see the water stain on the ceiling below, or feel dampness around the tub. It's frustrating, anxiety-inducing, and makes you worry about water damage and repair costs. Whether it's a steady drip from the faucet, water seeping from the drain pipe under the tub, moisture around the overflow plate, or mysterious pooling on the floor, a leaky bathtub feels like an urgent problem. You want it fixed now, but you also want it fixed right without causing more problems or wasting money.
That persistent drip-drip-drip from your bathtub isn't just annoying – it's wasting water and potentially damaging your home. Before you panic or reach for the phone to call a plumber (and their hefty bill), take a deep breath. Most bathtub leaks are surprisingly fixable DIY projects once you know where to look and what to do. A leaky bathtub drain is often caused by a failed rubber gasket or improper use of plumber's putty on fiberglass tubs 1. Experienced plumbers point out that for fiberglass tubs, silicone should be used instead of plumber's putty, as putty can damage the tub. One plumber explained the correct method: "Rubber gasket on the bottom. Plumbers putty on top. Crank it down till the putty compresses out and the flange is tight to the tube. Done." Another added a simpler approach: "Unscrew, silicone on top, rubber at the bottom. Screw the drain back. Fill it to test it. Done." This guide will walk you through finding the leak, choosing the right fix, and getting your bathroom back to peaceful silence, empowering you as a homeowner.
Tools Needed
- Adjustable Wrench (or Basin Wrench for tight spaces): For loosening/tightening nuts.
- Screwdrivers (Phillips & Flathead): For removing trim plates and screws.
- Channel-Lock Pliers: Gripping pipes and stubborn parts.
- Plumber's Putty Knife: Scraping off old putty/silicone.
- Flashlight: Shining light into dark recesses.
- Bucket & Towels: For catching water and cleanup.
- Safety Glasses: Protecting eyes from debris.
- Gloves (Nitrile or Rubber): Keeping hands dry and clean.
Materials Needed
- Plumber's Putty (Non-staining): For sealing drain flanges & overflow covers.
- Silicone Caulk (100% Silicone, Bathroom Grade): For sealing around tub edges/spouts (check compatibility!).
- Replacement Washers/O-Rings: Specific size/type for your faucet cartridge/stem.
- Replacement Gasket(s): For drain waste/overflow assembly (often comes in kits).
- Teflon Tape (Thread Seal Tape): For sealing threaded pipe connections.
- Replacement Cartridge/Stem Assembly (If needed): Match your faucet model exactly.
Solution (Beginner to Intermediate - 30 minutes - 2 hours (depending on leak source & complexity))
Step 1: Find the Leak Source (Be a Plumbing Detective!)
Turn on the tub faucet fully and watch closely. Check: the spout itself, where the spout meets the wall, the handles/base of the faucet, the overflow plate (inside the tub), and the drain. Dry everything thoroughly with a towel. Now, just fill the tub a few inches (don't run the faucet). Check under the tub (if accessible) and around the overflow for leaks. Drain the water. Does the leak occur while filling, draining, only when full, or constantly? This tells you if it's the faucet, overflow gasket, drain gasket, or tub sealant.
⚠️ Warning: Ensure the floor is dry before starting to prevent slips. Wear gloves and eye protection when inspecting under the tub.
Step 2: Gather Your Tools & Materials (Match the Fix to the Leak)
Based on your detective work: For faucet drips, you'll likely need washers/O-rings or a cartridge. For drain/overflow leaks, you need plumber's putty and/or gaskets. For water around the tub edge, you need silicone caulk. For a leaking drain pipe under the tub, you might need a new gasket or Teflon tape. Get the exact replacement parts for your specific fixtures – take old parts to the hardware store if unsure.
⚠️ Warning: Turn OFF the main water supply to the house before working on faucets! Relieve pressure by opening a faucet on a lower floor.
Step 3: Fix Faucet Leaks (Washers, O-Rings & Cartridges)
Remove the handle(s) (often a small set screw under a cap). Use your wrench to carefully unscrew the packing nut. Pull out the stem or cartridge. Inspect the rubber washer at the tip and any O-rings on the stem. Replace any worn or damaged parts with exact matches. Lightly lubricate new O-rings with plumber's grease. Reassemble carefully, ensuring the stem/cartridge key aligns. Hand-tighten nuts first, then give a gentle quarter-turn with the wrench. Don't overtighten! Turn water back on slowly and test.
⚠️ Warning: Handle cartridges gently. Take photos during disassembly to ensure correct reassembly. Overtightening can crack fixtures.
Step 4: Fix Drain & Overflow Leaks (Gaskets & Putty Power)
Remove the overflow plate screws. Carefully pull the plate and linked drain assembly up from inside the tub. Underneath, you'll find a large gasket sealing the overflow pipe to the tub wall. Scrape off old putty/gunk from the overflow flange and drain flange. Apply a thick rope of plumber's putty under the drain flange lip before setting it back into the tub hole. Place the new overflow gasket over the pipe. Reassemble the linkage. Tighten the large locknut under the tub onto the drain body firmly by hand, then a quarter-turn with pliers. Ensure the assembly moves freely to open/close the drain. Wipe away excess putty.
⚠️ Warning: Support the drain assembly while tightening underneath. Overtightening the locknut can crack the tub or distort the gasket. Ensure the drain shoe sits flush with the tub bottom.
Step 5: Seal the Tub Edge (Silicone Savior)
If water is escaping around the tub edge onto the floor, the sealant has failed. Use a putty knife to meticulously remove ALL old silicone or caulk from the joint between the tub and tile/wall. Clean the area thoroughly with rubbing alcohol and let it dry completely. Apply painter's tape to the tub and wall for clean lines. Cut a SMALL hole in the silicone tube tip. Apply a smooth, continuous bead of 100% silicone into the joint, slightly overfilling it. Immediately wet your finger (spit works!) or use a smoothing tool and run it along the bead to tool it smooth and force it into the joint. Carefully remove the tape while the silicone is still wet. Let it cure fully (check product instructions, usually 24+ hours) before using the shower.
⚠️ Warning: Ventilate the area well. 100% silicone sticks to everything – wear gloves and avoid contact with surfaces you don't want it on! Acrylic caulk won't hold up in the wet shower environment.
Step 6: Final Test & Cleanup (Celebrate the Silence!)
Double-check all connections are snug but not overtightened. Turn the water supply back on slowly. Fill the tub past the overflow line and let it sit for 15-30 minutes. Drain the tub and check again. Wipe everything down. Admire your leak-free handiwork!
⚠️ Warning: Be patient during the test. Small seeps might take a minute to appear. If a leak persists, re-evaluate the source before proceeding.
Pro Tips
- Take photos with your phone at every disassembly step – your future self will thank you!
- Wrap the jaws of your wrench or pliers with masking tape to prevent scratching chrome fixtures.
- For stubborn nuts under the tub, a basin wrench is worth its weight in gold for extra reach and leverage.
- When applying silicone, less is more. A small, well-tooled bead is better than a thick, messy one.
- Keep replacement washers/O-rings for your specific faucets on hand – they're cheap insurance.
- A headlamp frees up both hands for working under the tub.
When to Call a Professional
Call a licensed plumber if: The leak is in the water supply lines inside the wall/floor (not at fixture connections), you suspect major pipe corrosion, the leak persists after multiple careful repair attempts, you need to solder pipes (if you're not experienced), the tub itself is cracked, or you simply feel unsafe or overwhelmed. Don't risk significant water damage – knowing your limits is smart DIY.
Understanding the Problem in Detail
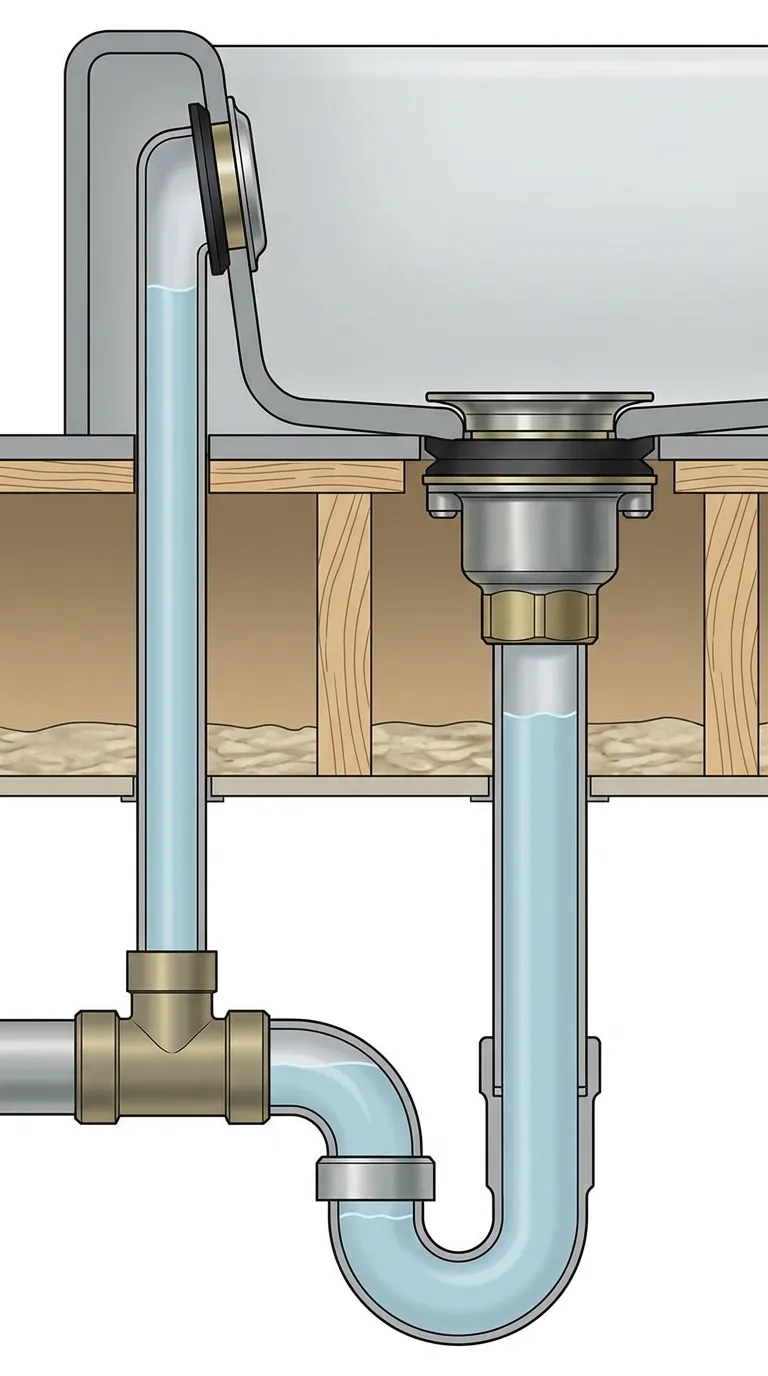
Leaks happen for a few reasons: rubber washers and gaskets harden with age, metal parts corrode, someone didn't use enough sealant or left a nut loose, or the house settles and breaks a seal. Water takes the path of least resistance, so where you see the drip isn't always where the problem starts. Bathtub leaks commonly come from the drain assembly, overflow pipe, faucet, or cracks in the tub itself 2. A leak around the overflow plate or drain flange often means a gasket failed or a connection worked loose 3. Knowing the basic parts—cartridge, stems, drain assembly, overflow tube, P-trap—takes the mystery out of it.
A missing or improperly installed P-trap under the tub is a common code violation that lets sewer gas in and messes with drainage 4. Experienced plumbers don't hold back on installations without a proper trap—they call them "hacky" and "half ass." One plumber said, "There should be a trap. Also that flex pipe is super hacky. Find an actual plumber." Another noted, "Lol the accordion pipe is the trap! But not the right kind of trap." If you're dealing with a persistent sewer smell or slow drainage, a missing or wrong trap could be your culprit.
If you're thinking about a full tub or shower replacement, it's worth knowing that TCNA Handbook methods B440 and B441 call for one-coat mortar bed walls with rigid backing for tile installations 5. Solid surface shower pans are non-porous, resist mold and mildew, and come with 10–30 year warranties; tile pans have grout lines that can leak 6. This matters because a persistent leak around a tile tub surround might not be a simple sealant failure—it could point to a deeper waterproofing issue behind the tile.
Tools and Materials Guide
An adjustable wrench is handy, but you'll really need a basin wrench ($15–25) for those tight sink and tub nuts. Plumber's putty stays pliable — it's perfect for drain flanges. For silicone, you must use 100% silicone (like GE Advanced or DAP Kwik Seal Ultra) in wet areas; latex or acrylic will mold. When it comes to washers and O-rings, take the old ones to the hardware store's plumbing aisle for exact matches. Gaskets are often sold as a complete drain/overflow kit ($15–40) or individually. Buy from hardware stores (Home Depot, Lowe's) or plumbing supply houses — you'll get better quality parts.
If you're replacing a bathtub cartridge and the old one is stuck, needle-nose pliers and grit cloth can help you remove it 7. One plumber advised: "Try needle nose pliers. After you do, take some grit cloth to the inside surface, and grease the new cartridge before putting in." Another homeowner reported success: "I got it out in pieces, but it's out." Don't force a stuck cartridge — work it patiently and clean the housing thoroughly before installing the new one.
When installing a drain flange, apply a generous bead of plumber's putty under the flange and tighten the drain shoe from underneath 8. It's straightforward: apply the putty bead around the underside of the drain flange, insert the flange into the drain opening from above, then from underneath, thread the drain shoe onto the flange until hand-tight, then tighten with a wrench. The putty will compress out — that's exactly what you want. Wipe away the excess cleanly.
Safety Considerations
ALWAYS turn off the main water supply first! Protect your eyes from debris and falling gunk under the tub. Wear gloves to shield your hands from sharp edges and chemicals. You'll want good lighting and ventilation, too. Watch out for slippery floors. Use sturdy step ladders, not chairs. Never force fittings — you risk cracking expensive porcelain or brass. If you're accessing under the tub in a crawlspace, be aware of pests, insulation, and limited mobility.
If your repair involves opening walls or working near pipes running through studs, be aware that IPC 305.6 requires steel shield plates (min 0.0575 inch thick) to protect pipes installed less than 1.25 inches from the edge of studs or joists 9. This code exists for a reason — a drywall screw through a water line creates a slow, hidden leak that can rot out an entire wall cavity before you notice. If you're drilling or nailing near plumbing, know where your pipes are and use protective plates if required.
Troubleshooting Common Issues
Leak returns right away? You probably missed a worn washer or O-ring, or didn't seat a gasket properly. Take it apart and re-inspect. Drain wobbles? The locknut underneath is likely loose — tighten it carefully. Faucet still drips after you've replaced the washer? The valve seat inside the faucet body might be corroded or scratched. You'll need a reseating tool, or it may be time for a new faucet. Silicone not sticking? The surface wasn't perfectly clean and dry. Remove it all and start over. Water leaking from the ceiling below? The source could be the tub overflow, a drain pipe connection, or even supply lines — trace it carefully from below if you can.
Small cracks in a bathtub can be repaired with a bathtub repair kit, but large cracks require professional replacement 3. If you spot a hairline crack in the tub surface, don't ignore it — water seeping through can rot the subfloor and framing below. A repair kit can buy you time, but a crack that runs through the full thickness of the tub means the structural integrity is compromised. That's a replacement job, not a patch job.
Maintenance and Prevention
Check your tub's silicone seals once a year. If you spot cracks or gaps, recaulk right away. Replace rubber washers and O-rings in faucets every 2–3 years—it's cheap insurance. Don't hang heavy stuff on the faucet or overflow plate. Use drain strainers to keep clogs from stressing your pipes. And fix small drips the moment you notice them. They only get worse, and they waste water.
Cost Analysis: DIY vs Professional
DIY: Washers/O-rings: $1-$5. Gasket Kit: $15-$40. Silicone/Plumber's Putty: $5-$10. Cartridge: $15-$50. Total DIY: $5 - $100+ (for complex cartridge). Professional: Service Call + 1-2 hours labor: $150 - $400+, plus parts. Savings: DIY saves $100-$300+ on most common leaks. Investing in quality tools (basin wrench) pays off long-term.
Related Plumbing Problems
Leaking Shower Head: Similar washer/cartridge fixes. Clogged Bathtub Drain: Requires different tools (drain snake). Running Toilet: Different valve mechanism. Low Water Pressure: Could be clogged aerator (on spout) or supply line issue. Tile Grout Damage: Often caused by persistent leaks behind the wall. Mold/Mildew Growth: Result of undetected moisture from leaks.
Frequently Asked Questions
Can I just use duct tape or caulk to stop the leak under the tub?
Absolutely not! These are temporary fixes at best and will fail quickly under water pressure. They won't create a proper seal and can mask the real problem, leading to worse damage. Always fix the underlying cause (replace gasket, tighten connection properly).
How do I know if I need a new faucet or just to repair it?
Try replacing the washers/O-rings or cartridge first (often fixes it). If the leak persists, the faucet body itself might be cracked or the internal valve seats severely damaged. If parts are obsolete or repairs fail repeatedly, replacement is usually more cost-effective than endless fixes on an old fixture.
The leak is only when the tub is draining, not filling. What's wrong?
This almost always points to the drain gasket or the connection between the drain pipe and the P-trap under the tub. The gasket sealing the drain body to the tub bottom fails, or the slip-nut connecting the tailpiece to the P-trap is loose. Check the drain gasket first and tighten the slip-nuts under the tub (hand tight plus 1/4 turn).
Is plumber's putty better than silicone for the drain?
Yes, for the drain flange (the visible part inside the tub), plumber's putty is generally preferred. It remains pliable, creates a great seal under compression, and is easier to clean up excess. Silicone is better for the tub edge where flexibility and constant water exposure are key. Never use putty on plastic drain parts – check manufacturer instructions.