Stop Shower Leaks Fast: Your Stress-Free Guide to Fixing a Shower Door Seal
Tired of wet bathroom floors? Learn how to easily replace a leaky shower door seal in 30 minutes with our step-by-step DIY guide. Save money and prevent water damage!
You're probably staring at a brittle, discolored, or warped strip along your shower door that's letting water sneak onto your floor. Maybe it's crumbled when you touched it, or you've tried 'temporary fixes' that failed after two showers. I get it—water leaks breed frustration and mold worries. But 90% of the time, this happens because seals dry out from heat/cleaners or weren't installed right initially.
That puddle on your bathroom floor after every shower isn't just annoying—it's a water damage risk waiting to happen. If your shower door seal is cracked, loose, or missing chunks, I've been there too. The good news? Fixing it is simpler than you think, and I'll walk you through every step so you can stop leaks for good.
Tools Needed
- Needle-nose pliers (for stubborn old seal removal)
- Scissors or utility knife (for trimming new seal)
- Soft cloth and mild cleaner (for track cleaning)
- Hair dryer (optional, for softening stiff seals)
- Measuring tape (for accurate sizing)
Materials Needed
- Replacement shower door seal (match profile type: T-shaped, P-shaped, or D-shaped)
- Silicone lubricant spray (food-grade, prevents sticking)
- Rubbing alcohol (for degreasing track)
- Cotton swabs (for detailed track cleaning)
Solution (Beginner - 30-60 minutes)
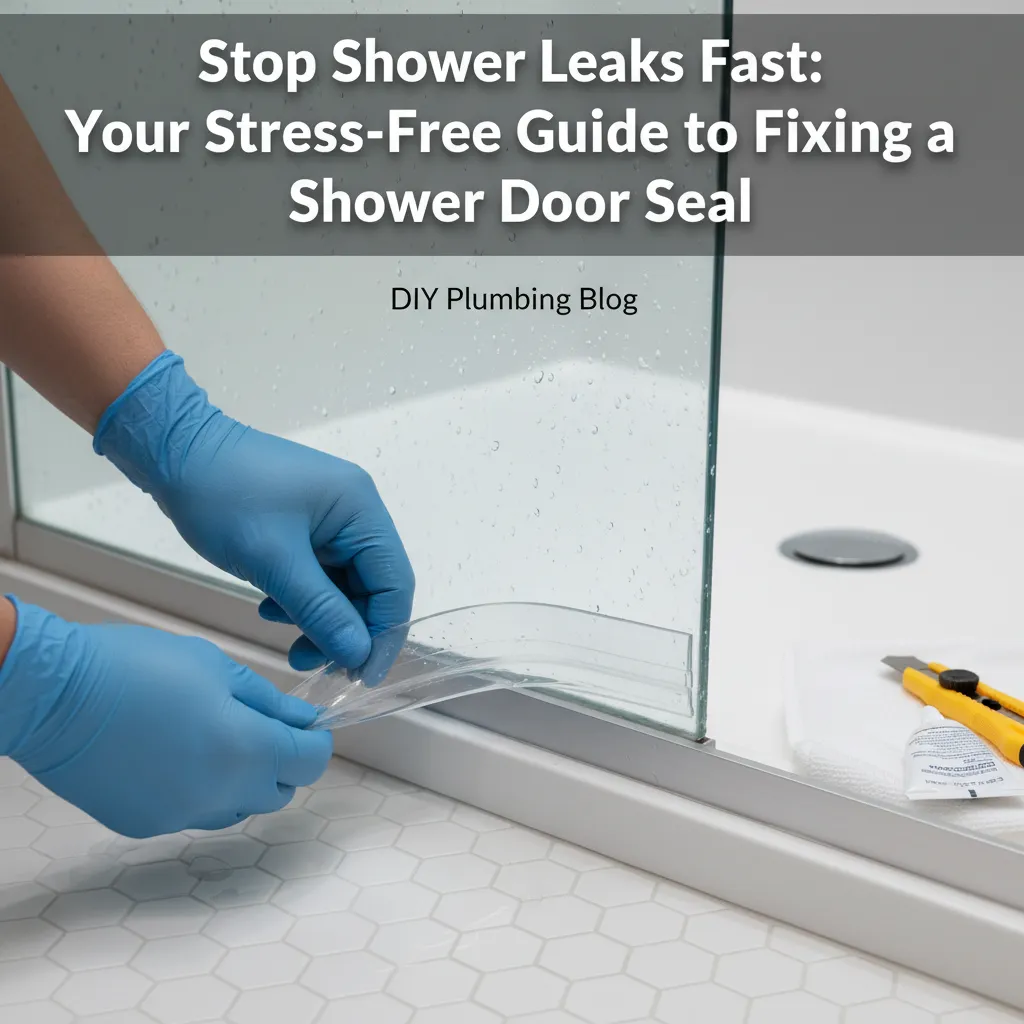
Step 1: Remove the Old Seal Gently
Grab the seal's edge with needle-nose pliers and pull slowly along the track. If it resists, avoid yanking—use a hairdryer on low heat for 20 seconds to soften the material. Clean any leftover bits with cotton swabs dipped in rubbing alcohol.
⚠️ Warning: Wear safety glasses! Tiny seal fragments can fly when pulling.
Step 2: Deep-Clean the Track
Scrub the empty track with a cloth soaked in rubbing alcohol. Focus on corners where gunk hides—this ensures your new seal sticks properly. Dry thoroughly with a microfiber cloth. Insider trick: Shine a flashlight to spot hidden debris!
⚠️ Warning: Never use bleach or abrasive cleaners—they damage metal tracks.
Step 3: Measure Twice, Cut Once
Measure your door's seal channel length precisely. Add 1/2 inch extra. Lay the new seal flat for 10 minutes to relax (reduces curling). Cut at a 45° angle for cleaner joints.
⚠️ Warning: Don't stretch the seal while measuring—it'll shrink and leave gaps.
Step 4: Install with the 'Pinch and Slide' Method
Spray silicone lubricant lightly inside the track. Start at one end, pinching the seal's spine between thumb and forefinger. Push firmly into the groove, working in 6-inch sections. If it pops out, reheat slightly with your hair dryer.
⚠️ Warning: Avoid over-lubricating—excess spray attracts dirt.
Step 5: Test and Adjust
Close the door slowly. The seal should compress evenly without buckling. Run a towel along gaps while someone sprays water inside (bucket test!). If leaks persist, gently nudge the seal toward the gap using a plastic putty knife.
⚠️ Warning: Never force the door shut—it warps the seal permanently.
Pro Tips
- Buy extra seal: Keep leftover length for future patches
- Morning install: Seals are more pliable in warm rooms
- Mold prevention: Wipe seals monthly with vinegar/water mix
- Profile cheat sheet: Take a close-up photo of your old seal to the hardware store
When to Call a Professional
Call a pro if: the track is bent/damaged, door alignment is off (causing uneven pressure), or leaks persist after two seal replacements. Costly water damage isn't worth the risk!
Understanding the Problem in Detail
Shower seals fail because heat, soap scum, and cleaning chemicals break down plastics over time. Hard water accelerates cracking. A 1/8 inch gap can leak a gallon of water per month!
Tools and Materials Guide
Seals cost $10-$30. Big-box stores carry universal kits, but for odd-shaped tracks (like curved glass), order custom online. Silicone spray ($5) prevents squeaking and extends seal life.
Safety Considerations
Wear gloves to protect from sharp track edges. Ensure bathroom ventilation—chemical fumes from cleaners can be strong. Never use metal tools on glass doors.
Troubleshooting Common Issues
Problem: Seal keeps popping out. Fix: Clean track again—residue reduces grip. Problem: Water pools at corners. Fix: Ensure 45° cuts are tight; add a dab of clear silicone sealant if gaps remain. Problem: Door drags. Fix: Lightly trim any bulging sections with scissors.
Maintenance and Prevention
Extend seal life 2x by: 1) Rinsing seals after each use, 2) Using pH-neutral cleaners, 3) Applying silicone spray quarterly, 4) Running bathroom fans 30 mins post-shower.
Cost Analysis: DIY vs Professional
DIY: $15-$40 (seal + spray). Pro hire: $120-$200. Save by buying generic brands—they perform identically to 'premium' seals. Bonus: A good seal prevents $500+ floor repairs!
Related Plumbing Problems
Leaks might actually be from: cracked shower pan, worn door hinges, or failed tile grout. If fixing the seal doesn't stop water, investigate these next.
Frequently Asked Questions
How often should I replace my shower door seal?
Every 1-2 years. Signs include visible cracks, stiffness, or persistent leaks despite cleaning. Humidity-heavy bathrooms need replacements more often.
Can I use duct tape as a temporary fix?
Not recommended—tape leaves sticky residue that's hard to remove and won't create a watertight seal. A hardware store trip takes 20 minutes and solves it right!
Why is water still leaking after I installed a new seal?
Two common culprits: 1) The track wasn't thoroughly cleaned (oil residue prevents sealing), or 2) Your door is misaligned. Check if the door sits parallel to the frame when closed.