Fix Your Toilet Chain in 15 Minutes: A Stress-Free DIY Guide
Struggling with a running toilet or weak flush? Learn how to quickly diagnose and fix a toilet chain with simple tools. Save money and regain bathroom peace today!
That tiny chain inside your toilet tank might seem insignificant, but when it's too long, too short, disconnected, or corroded, it causes big headaches. You're likely here because your toilet either runs constantly (wasting water and money), flushes weakly, or won't flush at all. I've been there - staring into the tank feeling overwhelmed. But take a deep breath; this is one of the easiest toilet fixes you'll ever do.
Hear that constant running water? Feel that frustration when your toilet won't flush properly? A malfunctioning toilet chain is often the culprit behind these maddening bathroom woes. Don't panic - in this guide, I'll walk you through the simple repair that'll have your toilet working like new faster than you can say 'plumber's bill'.
Tools Needed
- Adjustable pliers (for stubborn clip connections)
- Needle-nose pliers (for precise chain adjustments)
- Flashlight (to see inside the tank clearly)
Materials Needed
- Replacement toilet chain (stainless steel, 6-8 inches)
- Replacement flapper (universal fit if needed)
- Paper towels (for quick cleanups)
Solution (Beginner - 15-30 minutes)
Step 1: Cut the Water & Empty the Tank
Turn the water shutoff valve clockwise behind the toilet until tight. Flush to drain most water. Soak up remaining water with paper towels. Pro tip: Place towels around the base to catch spills - tanks can be slippery!
⚠️ Warning: Never skip shutting off the water - a sudden flush could drench you!
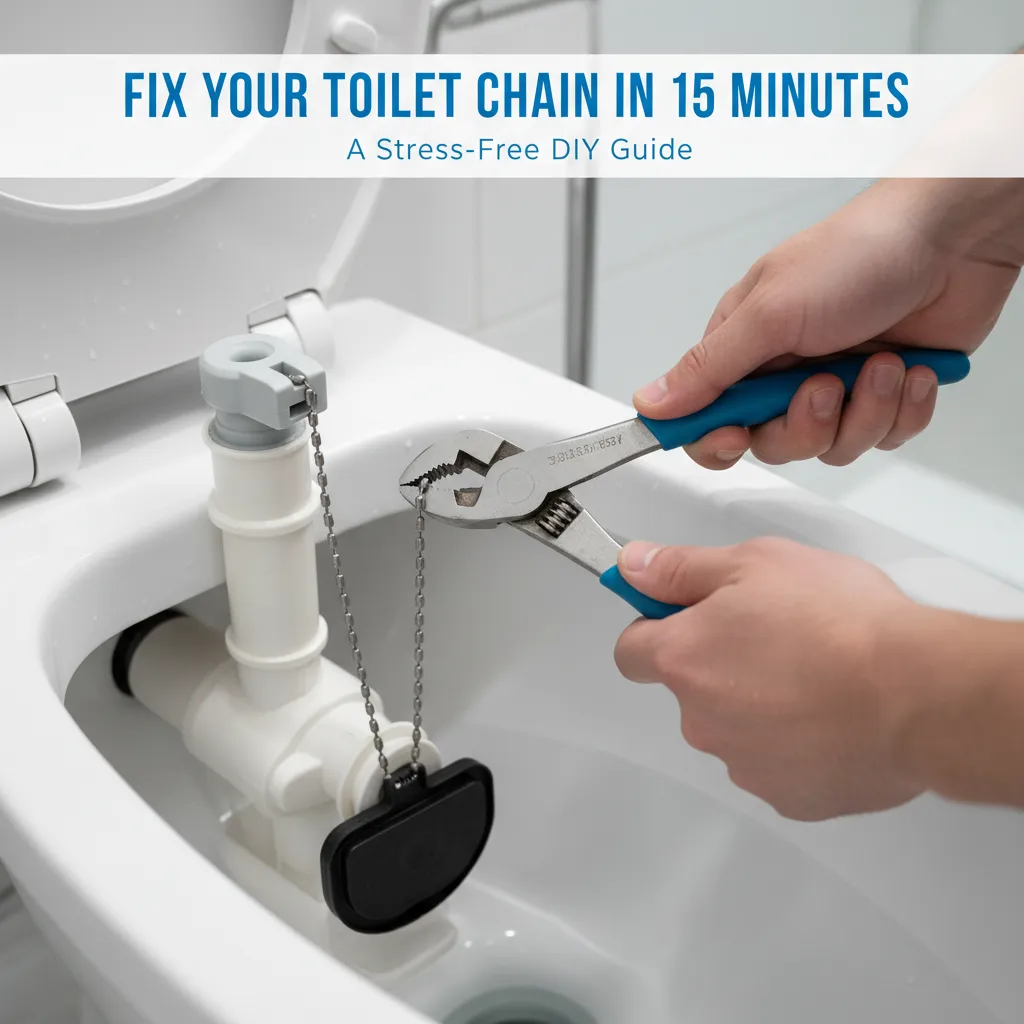
Step 2: Inspect the Chain Situation
Locate where the chain connects to the flush lever arm (metal rod) and flapper (rubber seal at bottom). Check for: 1) Chain hooked properly? 2) Rust/corrosion? 3) Too tight/loose? The sweet spot is 1/2 inch of slack when flapper's closed. Insider trick: Use a finger to lift the flapper - if chain goes taut immediately, it's too short.
⚠️ Warning: Avoid yanking components - plastic parts can crack easily
Step 3: Adjust or Replace the Chain
For adjustments: Use needle-nose pliers to bend the S-hook or reposition the clip on the lever arm. Shorten by removing links (pinch chain sideways to pop open). For replacements: Attach new chain to lever arm first, then flapper. Ensure it doesn't snag on anything when flapper closes. Golden rule: Always test before reassembly!
⚠️ Warning: Wear gloves if handling corroded metal - edges can be sharp
Step 4: Test Flush & Fine-Tune
Slowly turn water back on. Let tank refill. Press handle - watch the chain lift the flapper straight up (not sideways) and snap back cleanly. Listen for complete seal after flush. Still running? Adjust slack incrementally. Still weak? Your flapper might need replacement too (it often wears out with the chain).
⚠️ Warning: Check for leaks around tank bolts after refill - tighten carefully if needed
Pro Tips
- Use a bent paperclip as emergency chain replacement until you buy a new one
- If chain keeps slipping off, add a small split key ring to the lever arm as a secure attachment point
- Lubricate the lever arm pivot point with silicone grease if it feels stiff
- Always buy stainless steel chains - brass corrodes quickly in water
When to Call a Professional
Call a plumber if: 1) Water keeps running after chain adjustment 2) You see cracks in the tank or bowl 3) Fill valve or flush mechanism is damaged. Don't risk floods - some repairs need expert tools/knowledge.
Understanding the Problem in Detail
Your toilet chain is the critical link between the flush handle and flapper valve. When you push the handle, it lifts the chain, which lifts the flapper to release water. Too much slack? The flapper doesn't lift high enough, causing weak flushes. Too tight? The flapper can't seal, creating constant running water. Corrosion weakens the chain over time, while improper hooking causes disconnections.
Tools and Materials Guide
Adjustable pliers ($8-15) grip stubborn connections without stripping. Needle-nose pliers ($5-10) offer precision. Stainless steel chains ($3-8) resist rust - measure your old chain before buying. Universal flappers ($7-15) fit 95% of toilets. Find these at hardware stores (avoid dollar store chains - they rust fast). No pliers? Use sturdy kitchen tongs temporarily.
Safety Considerations
- Always shut off water first - unexpected flushes soak everything 2) Wear safety glasses - tank minerals can irritate eyes 3) Place towels everywhere - porcelain chips easily if tools drop 4) Don't overtighten plastic nuts - they crack at about 1/4 turn past snug 5) Wash hands thoroughly after - tank water isn't clean.
Troubleshooting Common Issues
• Chain still catches? Ensure it's centered under lever arm • Flapper not sealing? Clean mineral deposits from flush valve seat • Weak flush after fix? Check water level mark inside tank - should be 1/2 inch below overflow tube • Handle feels loose? Tighten mounting nut behind toilet handle cover.
Maintenance and Prevention
- Every 6 months: Lift flapper to check chain slack 2) Annually: Replace chain (they degrade even if not broken) 3) Avoid harsh tank cleaners - they corrode metal parts 4) Teach kids gentle handle use - slamming causes chain jumps.
Cost Analysis: DIY vs Professional
DIY: Chain $3-8, flapper $7-15 = $10-23 total. Plumber visit: $100-250+. Save 90% by DIYing! Pro tip: Buy a 'toilet repair kit' ($20) containing chain, flapper, and fill valve - future-proof your repairs.
Related Plumbing Problems
Often accompanies: 1) Worn flapper (causes running water) 2) Misaligned flush handle (prevents full lift) 3) Mineral-clogged flush valve (prevents sealing) 4) Broken lift arm (chain has nothing to attach to).
Frequently Asked Questions
How much slack should the toilet chain have?
About 1/2 inch of loose chain when the flapper is closed. Test by lifting the chain straight up - it should lift the flapper without resistance for the first half-inch. This prevents tension (which causes leaks) and avoids excessive slack (which causes weak flushes).
Can I use string instead of a chain?
Only temporarily! String swells when wet, causing length changes and eventual snapping. It's an emergency fix (like overnight) until you get a proper stainless steel chain. Dental floss works better than string in a pinch but still isn't permanent.
Why does my chain keep unhooking?
Usually due to: 1) Excess slack allowing the chain to swing loose 2) Bent S-hook 3) Worn lever arm hole. Fix by adjusting chain length, straightening the hook with pliers, or using a small key ring to create a more secure attachment point on the lever arm.