Stop Shower Leaks & Temperature Tantrums: Your DIY Guide to Replacing a Shower Cartridge
Frustrated by a dripping shower or unpredictable temperature? Learn how to confidently replace your shower cartridge yourself with our step-by-step guide. Save money & water today!
You turn off the shower, but water keeps dripping or even running steadily from the spout or showerhead. Or worse, you're enjoying a warm shower when suddenly it turns scalding hot or freezing cold without warning. Maybe the handle feels stiff, loose, or squeaks. These aren't just annoyances; they waste water, hike up your bills, and signal internal wear in the shower cartridge – the precise control valve inside your shower wall. It feels like your shower is rebelling!
That constant drip... drip... drip keeping you up at night? Or maybe that sudden icy blast when someone flushes the toilet? We've all been there. A faulty shower cartridge is often the culprit behind these infuriating shower problems. Before you panic or call an expensive plumber, take a deep breath. Replacing a shower cartridge is a surprisingly achievable DIY project for most homeowners. This guide walks you through it step-by-step, turning frustration into accomplishment. We've got your back!
Tools Needed
- Phillips & Flathead Screwdrivers: For removing handles and trim plates.
- Adjustable Wrench or Channel Locks: For gently loosening retaining nuts (wrap jaws in tape to prevent scratches).
- Cartridge Puller Tool (Highly Recommended): Makes removal MUCH easier and safer than pliers (prevents damage).
- Needle-Nose Pliers: For removing retaining clips.
- Rag or Small Towel: To catch drips and protect surfaces.
- Flashlight: Essential for seeing inside the dark valve body.
- Safety Glasses: Protect your eyes from debris and spray.
Materials Needed
- Exact Replacement Cartridge: CRITICAL - Identify your brand/model BEFORE buying (Moen, Delta, Kohler, Pfister, etc.).
- Plumber's Grease (Silicone-Based): Lightly lubricate the new cartridge O-rings for smooth installation.
- White Vinegar & Old Toothbrush (Optional but Recommended): For cleaning mineral deposits inside the valve body.
- Replacement Retaining Clip (Optional): Good to have on hand in case the old one breaks or is lost.
Solution (Intermediate - 1-2 hours (depending on access and stubbornness))
Step 1: Shut Off Water & Prepare Your Workspace
Locate your home's main water shutoff valve and turn it OFF. Open a tub faucet or the lowest faucet in your house to drain remaining pressure. Protect your tub/shower base with a towel. Remove the shower handle (usually via a hidden screw under a cap) and the trim plate/escutcheon.
⚠️ Warning: CONFIRM WATER IS OFF! Test by trying to turn the shower on after shutting off the main valve.
Step 2: Remove the Retaining Nut or Clip
With the trim removed, you'll see the cartridge body and a retaining mechanism. This is usually a large brass nut (use your wrench/channel locks gently) or a U-shaped metal clip (use needle-nose pliers to squeeze ends together and pull out). Keep track of this part!
⚠️ Warning: Use gentle force. Overtightened nuts can be stubborn; penetrating oil helps. Don't force the clip if it won't budge easily.
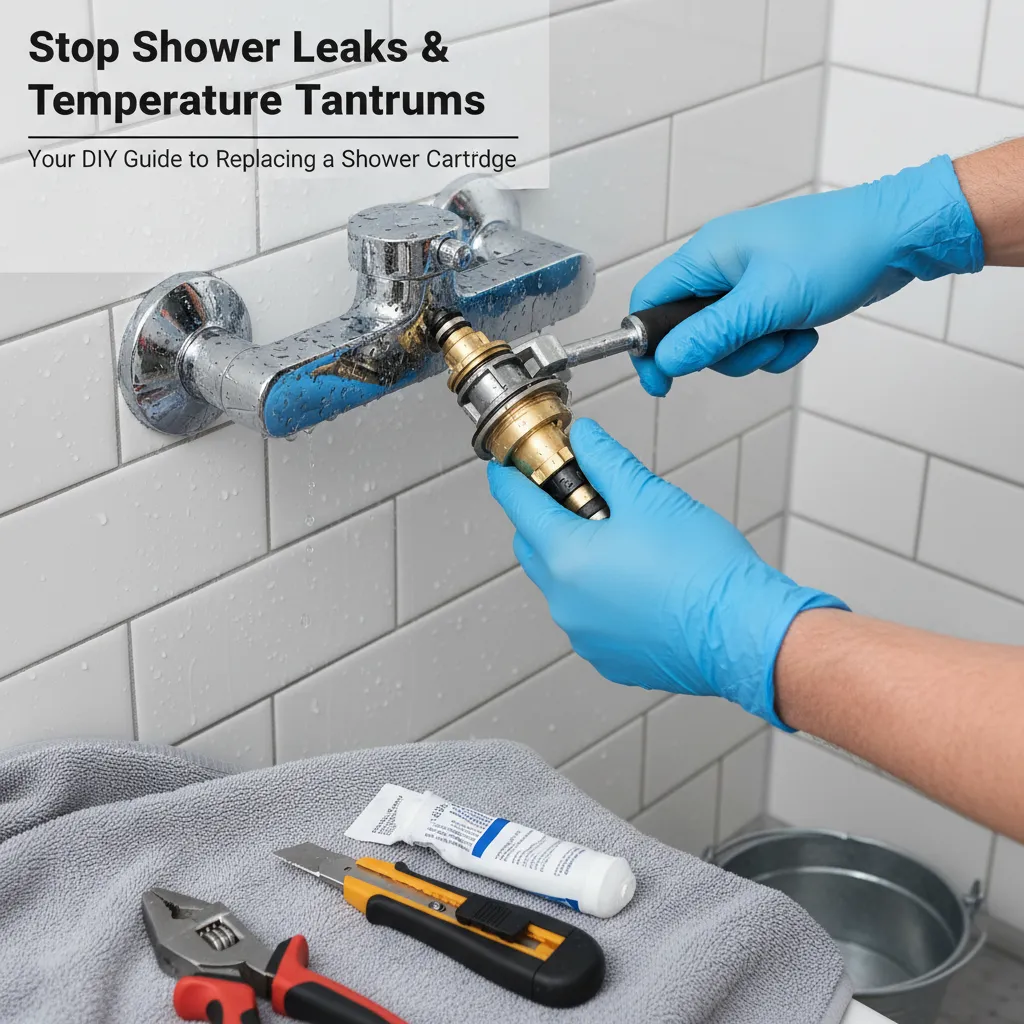
Step 3: Extract the Old Cartridge (Patience is Key!)
This is the trickiest part. DO NOT GRAB WITH PLIERS (it crushes plastic and metal). Attach the cartridge puller tool according to its instructions and slowly, steadily crank it to pull the cartridge straight out. If no puller, gently wiggle while pulling straight out. If stuck, penetrating oil and patience are your friends.
⚠️ Warning: FORCING IT CAUSES DISASTER! You could break the cartridge inside the valve body, requiring major surgery.
Step 4: Inspect, Clean & Prep the Valve Body
Shine your flashlight inside the valve body. Look for mineral deposits (white/green crust). Scrub gently with vinegar and an old toothbrush if needed. Wipe clean with a rag. Compare the old cartridge to the new one meticulously – orientation matters! Note the position of tabs and slots.
⚠️ Warning: Never use metal tools to scrape inside the valve body – you can damage critical sealing surfaces.
Step 5: Install the New Cartridge Correctly
Apply a thin film of plumber's grease ONLY to the rubber O-rings on the new cartridge. Align the cartridge EXACTLY as the old one came out, matching tabs and slots. Push it firmly and smoothly straight into the valve body until it seats fully. You should feel it stop. DON'T twist or force.
⚠️ Warning: Grease ONLY the O-rings. Getting grease inside the ports can impede water flow. Incorrect orientation causes leaks/no function.
Step 6: Reassemble & Test Carefully
Reinstall the retaining clip or nut. Hand-tighten the nut first, then give it a gentle 1/4 to 1/2 turn with the wrench – snug, not super tight. Reattach the trim plate and handle. Slowly turn the main water supply back on. Open the shower valve SLOWLY to check for leaks at the cartridge and handle area. Test hot and cold functions.
⚠️ Warning: Open water SLOWLY to avoid water hammer. Check for leaks thoroughly before closing up walls!
Pro Tips
- Take Photos: Snap pics with your phone before removing anything, especially cartridge orientation.
- Identify First: Find your faucet brand/model before going to the store. Look for logos, model numbers on trim, or inside the handle.
- Teflon Tape Trap: DO NOT use Teflon tape on the cartridge itself. It's not needed and can cause issues.
- Puller Power: The cartridge puller tool is worth its weight in gold for avoiding frustration and damage.
- Old Cartridge = Template: Keep the old cartridge nearby as a visual guide during installation.
When to Call a Professional
Call a plumber if: the cartridge breaks inside the valve body during removal; you discover significant corrosion or damage inside the valve body; you cannot identify the correct replacement cartridge; leaks persist after careful reassembly; you have a multi-function shower system or complex valve; or you simply feel uncomfortable or unsafe proceeding.
Understanding the Problem in Detail
Inside your shower valve is a precision cartridge – essentially a sophisticated spool with rubber seals (O-rings). Over years, mineral deposits wear down these seals, or the plastic/metal parts fatigue. This causes leaks (worn seals can't hold back water pressure) and erratic temperature control (the cartridge can't precisely mix hot and cold anymore). Hard water accelerates this wear. Think of it as the 'brains' of your shower that eventually wears out.
Tools and Materials Guide
Cartridge Puller: Non-negotiable for most. Styles vary (internal/external jaws). Buy/rent based on your brand. Wrenches: Adjustable or channel locks. Wrap jaws in electrical tape to prevent marring chrome finishes. Grease: Silicone-based plumber's grease ONLY. Petroleum-based greases degrade rubber. Cartridge: MUST match brand and model. Find the model number on the old cartridge or trim plate, or take the old one to a plumbing supply store. Big box stores have common models but limited selection. Alternatives: In a pinch, penetrating oil (like PB Blaster) can help loosen a stuck cartridge nut. Vinegar effectively dissolves common mineral scale.
Safety Considerations
- Water Off: Double and triple-check the main water is OFF before starting. 2. Eye Protection: Always wear safety glasses – debris and spray happen. 3. Protect Surfaces: Cover the tub/shower floor. 4. Gentle Force: Never use excessive force. If something won't budge, stop, reassess, use penetrating oil, or call a pro. Forcing causes expensive breaks. 5. Electrical Awareness: Be mindful of nearby electrical fixtures if working with water.
Troubleshooting Common Issues
- Cartridge Won't Budge: Penetrating oil soak (15-30 mins), gentle wiggle with puller, patience. If truly stuck, stop. * Leak After Replacement: Did you grease the O-rings? Is the cartridge seated fully and straight? Is the retaining nut/clip secure? Did you accidentally nick an O-ring? Recheck installation steps. * No Hot/Cold or Wrong Temp: Cartridge likely installed backwards or rotated 180 degrees. Double-check orientation against the old one. * Low Flow: Did grease get inside the ports? Did debris fall into the valve body during cleaning? Remove cartridge and inspect/flush. * Handle Feels Wrong: Ensure handle is seated properly on the cartridge stem and the set screw is tight.
Maintenance and Prevention
- Gentle Handles: Turn handles smoothly, don't wrench them. 2. Flush Occasionally: Periodically remove the showerhead/aerator to flush out sediment. 3. Water Softener: If you have hard water, a softener significantly extends cartridge and appliance life. 4. Know Your Shutoffs: Ensure everyone knows where the main shutoff is.
Cost Analysis: DIY vs Professional
DIY: Cartridge ($20 - $100+ depending on brand/rarity), Puller Tool ($15-$40, often reusable), Grease ($5). Total: ~$40 - $150+. Pro Call: Service fee ($75-$150) + Labor (1-2 hours @ $80-$150/hr) + Cartridge. Total: $200 - $500+. Savings: DIY saves $150-$400+ on labor alone. Investing in the puller tool pays for itself quickly.
Related Plumbing Problems
Dripping showerhead (could be cartridge or showerhead itself), Low water pressure (clogged aerator/showerhead, supply issue), Water temperature fluctuations elsewhere (water heater issue), Leaking from shower arm/head connection, Scald risk (faulty cartridge or anti-scald device).
Frequently Asked Questions
How do I know which shower cartridge to buy?
This is the most crucial step! Look for a brand name (Moen, Delta, etc.) and model number on the old cartridge itself, the trim plate behind the handle, or inside the handle. Take clear photos and the old cartridge to a plumbing supply store. If unsure, many manufacturer websites have identification guides using photos of your faucet.
My shower is still dripping a little after replacing the cartridge. What now?
First, ensure the retaining nut/clip is fully secure. Double-check the cartridge is pushed ALL the way in and seated straight. Did you apply plumber's grease to the O-rings? Inspect the new cartridge O-rings for nicks (a tiny nick can cause a leak). If it persists, the valve body seat (where the cartridge seals) might be damaged or corroded, requiring professional attention.
Can I replace the cartridge without turning off the main water?
ABSOLUTELY NOT. Attempting this will result in a significant flood inside your wall and bathroom. Always shut off the main water supply to the house before starting any plumbing repair involving valves or cartridges.
Is plumber's grease really necessary?
Yes, highly recommended. A thin film on the new O-rings reduces friction during installation (preventing damage), helps create a better seal immediately, and protects the rubber from drying out prematurely. Use silicone-based grease specifically for plumbing.