
You’re staring at a crusty, clogged drain valve on your water heater and dreading the idea of draining 40 or 50 gallons just to swap it out. Take a deep breath — you’re not alone, and you don’t have to empty the tank to fix this.
Safest way to replace water heater drain valve without draining the tank
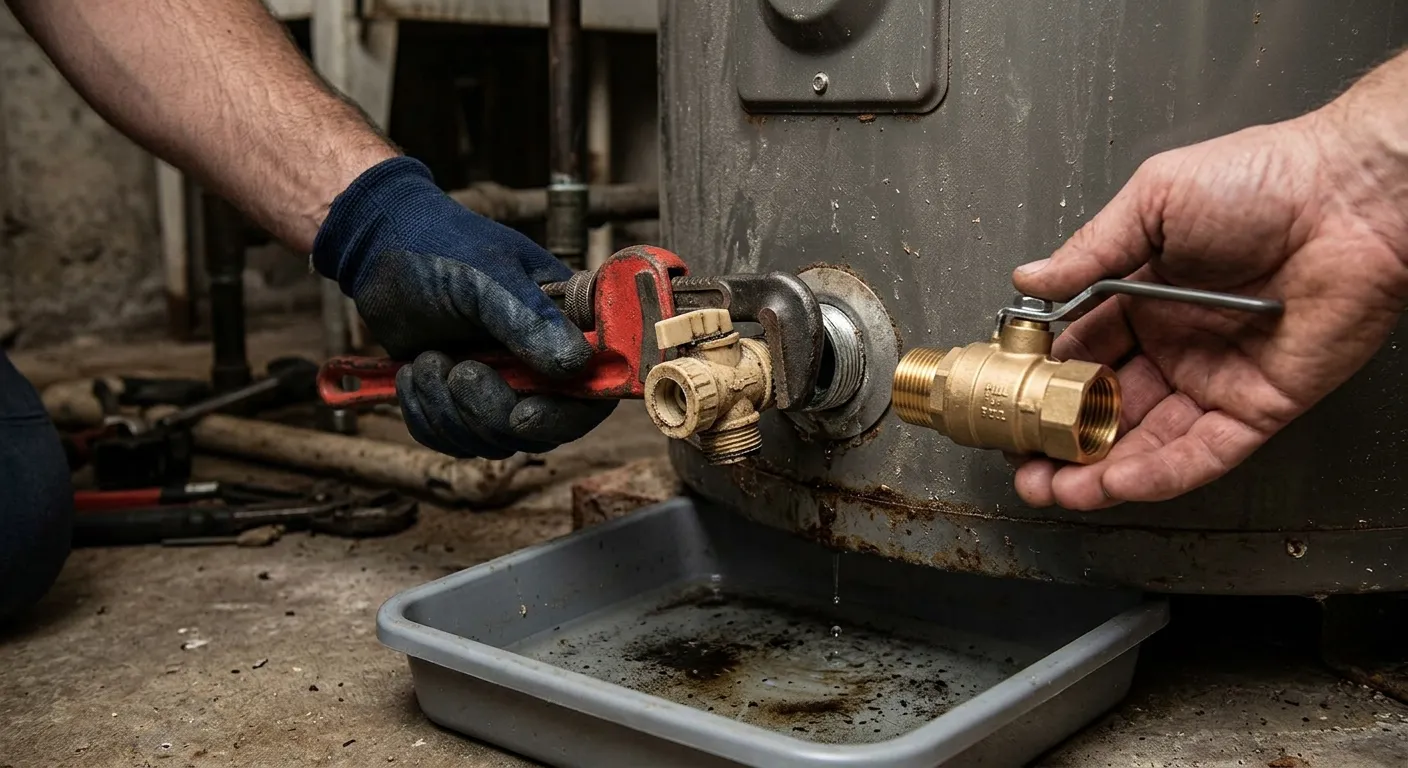
Yes, you can replace the water heater drain valve without draining the tank—but you'll need to be careful about the power, the water temperature, and the risk of a flood. Experienced plumbers recommend a 3/4-inch full-port brass ball valve with a threaded nipple that screws directly onto the tank's drain outlet, letting you swap it while the tank is full 1. Here's how to do it safely.
Step 01
Disconnect the water heater from its power source. If it's electric, cut the breaker. If it's gas, set it to pilot mode.
⚠️ Warning: Working on a powered water heater can cause electric shock or ignite gas fumes. Always double-check the power is off before touching any component.
Step 02
Let the water inside cool to a safer temperature. It can take a day or two for the water to come down to a normal level. You can use the hot water faucets, take a bath, or run laundry while you wait.
Step 03
Shut off the cold-water supply to the heater by closing the valve on the inlet line.
Step 04
Keep all hot water outlets shut—faucets, showers, everything. With the cold supply off and all outlets closed, an air lock can form that holds back the water when you remove the drain valve. This isn't guaranteed, though. An open valve somewhere or a leaky fitting can break the vacuum.
Step 05
Set up a way to catch the water that might come out when you pull the old valve. The simplest method is a large pan placed below the drain outlet.
Step 06
Get your tools and materials ready and double-check everything before you start. You'll need:
- A suitable pipe wrench
- Plumber's tape (Teflon tape) or joint compound
- A new drain valve
- A garden hose—ideally with a connector that fits the new valve's outlet quickly
Step 07
- Now remove the old, clogged drain valve and replace it with the new one. Be very careful here—you're pulling a valve from a tank full of water. It's smart to have a partner with you to help manage any water that escapes.
- Swap the old valve for the new one as quickly as you can. This can be a temporary fit, so you don't need to apply tape or compound right away.
- If you got the new valve on, connect the garden hose to its outlet.
- Run the other end of the hose to a suitable drain. Open a few hot water faucets, then open the drain valve. Check if water flows from the tank with decent pressure. If the flow is very weak, you can try opening the T&P valve too—if it's safe to operate.
⚠️ Warning: Opening the T&P valve releases scalding water and steam. Make sure the discharge tube points toward a safe drain and keep your hands and face clear.
Even after replacing the drain valve, if you still have a clog, you might have a lot of sediment in the tank blocking the flow. In that case, the best move is to flush the heater tank.
What can go wrong if I remove the water heater drain valve without draining
If you try to remove the water heater drain valve without emptying the tank, the worst thing would be flooding your floor with 140-degree Fahrenheit hot water. Removing the drain valve without draining can cause a sudden release of hot water, leading to burns or flooding 1. One homeowner reported that when they unscrewed the old valve, water shot out under pressure, soaking the floor and causing minor burns to their hand 1. This could be a much more hazardous situation if you have electrical sockets or damaged wires at floor level near the water heater. So you'll need to be very careful about two important things before removing the water heater drain valve.
- Let the water inside the tank cool down to a temperature that's safe to touch.
- Arrange a proper method to collect possible sudden water discharge through the drain valve opening after you remove the drain valve while water is still inside.
Also, always have all required tools, equipment, and materials with you before starting the work. Keep another person with you if you need help. Better to keep your children away from this operation.
Best drain valve to install if you are replacing the old one
While most water heaters come with plastic valves, you should consider upgrading to a brass ball valve. These valves are stronger and more durable, while plastic drain valves are prone to breaking and clog relatively easily. A full-port ball valve is the best replacement because it provides unrestricted flow and is less likely to clog 2. Working plumbers often install a 3/4-inch full-port brass ball valve with a threaded end, such as the NIBCO S-636-3/4, for durability and easy maintenance 2.
The built-in drain should be at least ¾ inch in diameter. That’s the standard specification. However, if your drain valve gets clogged every now and then, it might be better to install a ball valve. You can’t buy a ready-made larger-diameter drain valve and fix it directly into the water heater because of the outlet hole size. Therefore, you need to assemble a custom one using a ball valve, a brass nipple, and an adapter to connect the garden hose.
How to keep your drain valves clean and unclogged
After replacing your drain, keep it regularly maintained to avoid possible clogging. If you'd just replaced the drain valve because of sediment clogging, you probably flushed the tank to remove the sediment collected at the bottom. Flushing the water heater annually prevents sediment buildup that can clog the drain valve 1. Manufacturer guidelines recommend attaching a garden hose and draining a few gallons every year to remove sediment and keep the valve functioning 1.
About a week after replacing the drain valve, drain your water heater and check the performance. If it drains with a good flow, that's a good sign. Check a few water samples visually for particles. If it's as clear as the water coming from the cold water mains, you don't have anything to worry about — you can fully drain the tank 2–3 times a year. Otherwise, you may need to flush it regularly, usually once a month.
Tools Needed
- Pipe wrench — grips the old valve securely without slipping
- Adjustable wrench — backs up the tank fitting so you don’t twist the tank
- Large shallow pan or wet/dry vacuum — catches the inevitable water release
- Garden hose with quick-connect fitting — lets you attach to the new valve instantly
- Teflon tape or pipe joint compound — seals the threads on the final installation
- Work gloves and safety glasses — protects against hot water splash and sharp edges
Materials Needed
- 3/4-inch full-port brass ball valve — the core upgrade; look for a threaded inlet and hose-barb or threaded outlet
- 3/4-inch brass nipple (close or short) — bridges the tank bung to the ball valve
- Brass adapter (3/4-inch NPT to garden hose thread) — connects your hose to the ball valve
- Teflon tape (yellow gas-rated or standard white) — seals metal-to-metal threads
- Pipe joint compound — optional but adds a second layer of leak protection
When to Call a Professional
Call a licensed plumber if the tank’s drain bung is cracked, the threads are stripped, or the valve snaps off inside the tank. If you’ve got a gas water heater and smell gas at any point, shut everything down and call a pro immediately. Also, if the tank is old and the drain area shows heavy rust or weeping, the tank itself may be failing — a plumber can assess whether replacement is the safer route.
Troubleshooting Common Issues
Still clogged after installing a new valve? Sediment has likely piled up above the drain opening. Try back-flushing by forcing water through the new valve with a hose while the hot-side faucets are open.
Water won’t stop trickling during the swap? The air lock probably failed. Have a helper hold a wet/dry vacuum at the opening while you quickly thread the new valve on.
New brass valve leaks at the threads? You may have skipped the tape or used too little. Disassemble, apply 4–5 wraps of Teflon tape clockwise, and tighten again.
Flow is still slow after replacement? The T&P valve can be opened briefly to break the vacuum and improve drainage. Make sure the discharge tube is aimed safely first.
Plastic valve broke off in the tank? Use an internal pipe wrench or easy-out to extract the remaining stub. If you can’t get it out, stop and call a plumber before damaging the tank bung.
Cost Analysis: DIY vs Professional
Doing it yourself will run you about $15 to $35 for a quality brass ball valve, nipple, and adapter, plus maybe $10 for Teflon tape and joint compound if you don’t already have them. A professional drain valve replacement typically costs between $150 and $300, depending on your location and whether a full tank drain is required. If the tank needs flushing or the T&P valve is also replaced, expect the higher end of that range.
Frequently Asked Questions
Can I really do this without draining the tank? Yes, if you work fast and have everything ready. The air lock created by shutting off the cold supply and closing all hot outlets usually holds back most of the water.
What if my water heater has a plastic valve that’s already cracked? Be extra cautious. A cracked valve can break apart as you unscrew it. Have a wet/dry vacuum ready and consider calling a pro if the plastic looks brittle.
How long should I let the water cool? At least 12 hours, but 24 to 48 hours is safer. Use up the hot water by running laundry or taking showers to speed up the cooling.
Do I need to use Teflon tape on a brass valve? Yes. Brass-on-steel threads need a good seal. Wrap the nipple threads with 4–5 turns of tape or use pipe joint compound.
Will a ball valve fit my water heater? Most residential water heaters have a 3/4-inch NPT drain bung. A standard 3/4-inch brass nipple and ball valve assembly will fit.
Safety Considerations
Before you touch anything, turn off the power or gas. Water and electricity don’t mix, and a gas leak during the work could be catastrophic. Let the tank water cool until it’s lukewarm at most — 140°F water will scald skin in seconds. Wear gloves and safety glasses the entire time. Keep children and pets out of the work area, and make sure your floor is clear of electrical cords or outlets that could get wet.
Maintenance and Prevention
Flush a few gallons from the tank every six to twelve months to keep sediment from hardening around the drain opening. Attach a hose to the new ball valve, run it to a floor drain or outside, and open the valve for 30–60 seconds. After a full tank flush, check the water clarity in a clear glass. If you see particles, increase the frequency to once a month until it runs clear. Regularly exercising the ball valve handle also prevents it from seizing up.
Pro Tips
- Pre-assemble the brass nipple, ball valve, and hose adapter before you remove the old valve. You'll only have to make one thread connection at the tank.
- Wrap the nipple threads with Teflon tape ahead of time, but leave the tank-side threads bare until you're ready to spin it in.
- Keep a second pair of hands nearby — one person holds the vacuum or pan, the other swaps the valve.
- After installation, open the ball valve a quarter turn at a time the first time you drain, so you don't blast a slug of sediment into your hose and clog it.
- Mark the date on the tank with a permanent marker so you remember the next flush.