When to Call a Professional
Installing a whole house water filter is a manageable DIY project for many homeowners, but some situations call for a licensed plumber. If your main water line is galvanized steel or you need to cut into it, the pipe threads can be corroded and fragile — one wrong turn and you'll snap the line. If your main line is galvanized, call a plumber.
You should also step back if the installation requires moving your water meter, altering the main shut-off valve, or running new pipe through finished walls. These jobs involve code compliance, permits, and specialized tools that go beyond a typical DIY scope. If you need to relocate the meter or main valve, hire a plumber.
Finally, if your home has a fire suppression system, never install a filter on the sprinkler branch. A clogged filter can block water flow during a fire. If your home has fire sprinklers, have a plumber design the bypass and filter placement.
When in doubt, get a quote. Working plumbers report whole house filter installs typically run $300–$800 in labor, depending on your piping and location 1. That's a small price for peace of mind if your plumbing is older or unconventional.
Safety Considerations
Before you start cutting into your main water line, take a moment to think through the risks. A whole-house filter install isn't complicated, but water under pressure can turn a small mistake into a big mess fast. Here's what you need to watch out for.
Water pressure is powerful. Always confirm the main water is off and the system is drained before you cut any pipe. Even a pinhole leak can spray everywhere if there's still pressure in the line. After shutting off the main, open the lowest faucet in the house to let the pipes drain.
Sharp edges. Cut pipes leave razor-sharp burrs inside and out. Deburr thoroughly with a pipe reamer or utility knife, and wear cut-resistant gloves. A burr can slice your hand open or catch debris that clogs your new filter.
Eye protection. Essential whenever you're cutting, deburring, or soldering. A shard of copper or a drop of flux in the eye will ruin your afternoon.
Chemical safety. If you're soldering copper, have a fire extinguisher nearby, clear flammable materials, and use a heat shield to protect nearby wood or drywall. If you're gluing CPVC, work in a well-ventilated area—those solvent fumes are no joke.
Heavy objects. Filter housings get heavy when full of water. Support them securely with pipe hangers or a mounting bracket so they don't sag and stress the connections.
Ladder safety. If your pipes run overhead, use a proper ladder, not a chair or a bucket. Have someone spot you if you're working alone.
Freezing. The International Plumbing Code requires water filters to be protected from freezing 2. If your filter is in an unheated garage or crawlspace, insulate the housing and pipes, or install heat tape. A frozen filter can crack and flood the area when it thaws.
Germ growth. The CDC warns that whole-home filters that remove chlorine can allow germs to grow inside the system if you don't maintain them properly 3. Chlorine normally keeps bacteria in check. Without it, a neglected filter becomes a breeding ground. Replace cartridges on the schedule the manufacturer recommends—don't stretch it.
Understanding the Problem in Detail
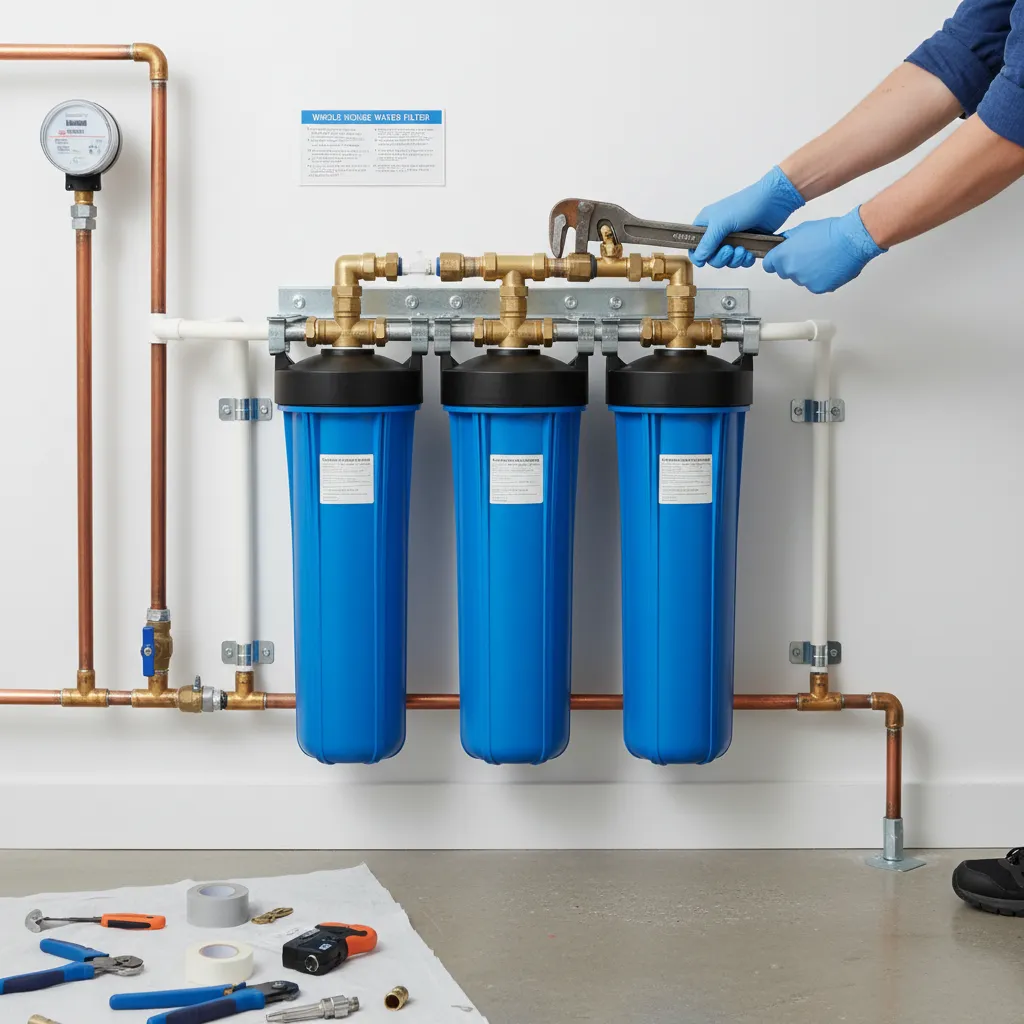
Your water picks up stuff on its journey – sand/silt (sediment), chlorine (from city treatment), minerals (hardness causing scale), rust from old pipes, or even hydrogen sulfide (rotten egg smell). A whole house filter acts as a gatekeeper right where water enters your home, trapping these contaminants before they reach any faucet, showerhead, appliance (like your water heater, washing machine, dishwasher), or ice maker. This protects your health, improves taste/odor, extends appliance life, prevents stains, and gives cleaner laundry.
Crucial Match: Identify your main water pipe material (copper, PEX - usually blue/red, CPVC - beige plastic) and size (common: 3/4" or 1"). Buy matching fittings. Filter Choice: Sediment Filters: Trap dirt/sand (5-50 micron). Carbon Filters: Remove chlorine, taste, odor, some chemicals (0.5-10 micron). Combination: Best of both. Choose capacity (e.g., 4.5" x 20" Big Blue style is common). Bypass Valve: Non-negotiable for easy maintenance. Fittings: Couplings (straight connectors), Elbows (90/45 degree turns), Unions (for easy disconnection), Ball Valves (optional extra shutoffs). Sealant: Teflon tape for NPT threads, Pipe dope (thread sealant) for trickier joints. Buying: Big box stores (Home Depot, Lowe's), Plumbing supply houses, Online retailers (Amazon, specialized filter sites).
A whole-house filter needs a minimum water pressure of 45 psi to work properly, and it's rated for water temperatures between 40°F and 100°F 4. If your home's pressure is lower or your water runs hotter, you'll need to address that before installing. Carbon filters are particularly effective at chlorine removal—one model, the WaterBoss whole-house filter, removes up to 96.9% of chlorine, taste, and odor and is NSF/ANSI Standard 42 certified 5. That certification means it's been independently tested to reduce aesthetic impurities, so you can trust the performance claims.
Step-by-Step Installation
Step 1: Shut Off the Water and Drain the Pipes Locate your main water shut-off valve and turn it off. Open the lowest faucet in your home to drain the pipes and relieve pressure.
Step 2: Choose the Filter Location Pick a spot on the main cold water line after the shut-off valve but before the line branches to fixtures. You'll need enough room to change filters and access the bypass valve. If the area is unheated, protect the filter from freezing—freezing can crack the housing and flood your home 2.
Step 3: Cut the Pipe Measure the filter assembly with bypass valve and unions attached to know exactly how much pipe to remove. Mark the pipe, then cut it with a tubing cutter for copper or a pipe cutter for PEX/CPVC. Make sure the cuts are square and clean.
Step 4: Install the Filter Assembly Attach the bypass valve to the filter head, then connect the assembly to the pipe using unions. For copper, you'll need to solder the unions in place. If you're not comfortable soldering copper pipe, call a plumber for this step. For PEX, use push-fit or crimp fittings. For CPVC, use solvent cement. If you're working with CPVC and haven't cemented it before, call a plumber—a bad joint can burst under pressure.
Step 5: Check the Flow Direction Make sure the water flows through the filter in the direction marked on the housing. Installing it backwards can crush the filter cartridge and block water flow 6.
Step 6: Turn the Water Back On Slowly open the main shut-off valve and let the filter housing fill. Open a faucet downstream to bleed air from the lines. Check all connections for leaks and tighten as needed.
Step 7: Flush the Filter Run water through the filter for several minutes to flush out carbon fines or manufacturing debris before using it for drinking or bathing.
Compact Tools & Materials Reference: pipe cutter, wrench, Teflon tape, filter housing, bypass valve, unions, fittings matching your pipe material and size.
Troubleshooting Common Issues
A pressure drop after installing a whole-house filter is common. If only some fixtures are affected, debris in aerators may be the culprit—not the filter itself 7. Clean faucet aerators before blaming the filter.
Leak at Connection: Turn the water off. Disassemble, then check for damaged threads, a missing or worn O-ring (in compression or SharkBite fittings), insufficient sealant or tape, or cross-threading. Reassemble carefully.
Leak at Filter Housing: Turn the water off. Open the housing and check that the O-ring is seated, lubricated, and free of nicks or cracks. Clean the housing groove. Reassemble, hand-tighten, then add a quarter turn.
Low Water Pressure: 1) Make sure the bypass valve is fully open to the filter. 2) If the filter is new, flush it longer—10 to 15 minutes. 3) If it's old, replace it. 4) Check for kinks in new piping. 5) Confirm the main valve is fully open. 6) Did you forget the plastic wrap? A new filter membrane often has protective plastic that must be removed—if left on, it'll choke flow 7.
Air in Pipes (Sputtering Faucets): Run water from all faucets for several minutes to purge air.
Filter Housing Won't Open: Use the wrench and tap gently around the seam with a rubber mallet. Try warm (not boiling) water on the housing to expand the plastic slightly. Never use excessive force.
Pro Tips
A few simple habits make a big difference in how well your filter runs and how long it lasts.
Label the housing with the install date and next cartridge change date using a permanent marker or sticker. You'll thank yourself later when you're not guessing whether it's time to swap the filter.
After the first week, check all fittings for drips. Temperature swings and water hammer can loosen connections that felt tight on day one. A quick visual inspection catches small leaks before they turn into cabinet rot or mold.
If your filter sits in an unheated garage or crawlspace, protect it from freezing. A burst housing will flood the area the moment the ice thaws. The plumbing code requires keeping equipment above 32°F, so insulate the pipes and housing or add a low-wattage pipe heating cable if the space ever drops near freezing 2.
Write the cartridge change date on your calendar or set a phone reminder. Most cartridges need replacement every 3–6 months, but if you notice a drop in pressure or a return of chlorine taste before then, change it sooner. Experienced plumbers report noticeable pressure loss when a sediment filter loads up, so don't wait for the flow to slow to a trickle 7.
Keep a spare set of cartridges and the housing wrench on hand. When the filter blinds over on a Sunday evening, you'll be glad you don't have to wait for a store to open.
Maintenance and Prevention
Filter Changes: Mark your calendar. Change sediment filters every 3–6 months and carbon blocks every 6–12 months, depending on your water quality and usage. Housing Care: Replace the housing O-ring annually or if it's damaged. Lubricate it during changes. Sanitize the empty housing with a mild bleach solution once a year—rinse thoroughly afterward. Pressure Check: Note your normal water pressure. A significant drop usually means a clogged filter. Bypass Valve Exercise: Turn the bypass valve to 'Bypass' and back to 'Filter' every few months to prevent it from seizing.
Cost Analysis: DIY vs Professional
A whole-house filter install can cost anywhere from a few hundred dollars to over ten thousand, depending on whether you do it yourself or hire a pro. One plumber reported charging around $350 for installation if the filter is already on site, while another noted that a system plus installation in their area runs $4,000 to $10,000 1. National averages from Angi and HomeAdvisor show a typical range of $1,129 to $3,539, with an average professional install cost of $2,273 8.
If you go the DIY route, you'll avoid labor charges but you'll need the right tools and know-how. A basic filter system and parts will run you $200 to $600, though a mistake could lead to water damage that costs far more than hiring a pro 8. Experienced plumbers often see DIY jobs go wrong when homeowners overtighten fittings, skip a bypass valve, or don't account for pressure drop. If you're comfortable with pipe cutting and basic plumbing, you can save significantly — just be honest about your skill level before you start.
DIY Costs: Filter System: $50 - $300+, Bypass Valve: $20 - $60, Pipe/Fittings: $20 - $100+, Tools (if buying): $50 - $150+. Total DIY Range: $150 - $600+. Professional Installation: Typically $350 - $10,000+ (parts + labor), with most jobs falling between $1,129 and $3,539. Money Savers: Choose standard filter sizes (Big Blue), source fittings carefully, borrow tools, skip complex mounting if safe pipe support exists. Ongoing: Filter cartridge replacements: $20 - $100 each, every 3-12 months.
Related Plumbing Problems
Low Water Pressure: Could be caused by a clogged filter, undersized pipes, or other issues. Water Hammer (Banging Pipes): Often needs air chambers or water hammer arrestors installed. Rotten Egg Smell: May require specific iron/sulfur filters after sediment removal. Scale Buildup: Indicates hard water; you might need a water softener after the sediment filter. Rusty/Brown Water: Could point to corroding pipes needing replacement or specialized iron filters.
Frequently Asked Questions
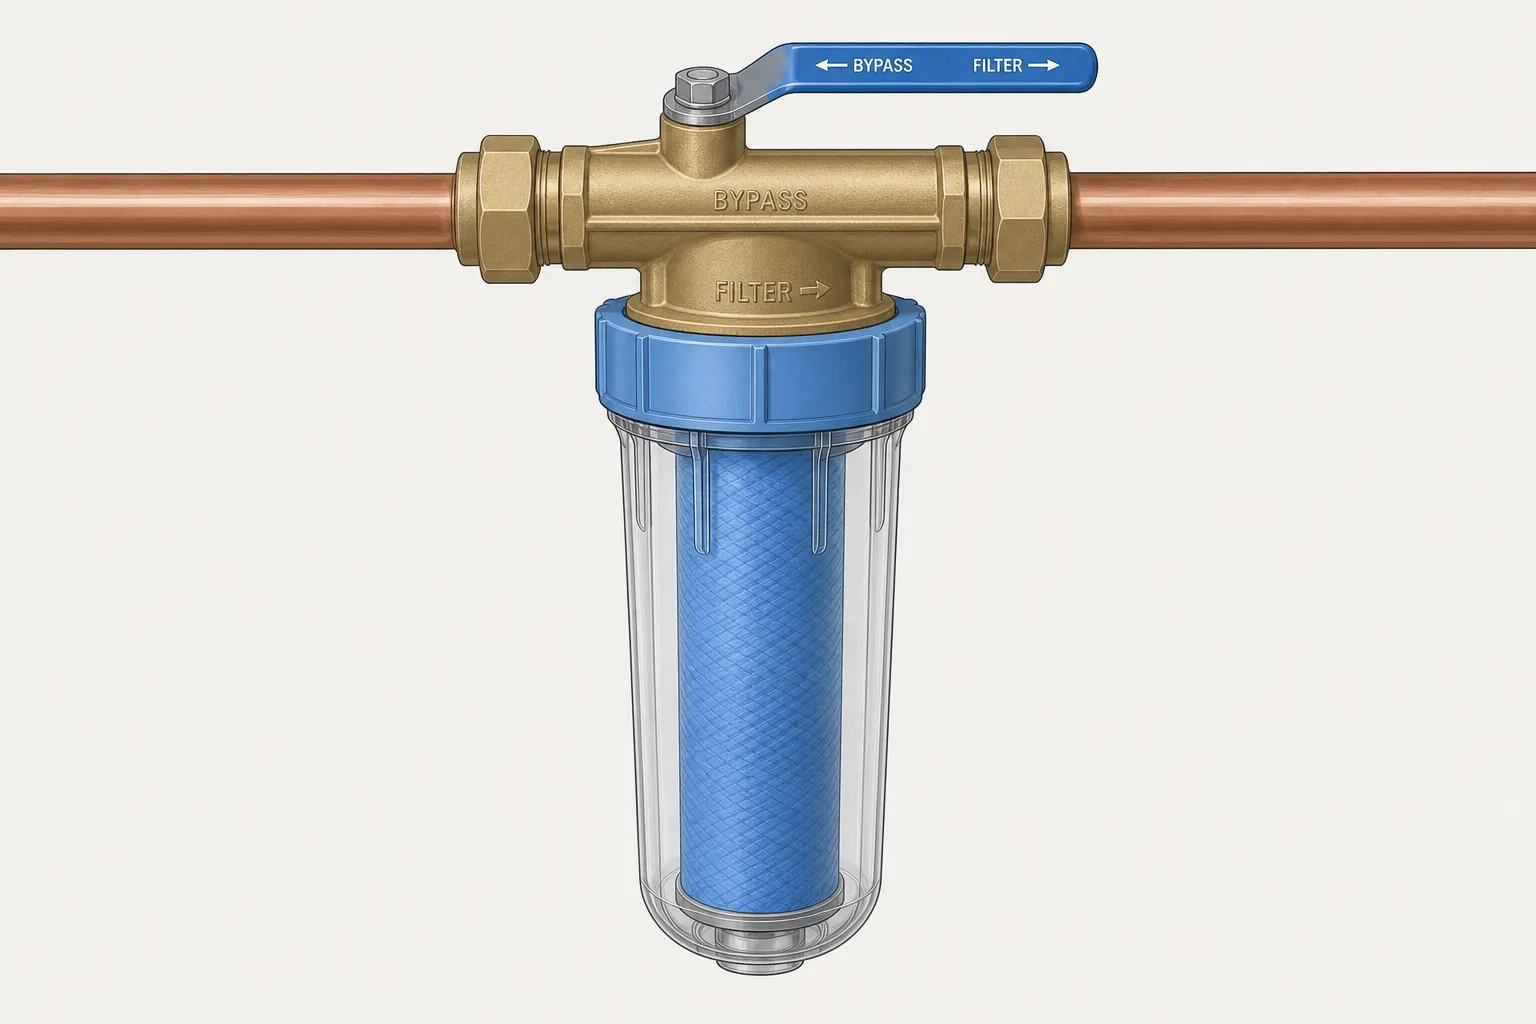
Do I really need a bypass valve?
Absolutely. If your filter clogs on a Sunday night or you need to change it, you'll have no water to the house without a bypass. It lets you temporarily restore flow around the filter.
Will a whole house filter make my water soft?
No. Standard sediment and carbon filters don't remove dissolved minerals like calcium and magnesium that cause hard water. You'll need a water softener for that, installed after the initial sediment filter.
How often do I REALLY need to change the filter?
It depends on your water quality and usage. The manufacturer's recommendation is a starting point—say, six months. But pay attention: a noticeable pressure drop, worsening taste or odor, or visible discoloration means it's time. When in doubt, change it sooner.
Can I install this on a well system?
Yes, and it's highly recommended. Well water often carries significant sediment and sometimes sulfur smells. A sediment filter is essential first-stage protection. Depending on your well test results, you might need additional filters like carbon for taste or iron-specific media.
My water pressure dropped after install, is that normal?
A slight drop of 1–5 PSI is normal from the filter's restriction. A significant drop usually means the filter is clogged (flush longer if new, replace if old), the bypass isn't fully open, you used undersized fittings, or there's a kink in the new piping. Check those before worrying.
What should I look for when choosing a whole house filter?
Consider the contaminants you want to remove and verify the filter's certification 9. Different filters target different stuff—sediment, chlorine, lead, or cysts—so match the unit to what's actually in your water. Look for NSF/ANSI standards on the label to confirm independent testing.