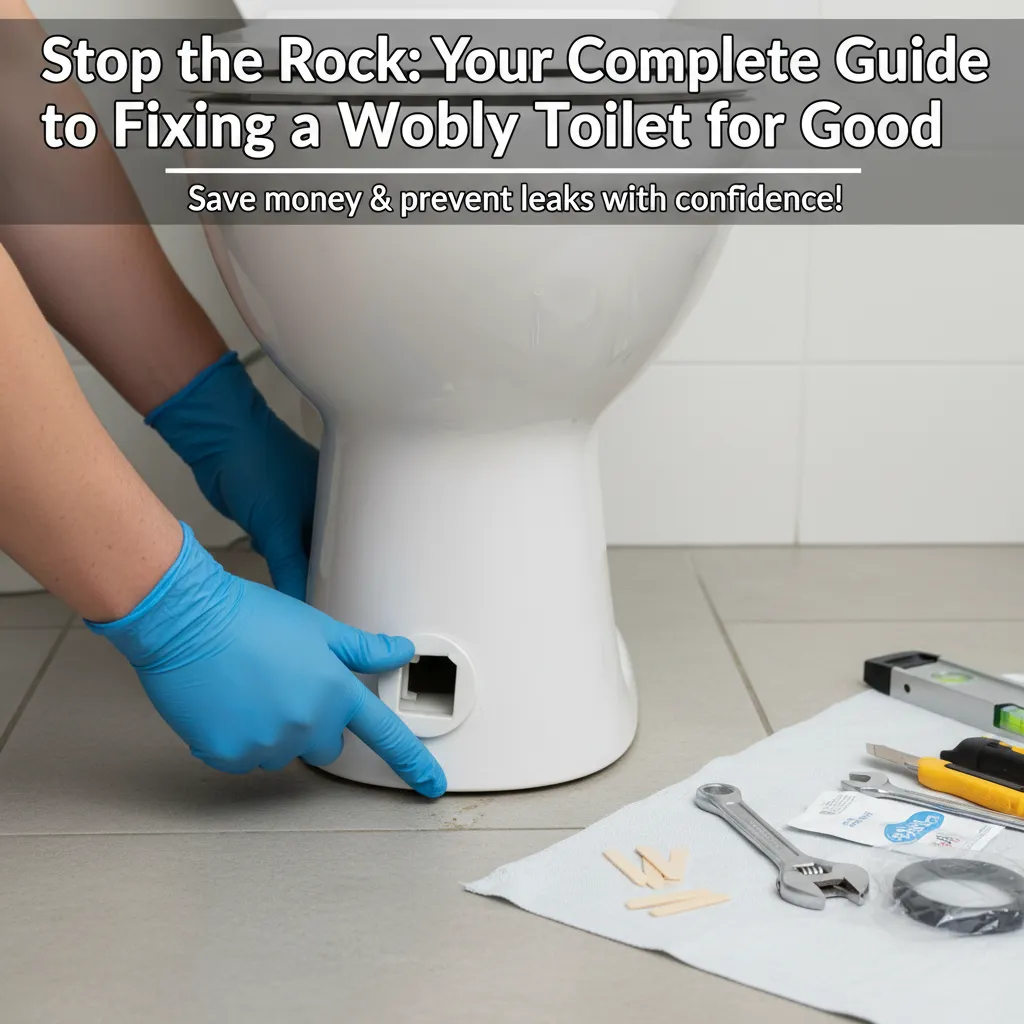
That unnerving sway when you use the toilet isn't just unsettling; it means something's wrong underneath. Usually, it's loose bolts connecting the toilet to the floor flange, an uneven floor, a worn-out wax seal, or a combination. Ignoring it risks broken porcelain, nasty leaks damaging your subfloor, and sewer gas smells. HomeSight Inspections reports that the two most common issues a loose toilet creates are an increased risk of leakage and potential for sewer gas to enter the house 1. Plumbing can feel intimidating, but tackling this wobble head-on is often simpler than you think and saves a costly plumber call.
That subtle (or not-so-subtle) rocking motion every time you sit down isn't just annoying—it can signal leaks and damage brewing under your toilet. Don't panic. You're not alone, and fixing a wobbly toilet is often a very manageable DIY project. This guide will walk you through exactly what's causing the wobble and how to fix it safely and permanently, whether you need a quick tweak or a bit more elbow grease.
Solution (Beginner to Intermediate - 30 minutes to 2 hours (depends on fix needed))
Step 1: Diagnose the Wobble & Prep the Area
First, shut off the water supply valve (usually behind the toilet) and flush, holding the handle down to empty the tank. Soak up remaining tank water with a sponge. Now, gently rock the toilet side-to-side and front-to-back. Feel where the movement is. Look at the base: Are the plastic caps covering the bolts missing or loose? Try gently tightening the nuts under those caps (one on each side) with your wrench—just a quarter turn at first, hand-tighten nuts, then gently tighten alternately with a wrench—snug, not Hercules-tight. Does the wobble stop? If so, you're done. If not, or if the nuts spin freely, you likely need shims or a full reseat.
⚠️ Warning: NEVER force-tighten bolts without checking underneath first. Overtightening cracks the porcelain toilet base instantly.
Step 2: The Quick Fix: Tighten & Shim (If Possible)
If gentle tightening helped but didn't eliminate the wobble, or if you see gaps under the base, it's shim time. Carefully insert plastic shims into the gaps around the base where the toilet meets the floor. Start with one shim, tap it gently with a hammer until snug (don't lift the toilet), then add another on top if needed. Re-tighten the closet bolts evenly and gently—alternate sides, quarter turns each. Use your level to check front-to-back and side-to-side. The goal is stable and level, not necessarily gap-free everywhere. Snug is enough. Trim excess shim with a utility knife. Replace caps.
⚠️ Warning: Over-shimming can lift the toilet off the wax seal, causing leaks. Ensure the toilet base is still firmly contacting the floor near the drain.
Step 3: The Permanent Fix: Reseating the Toilet (For Severe Wobble or Leaks)
If bolts are broken, the flange is damaged, tightening/shims don't work, or you suspect a leak (water on floor, smell), you need to pull the toilet. Remove the nuts from the closet bolts. Carefully rock the toilet straight up to break the wax seal—have a helper or be ready for its weight. Lift straight up and set it aside on old towels. Stuff a rag into the drain pipe to block sewer gas. Scrape ALL old wax off the flange and bottom of toilet (putty knife). Inspect the flange: Is it broken? Securely attached to the floor? Level with the floor? (See Troubleshooting). Install new brass closet bolts into the flange slots. Press the NEW wax ring firmly onto the toilet horn (not the flange). Carefully lower the toilet straight down, aligning the bolts through the base holes. Sit fully on it (don't rock) to compress the wax. Level & shim if minor gaps remain. Reconnect water, turn on supply, let tank fill, flush several times. Check underneath at the base for leaks.
⚠️ Warning: Toilets are heavy and awkward. Get help lifting. Avoid side pressure when setting down—align bolts carefully. Ensure the wax ring stays centered during placement. Double-check for leaks before using.
Pro Tips
- Listen for creaks: A loud creak when rocking often means the wax seal is broken and reseating is needed.
- Brass Bolts Rule: They won't rust solid like steel. Worth the extra dollar.
- Extra Thick Wax Ring: Use if your flange is slightly recessed below the floor level.
- Double-Nut Trick: If bolt threads are stripped, you can sometimes thread a second nut on top of the first to lock it.
- Dry Fit First: Before adding wax, lower the toilet to check bolt alignment and flange position.
- Check Twice, Tighten Once: Porcelain cracks are permanent. Err on the side of less torque.
When to Call a Professional
Call a plumber if: 1) The flange is cracked, broken, or rotted away. 2) The floor around the toilet feels soft or spongy (water damage). 3) The closet bolts are spinning freely and the flange is inaccessible (e.g., glued PVC). 4) You see significant leaks after reseating. 5) You're uncomfortable lifting the toilet or dealing with the drain. Don't risk major water damage.
Understanding the Problem in Detail
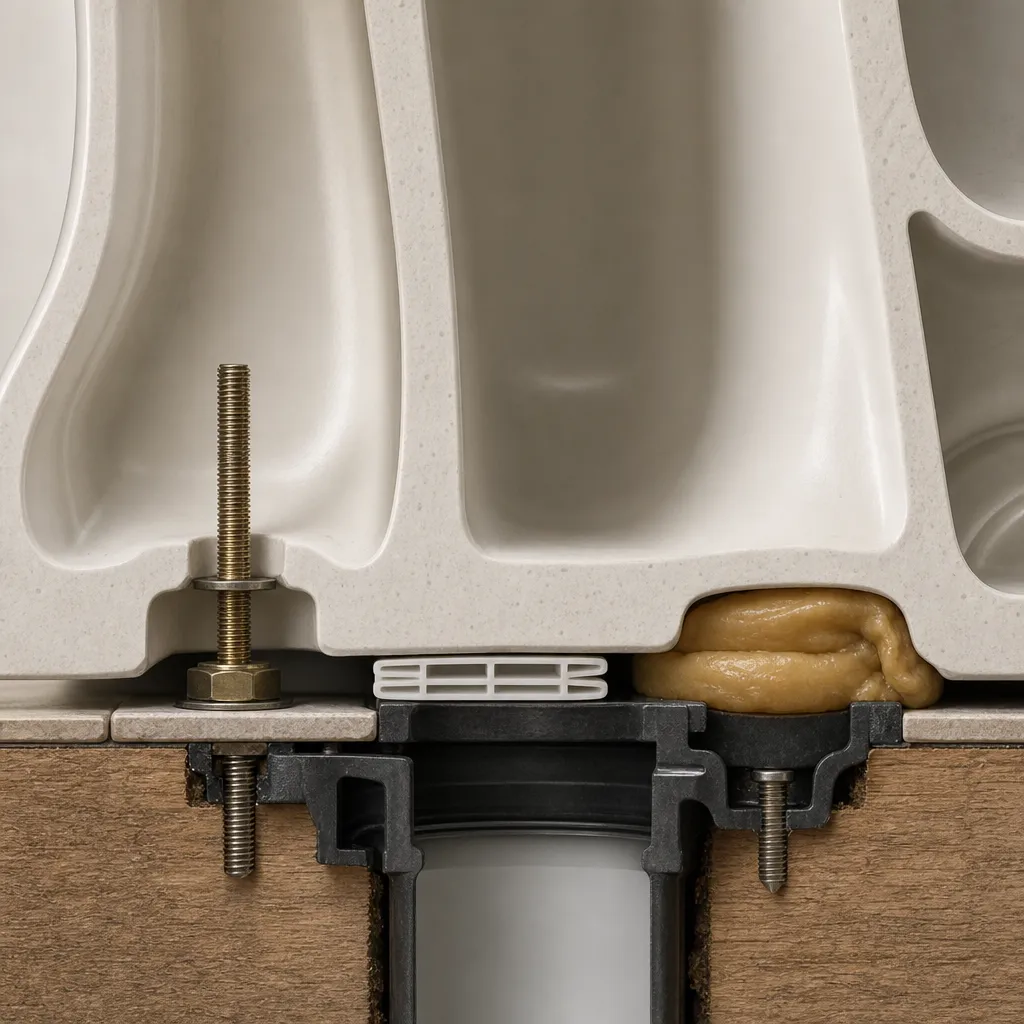
Your toilet bolts to a metal or plastic flange screwed to the subfloor, which connects to the drain pipe. A wax ring seals between the toilet horn and the flange. Wobble happens when: 1) The nuts on the bolts securing the toilet to the flange loosen over time. 2) The floor settles or becomes uneven under the toilet base. 3) The wax ring compresses unevenly or fails, removing support. 4) The flange itself is damaged or loose. 5) The flange sits too high or too low relative to the finished floor.
Flange height matters more than most homeowners realize. If the flange is too high, the toilet may rock, stressing the seal and causing wobble 2. On the other hand, a flange that's too low can prevent the wax ring from sealing properly—leak paths will form, and you may need an extra-thick wax ring or a flange extender to fix it 2. This instability stresses the wax seal, eventually causing leaks and potential floor rot.
Tools and Materials Guide
Wrench/Sockets: A 7/8" or adjustable wrench works. A deep socket makes it easier. Shims: Plastic/composite won't rot. Tapered design allows fine adjustment. Experienced plumbers recommend clear plastic plumbing shims—you can shove them under the toilet and trim with a utility knife to stop wobble without being visible 3. Wax Ring: Standard height for flanges level with the floor. 'Extra Thick' or 'Jumbo' for flanges slightly below the floor. Horned versions guide alignment. Bolts: Brass, 2.5" is common, 3" for thicker floors/flanges. Get a 'toilet bolt kit' which often includes bolts, washers, nuts, and caps. Alternatives: If flange is badly damaged, repair kits (e.g., stainless steel ring inserts, PVC spacers) exist but add complexity. Where: All items readily available at hardware stores (Home Depot, Lowe's) or plumbing supply houses.
Safety Considerations
Before you pick up a wrench, let's talk about what can go wrong—and how to avoid it. These precautions keep you safe and protect your toilet from costly damage.
Porcelain is Brittle: Never overtighten toilet bolts. Experienced plumbers tighten them gradually, alternating sides until the toilet sits flat on the floor without rocking 4. Overtightening can crack the porcelain, and a cracked bowl means a full replacement. Also, avoid prying against the toilet bowl—use your hands, not tools, to nudge it into place.
Lifting: Toilets are awkward and heavy. Get help if you can. Lift with your legs, not your back, and keep your fingers clear when setting it down.
Water: Shut off the valve completely and flush to drain the tank. Sponge out the tank and bowl so you're not sloshing water around when you lift the toilet.
Sewer Gas: Once the toilet is off, plug the open drain pipe immediately with a rag or a dedicated plug. Sewer gas isn't just smelly—it can be hazardous.
Hygiene: Wear gloves. The area under a toilet can be gross, and you'll be handling the old wax seal.
Old Floors (Pre-1980): If your home has original linoleum or flooring from before 1980, be cautious—it may contain asbestos. Don't sand or cut it. If you need to disturb it significantly, consult a professional.
Troubleshooting Common Issues
Nuts Won't Tighten: Bolts are spinning? Flange slots may be stripped. Try double-nutting. If the flange spins, it's detached – needs pro repair. If the toilet wobbles and bolts won't tighten further, the flange may be broken or the floor uneven; pull the toilet to inspect 5. Toilet Still Rocks After Reseating: Did you remove ALL old wax? Is the flange securely fastened and level with the floor? Did you use the correct thickness wax ring? Is the floor itself uneven? Double-check leveling and shimming. For a flange that is too high, you can use a waxless sealing ring or replace the flange with a lower-profile model 6. If the flange is too low, flange extenders are available in 1/4-inch and 1/2-inch sizes to raise it 7. Leaks After Reseating: Did the wax ring stay centered? Did the toilet shift while tightening? Did you overtighten and crack the base? Is the flange cracked? Tighten bolts a tiny bit more if safe, otherwise re-pull and inspect. Broken Bolt in Flange: Spray with penetrating oil (PB Blaster), wait 10 minutes, then use a hacksaw blade or oscillating tool to carefully cut the bolt vertically between the flange and floor. Avoid damaging the flange — it's harder to replace than the bolt. Bolt Snapped Flush with Floor: Use a bolt extractor or cut new slots with a Dremel. Replace both bolts while you're at it. For lead closet bends, a proper repair involves attaching a new brass flange and anchoring it; this is a job for a plumber experienced with lead 8.
Maintenance and Prevention
- Annual Check: Gently try to rock the toilet. If movement, carefully tighten the nuts just enough to stop it. 2) Avoid Harsh Cleaners: Bleach-based cleaners can degrade the wax seal over time near the base. 3) No Standing: Don't stand on the toilet bowl rim. 4) Fix Floor Issues: Address significant floor sagging or damage near the toilet promptly.
Cost Analysis: DIY vs Professional
DIY Fix (Tighten/Shim): $0-$5 (cost of shims). DIY Fix (Reseat): $10-$25 (Wax ring $5-$10, Brass bolts $3-$5, Shims $2-$5). Professional Repair: $150-$400+ (Reseating typically $150-$250, Flange repair adds $100-$300+ depending on complexity). Savings: DIY reseating saves $125-$375+ vs. a plumber. Fixing early prevents $1000s in water damage.
Related Plumbing Problems
- Toilet Leaking at Base: Almost always caused by a broken wax seal due to wobble or age. 2) Loose Toilet Seat: Separate issue; tightened with screws under rear hinges. 3) Sewer Odors in Bathroom: Can indicate a broken wax seal. 4) Squeaky/Rocking Bathtub: Similar instability issues, different fix. 5) Uneven Bathroom Floor: May be the root cause needing leveling.
Frequently Asked Questions
Can I just tighten the bolts without doing anything else?
Sometimes. If the wobble is very minor and started recently, gently tightening the nuts a quarter turn at a time (alternating sides) might fix it. BUT, if it's been wobbly a long time, the wax seal might already be compromised, or the floor might be uneven, requiring shims or reseating. Never force it – stop if you meet resistance or the wobble persists after snugging.
Is a wobbly toilet an emergency?
Not usually an immediate emergency like a burst pipe, but it's urgent. Every time it rocks, it stresses the wax seal. A broken seal means water (and worse) leaks under your floor every time you flush, causing hidden rot and mold. Fix it as soon as reasonably possible.
My toilet is wobbly but not leaking. Do I still need to fix it?
Absolutely yes. The leak often starts hidden under the toilet base or into the subfloor. By the time you see water on your bathroom floor, significant damage may already be done. Wobble is the warning sign – fixing it prevents the leak disaster.
I fixed it, but it still has a tiny bit of rock. Is that okay?
No, it's not ideal. Even a small rock will eventually work loose the bolts and compromise the wax seal. Go back to Step 2 (shimming) or double-check your reseating job (Step 3). Ensure it's truly stable and level. Persistence pays off to prevent future problems.
Can I reuse the old wax ring?
Absolutely NOT. Wax rings compress to form a seal once. Once the toilet is lifted, the old ring is deformed and won't seal properly again. Always use a brand new wax ring when reseating the toilet – it's cheap insurance against leaks.
What are the standard clearance and rough-in measurements for a toilet?
When you're installing or repositioning a toilet, you'll need to know two key dimensions. The standard rough-in distance from the finished back wall to the center of the flange is 12 inches 9. And the Uniform Plumbing Code requires at least 15 inches from the center of the toilet to any side wall or obstruction 10. These measurements ensure your toilet fits properly and meets code, which can also affect stability if the toilet is crammed into a tight space.