When to Call a Professional
Even a straightforward pan install can cross into territory where a pro is the safer bet. If your water heater is gas-fired, you're dealing with a gas line connection—shutoff and reconnection aren't DIY tasks. The same goes for any electrical work on an electric unit. If the existing setup has rigid plumbing connections that need cutting or re-routing to fit the pan, or if you're unsure about local code requirements for pan drains, call a licensed plumber. Experienced plumbers see too many homeowners get in over their heads and end up with leaks or code violations that cost more to fix than the original install 1.
If your water heater is on an upper floor or in a finished space, the stakes are higher—a botched pan or drain line can mean ceiling damage below. In those cases, the peace of mind from a professional install is worth the cost.
Safety Considerations
Before you touch anything, shut off the water supply and the power or gas to the water heater. Double-check with a voltage tester—you don't want surprises. Wear knee pads, because you'll be crouching a lot.
Never bypass the temperature and pressure relief valve to route the drain. That valve is your last line of defense against a tank explosion, and it needs a clear, unobstructed path.
Make sure the floor can handle the pan's added weight. A full pan plus the heater can top 1,000 pounds, so if you're on a wood-framed floor, check for any sagging or rot first.
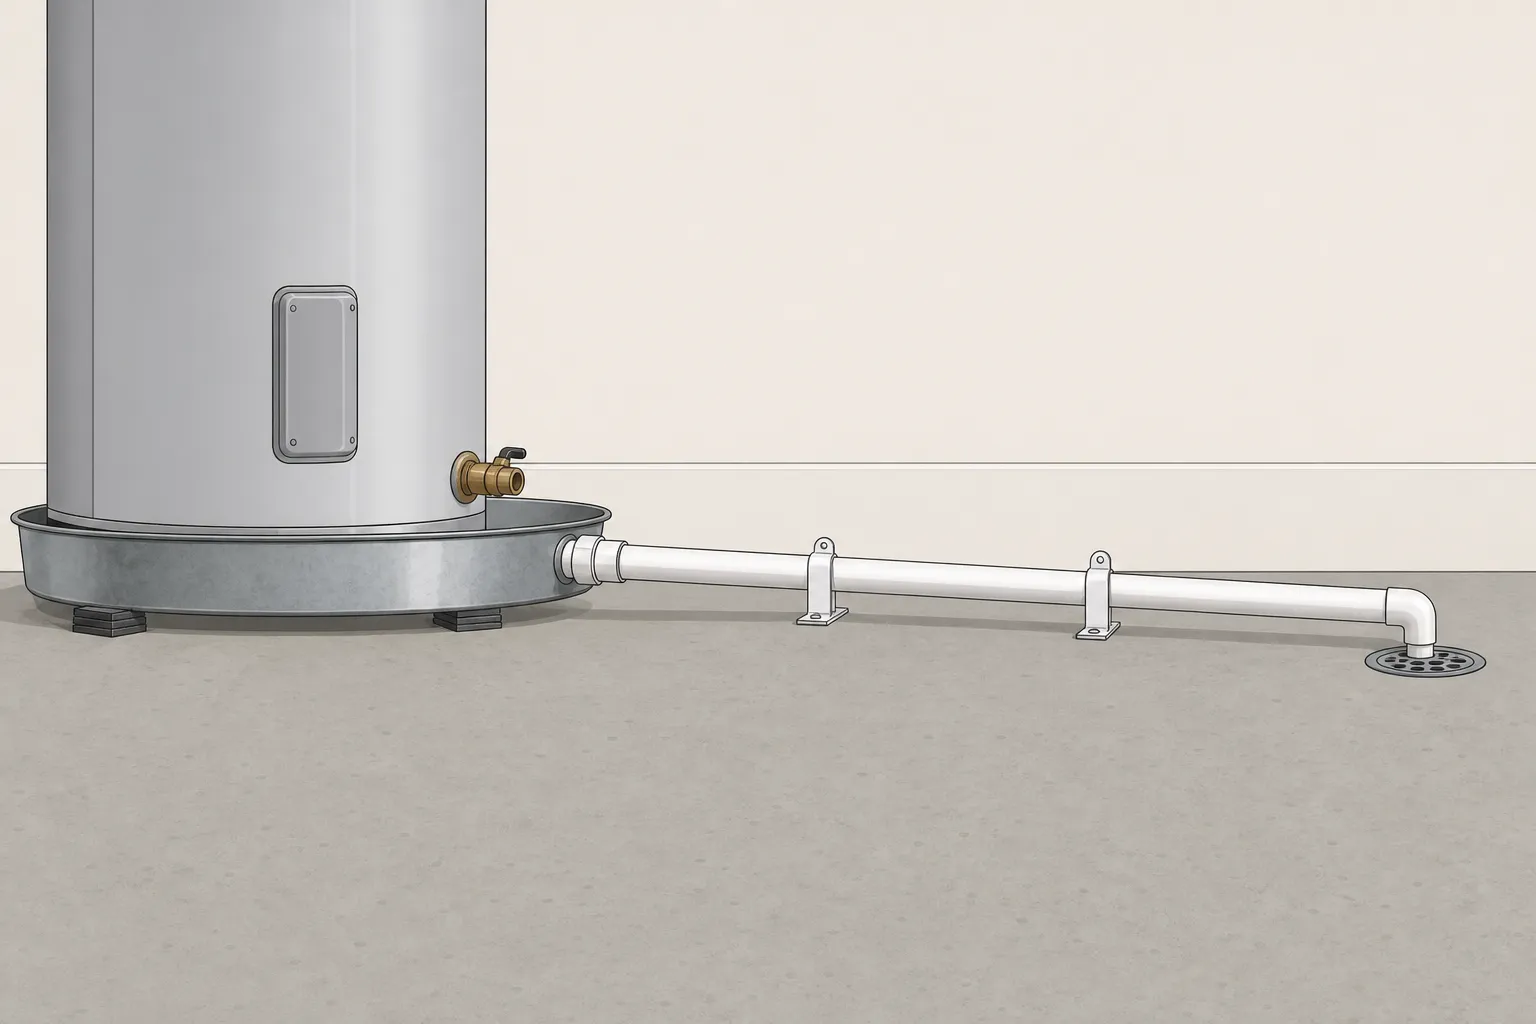
When you run the pan drain line, it must slope downward continuously without any traps. Traps hold water, and standing water breeds mold and blocks the drain when you need it most 2. A straight, downhill run to a floor drain or outside is what you're after.
Understanding the Problem in Detail
Water heaters fail gradually. Sediment buildup corrodes tanks, temperature/pressure valves weep, and fittings degrade. A pan catches these early warnings before 40+ gallons flood your home. In fact, the 2021 International Plumbing Code (IPC) Section 504.7 requires a pan under any water heater where leakage could cause damage 3. So if your unit is in an attic, finished basement, or living space, you'll likely need one to meet code.
Buy pans at hardware stores—look for EPDM rubber or polypropylene, which won't crack. Drain pipes must be PVC or CPVC; garden hoses degrade over time. Need a shorter pan? Some brands offer low-profile 1.5-inch deep options. Budget tip: use leftover PVC from sprinkler projects.
Step-by-Step Installation
Before you start, shut off the water heater’s power at the breaker (electric) or turn the gas valve to “pilot” (gas). Let the tank cool for a couple of hours so you don’t scald yourself. You’ll need a helper for lifting—water heaters are heavy.
Step 1: Choose the right pan Pick up a pan at any hardware store. EPDM rubber or polypropylene pans hold up best—they won’t crack over time. Measure your heater’s diameter and get a pan at least 2 inches wider. If clearance is tight, some brands offer low-profile pans only 1.5 inches deep. The drain line must be PVC or CPVC; garden hoses degrade and won’t meet code 1.
Step 2: Drain the tank Hook a garden hose to the drain valve at the bottom and run it to a floor drain or outside. Open the valve and let the tank empty completely. If the valve is clogged with sediment, don’t force it—call a plumber to avoid snapping the valve.
Step 3: Disconnect and remove the old heater Turn off the cold-water supply valve. Disconnect the water lines with a pipe wrench—have a bucket ready for drips. For gas heaters, disconnect the gas line at the union; for electric, disconnect the wiring. Cap the gas line immediately with a threaded plug. If you’re not comfortable working with gas or electrical connections, call a plumber or electrician for this step.
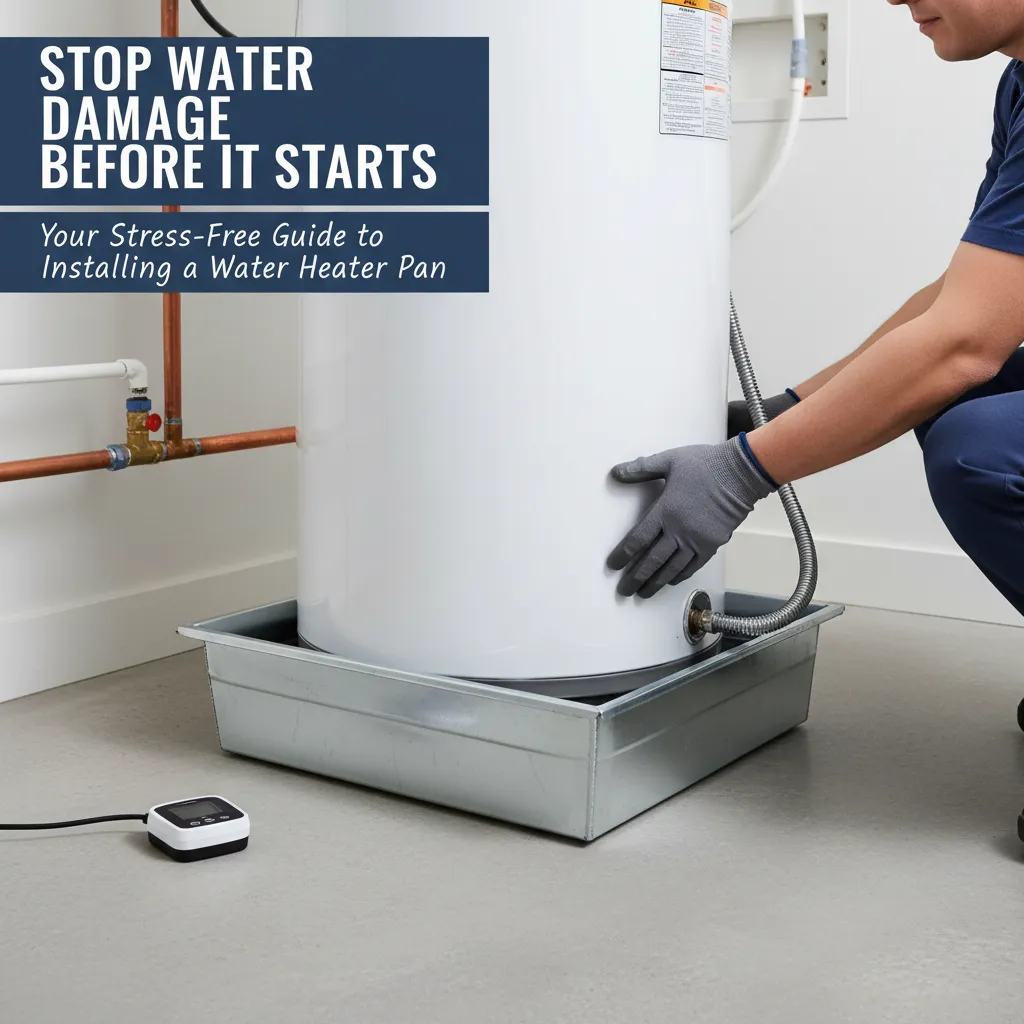
Step 4: Set the pan in place Position the pan where the heater will sit. If the floor isn’t level, shim the pan with plastic or composite shims—never wood, which rots. The pan’s drain opening should point toward the nearest floor drain or outside wall.
Step 5: Install the drain line Connect a PVC or CPVC drain line to the pan’s drain fitting. Slope the pipe at least 1/4 inch per foot toward the termination point. Code requires the drain to end at a floor drain, sump pit, or outside—not just onto the floor 4. If you’re tying into existing plumbing, call a plumber to ensure proper venting and trap configuration.
Step 6: Set the water heater With a helper, lift the heater into the pan. Center it so the drain opening isn’t blocked. Reconnect the water lines, gas or electrical, and the vent for gas models. Use new flexible connectors if the old ones are corroded. If you’re reconnecting gas, call a plumber to pressure-test the line and check for leaks.
Step 7: Refill and test Open the cold-water supply and a hot-water faucet somewhere in the house to bleed air. Once water runs steady from the faucet, close it. Check all connections for drips. Restore power or relight the pilot. To test the pan drain, pour a cup of water into the pan and verify it flows out the drain line.
Compact Tools & Materials: adjustable wrench, pipe wrench, screwdrivers, level, PVC/CPVC pipe and fittings, PVC cement, hacksaw, Teflon tape, shims, bucket, garden hose.
Troubleshooting Common Issues
If your pan isn't draining, check for debris blocking the outlet or make sure the pan slopes toward the drain. Even a slight tilt the wrong way can hold water.
A wobbly heater? Add more shims under the pan. Vibration can crack pipes over time, so you want the unit rock-solid.
Condensation pooling in the pan usually means the tank or nearby pipes are sweating. Insulate the cold water pipes and consider a tank blanket if the room is warm and humid.
Leaky connections at the drain line? Tighten gently or reapply Teflon tape. Don't overtighten—you can crack plastic fittings.
A common mistake experienced plumbers flag is using standard PVC for the pan drain. The IPC doesn't approve PVC for this, and an inspector flagged one homeowner for exactly that. Use CPVC instead 1.
Another common error is connecting the pan drain directly to the sewer line. That violates code and can let sewage back up into your pan. The drain must discharge through an air gap over a floor drain, indirect waste receptor, or to the exterior—never a direct connection 1. The 2021 IPC spells this out: the pan drain shall terminate over a suitably located indirect waste receptor or floor drain or extend to the exterior, and discharge piping shall not be directly connected to the drainage system 4.
If you're unsure about your drain setup or material, call a plumber to check it. A code violation here can lead to bigger problems down the road.
Pro Tips
A few small moves make a big difference in how well your pan holds up over time.
- Before you set the water heater in the pan, sprinkle a light layer of baking soda across the bottom. It'll absorb musty smells from any standing water that evaporates between checks.
- If your pan has a knockout for the drain, remove it with a hammer and screwdriver before you position the pan — doing it in place can crack the plastic.
- Slide a plastic shim or composite wedge under the pan's low side if the floor isn't perfectly level. You want water to flow toward the drain opening, not pool in the opposite corner.
- Check the pan drain line every six months. Pour a cup of water into the pan and watch the flow — if it's slow, flush the line with a garden hose or clear debris from the termination point.
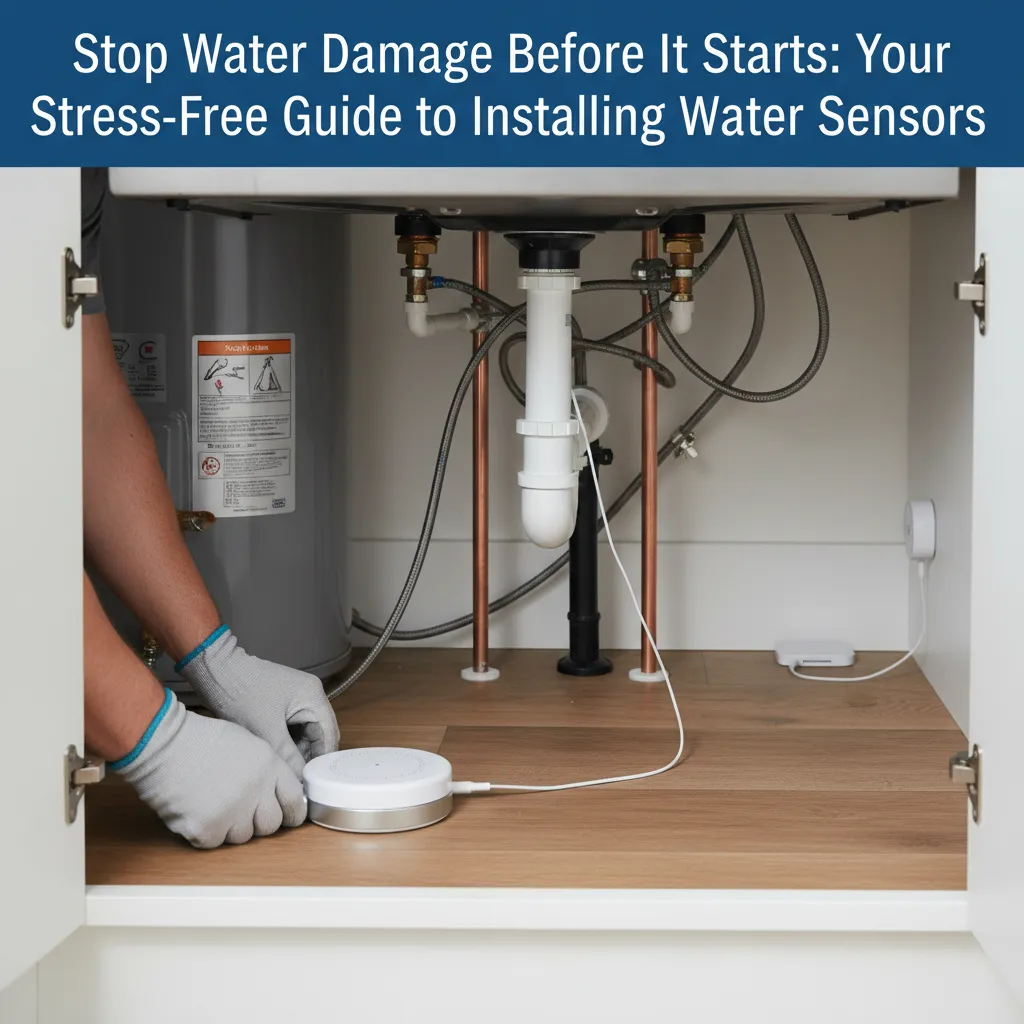
- When the water heater sits in a closet or finished space, add a water alarm in the pan. These battery-powered sensors scream when they detect moisture, giving you a heads-up before a slow leak turns into floor damage.
Maintenance and Prevention
Once your pan is in place, a few simple habits will keep it doing its job. Test the drain valves annually by briefly opening them to make sure water flows freely. Flush sediment from the tank every six months—this extends tank life and reduces the chance of a leak starting in the first place. Replace the anode rod every three to five years, and keep the area around the heater clear so you can spot trouble early.
A water alarm sitting in the pan gives you an early warning if water starts to collect. One homeowner reported that a basic alarm helped them catch a pan leak before it damaged the floor 5. Experienced plumbers often recommend WiFi-connected alarms that send alerts to your phone, so you’ll know about a leak even when you’re away 5.
Cost Analysis: DIY vs Professional
Doing the work yourself typically runs $30–$80 for materials, while hiring a plumber lands between $150 and $400. The pan itself is usually $15–$30, and drain pipe plus fittings add another $10–$30. Labor is the big variable—most of a pro’s quote goes to the $100–$300 it takes to get the pan in place and the drain line routed correctly.
Compare that to what a leak can cost you. Water damage repairs often start at $2,000 and can climb past $10,000 once flooring, drywall, and mold remediation are factored in. A pan is cheap insurance.
One more thing: check with your homeowners insurance agent. Many carriers offer a discount when a code‑compliant pan is installed, and some even require one for coverage. A five‑minute phone call could save you money every year.
Related Plumbing Problems
• Fixing leaky water heater valves
• Replacing an old water heater
• Installing flood sensors
• Repairing water-damaged subfloors
• Soundproofing water heater closets
Frequently Asked Questions
Can I install a pan without moving my water heater?
No—the heater has to be drained and lifted so you can slide the pan underneath. There’s no way to fit a pan around a seated tank, so plan on disconnecting and moving it.
What if my floor drain is across the room?
Route the pipe along the wall (not across walkways). Use PVC hangers every 4 ft and conceal it with a paintable conduit. If impossible, consider a condensate pump to push water uphill.
Do I need a pan for a tankless water heater?
Usually not—tankless units don’t store water. But check local codes, and always install a drain pan under whole-house filtration systems.