You're Not Imagining Things
Whether it's a failing water heater, a frozen pipe burst, or a slow leak under the dishwasher, water damage strikes 1 in 50 homeowners annually. The worst part? By the time you see visible damage, it's often too late. That panic you feel is justified — and totally preventable.
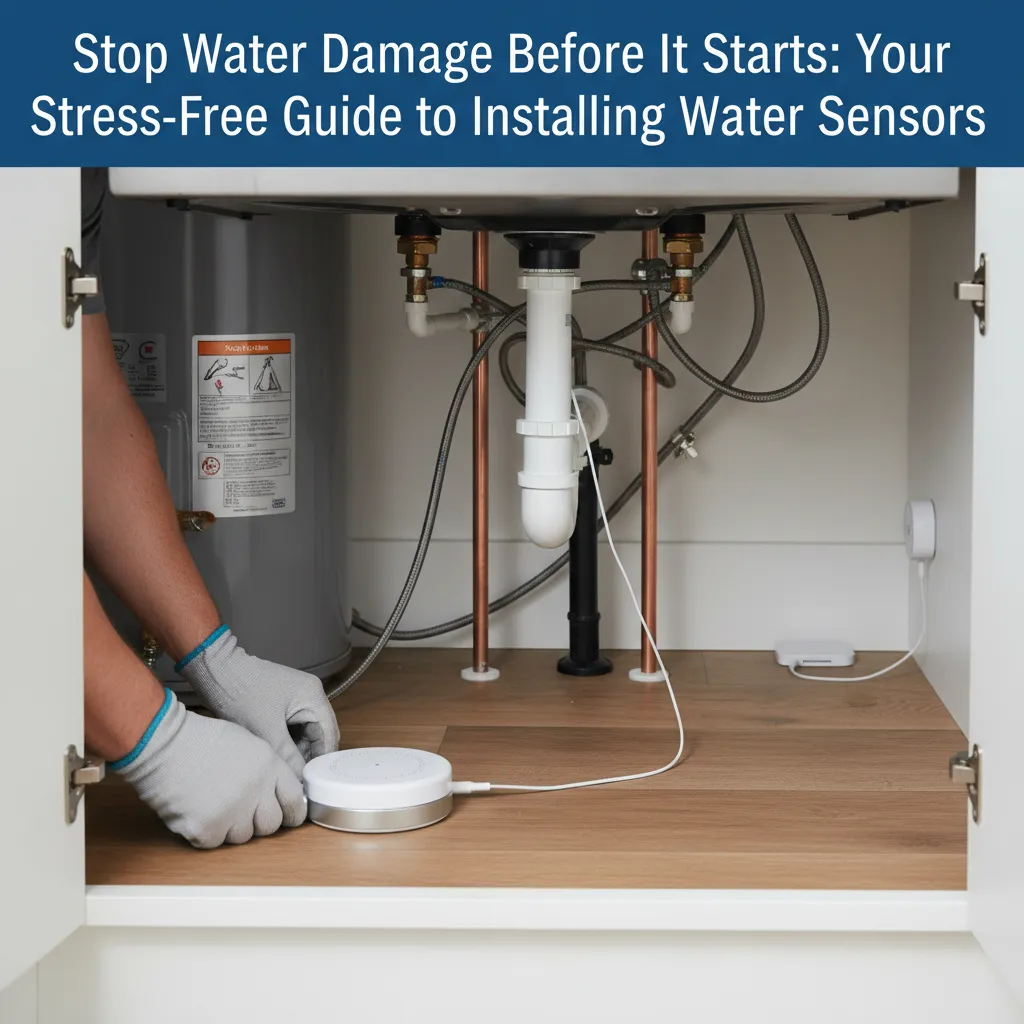
That heart-sinking moment when you spot a puddle under the sink — we've all been there. Water damage costs homeowners thousands every year, but a $20 sensor and 30 minutes of your time can save your sanity and your wallet. Slow leaks under washing machines often go unnoticed until black mold appears, as one homeowner discovered after a hidden leak had been festering for weeks 1. Let's walk through it together, like we're working side-by-side in your utility room.
Understanding the Problem in Detail

Water sensors work via exposed metal contacts that complete a circuit when water bridges them, triggering alarms. Most damage comes from slow leaks—toilet flappers, pipe joints, dishwasher supply lines—rather than floods. Just 1/8" of water can ruin flooring and drywall.
Toilet wax ring failures are a common cause of bathroom floor damage, often requiring subfloor replacement. One homeowner reported three bathroom floors damaged by compromised wax rings, two requiring full subfloor tear-out 2. Placing a sensor near the toilet base can catch these leaks early.
Water heater leaks can originate from the T&P valve, drain valve, or supply lines, not just the tank itself 3. The T&P valve must discharge in a visible location per code; routing it to a sump pump hides a critical safety warning 4. If you see water near the discharge pipe, it signals a larger issue like excessive temperature or pressure—so a sensor here gives you an early heads-up.
Dishwasher supply line leaks often occur at the connection nut above the valve 5. A sensor tucked under that connection can alert you before the leak spreads under cabinets.
Tools and Materials Guide
Best budget pick: Govee Water Detector ($19/3-pack). Smart choice: Moen Smart Flood Detector ($45, integrates with shutoff systems). Renters: Choose peel-and-stick models. Avoid 'universal' sensors if you have uneven floors. Buy at hardware stores for easy returns.
If you're placing a sensor near a toilet, keep a pack of plastic shims handy. Experienced plumbers prefer plastic over wood for leveling toilets because they resist moisture and won't rot 2. They're cheap insurance against a wobbly bowl that could let water sneak past the sensor.
Safety Considerations
Keep sensors and their wires well away from electrical panels and submerged outlets — you don't want moisture near live circuits. When you're working under sinks, knee pads make the job a lot more comfortable. If you spot mold or mildew during installation, stop and fix that moisture problem before placing a sensor. Route sensor wires so they don't touch drain pipes; condensation on a cold pipe can trigger false alarms.
If your water heater has a temperature and pressure relief (T&P) valve, never discharge it into a sump pit or any concealed location. The International Plumbing Code (IPC 504.6) requires the discharge pipe to end within 6 inches of the floor in a visible area, so you'll notice if it's dripping or running 4. Routing it into a sump hides a safety warning and violates code.
Troubleshooting Common Issues
If your sensor isn't behaving, start with these quick fixes.
False alarms? Move the sensor away from HVAC vents — blowing air can fool the contacts. No alarm at all? Clean the metal contacts with rubbing alcohol; dust and residue build up over time. App keeps disconnecting? Try switching your Wi-Fi router to a less crowded channel. Weak or intermittent alarm? Replace the batteries — they drain faster in humid spots like under sinks.
Maintenance and Prevention
Test your detectors monthly and replace the batteries once a year — mark it on your calendar so you don't forget. Vacuum the sensor vents every three months to keep dust from blocking them. Update the app firmware twice a year. After any leak, recalibrate the sensors. Every two years, rotate sensors between dry spots to prevent the adhesive from failing.
Cost Analysis: DIY vs Professional
You'll spend $20–$70 on a DIY fix, while water damage averages $2,700–$10,000. Many insurers offer a 5–10% discount for leak detection systems. Smart sensors typically pay for themselves in 18 months through early leak detection on your water bill.
Related Plumbing Problems
While you're checking for leaks, keep an eye out for these common problems: running toilets can waste 200+ gallons a day and often go unnoticed until the water bill spikes. Corroded supply lines should be replaced every 5 years — a pinhole leak can open up fast. Poor pipe insulation leads to frozen bursts during cold snaps. And clogged drain pans under water heaters overflow when the tank finally lets go.
Frequently Asked Questions
Will sensors work if my power goes out?
Battery-powered sensors will still sound local alarms, but smart features require Wi-Fi. If you're worried about power outages, go with cellular-connected models or a battery-backup sump pump.
Can I install sensors under laminate flooring?
Yes — slip low-profile sensors under the edges near appliances. Don't trap moisture—leave a slight air gap. If you're renovating, consider point sensors for subfloor installation.
How many sensors do I really need?
Start with 3-5: kitchen, 2 bathrooms, water heater, basement. Add more if you've got laundry on upper floors, multiple refrigerators, or a home older than 20 years where pipes are aging.