A disposal that hums without grinding, leaks from the bottom, or won't turn on at all is usually cheaper to replace than to fix. A like-for-like swap is a job most homeowners can handle in an afternoon. Below you'll find when to stop and call someone, the install step by step, and the problems that most often show up after the new unit goes in.
When to Call a Professional
If there's no plug-in outlet under the sink and the old unit is hardwired, the wiring is a job for an electrician. The same goes for aluminum or cloth-insulated wiring. If the drain pipes under the sink are corroded cast iron or crumbling, a plumber should look at them before you start twisting fittings loose.
And if you've already reinstalled once and it still leaks at the sink flange or the discharge elbow, it's time to get help. Experienced plumbers say a stubborn post-replacement leak usually traces to a corroded flange or a sink opening that won't seal, not the new unit 1. A plumber can spot that in minutes.
Safety Considerations
Turn the disposal off at the breaker, not just the wall switch, and test the switch to confirm it's dead before you reach underneath. Never put your hand inside the grinding chamber — use tongs or pliers to fish things out. A disposal weighs 10–20 pounds, so support it from below while you release the mounting ring.
Follow the manufacturer's electrical spec and the locally adopted NEC edition. Newer editions extend GFCI protection to more kitchen appliance circuits, so check before you reuse the old hookup 2.
Understanding the Problem in Detail
Disposals usually die one of three ways: the motor burns out from age or overloading, the internal seal fails and the unit leaks, or the grinding chamber cracks. Bones, fruit pits and grease all speed that up.
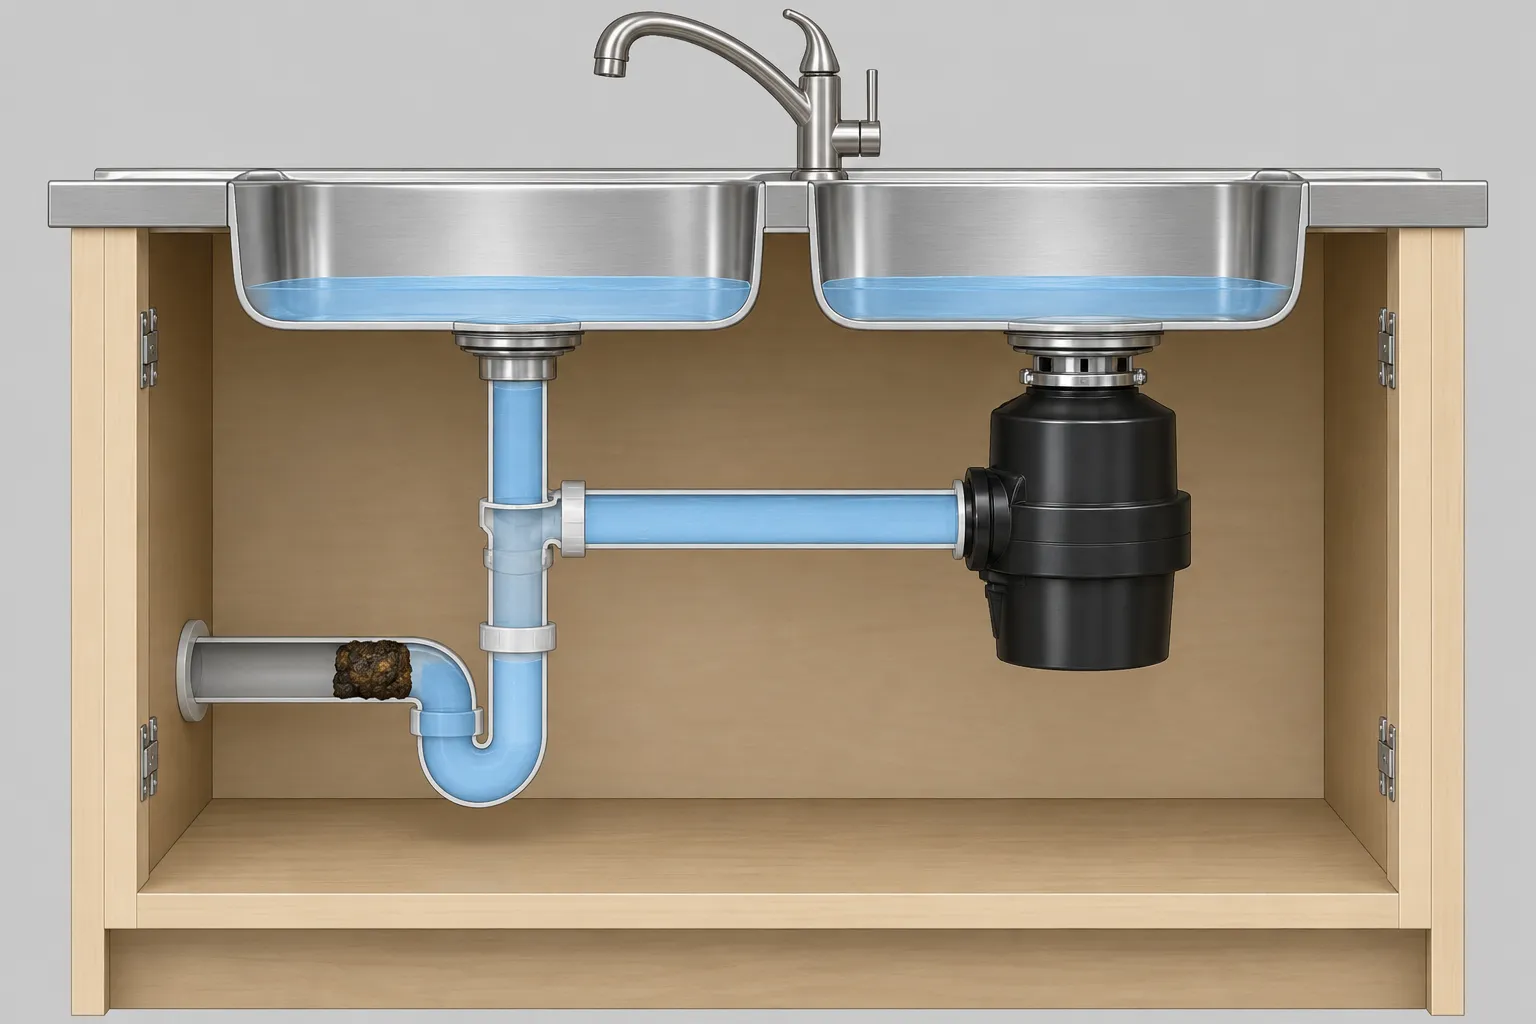
But before you blame the disposal, check the drain path. A new disposal that spins but won't drain is almost never a disposal problem. The motor running only proves the unit has power, not that the drain is clear 3. One homeowner replaced a disposal with the same model and found it "doesn't drain, just keeps spinning water." Experienced plumbers replied that the original unit was "probably functional, so now you have a spare" and that the "blockage downstream needs to be cleared before any disposal will work" 3.
To tell a disposal problem from a sink-branch clog, leave the other basin's drain open and run water down the disposal side. If water comes up into the other basin, the clog is past the tee where the two basins join, not in the unit 4. A plumbing operations manager put it plainly: "If water isn't backing up on the other side of your sink, then the clog is either in the disposal or in the fittings right below it" 4.
Step-by-Step Installation
InSinkErator's own install sequence is four stages: mount the disposal to the sink, complete the electrical connection, complete the plumbing connections, and test for leaks 5. The steps below follow that order. You can rent a basin wrench for about $5 a day instead of buying one.
Step 1: Shut off power and disconnect the old unit
Kill the breaker and confirm the power is off with a non-contact voltage tester. Put a bucket under the trap, then disconnect the dishwasher hose and the discharge pipe from the old disposal. Take a phone photo of the drain layout and any wiring before you undo anything.
Step 2: Remove the old disposal
Turn the mounting ring counterclockwise with a screwdriver or the wrench that came with the unit. Support the disposal from below as it drops free. If it's a corded unit, unplug it. If it's hardwired into a junction box, call an electrician to disconnect it.
Step 3: Install the new sink flange and mounting assembly
Scrape off the old putty with a plastic putty knife. Roll fresh plumber's putty into a 1/4-inch rope under the new flange and set it in the drain hole. From below, add the gasket, backup ring and mounting ring, then tighten all three mounting screws evenly. Leaving one loose is a common reason the gasket never seals 1.
Step 4: Knock out the dishwasher plug
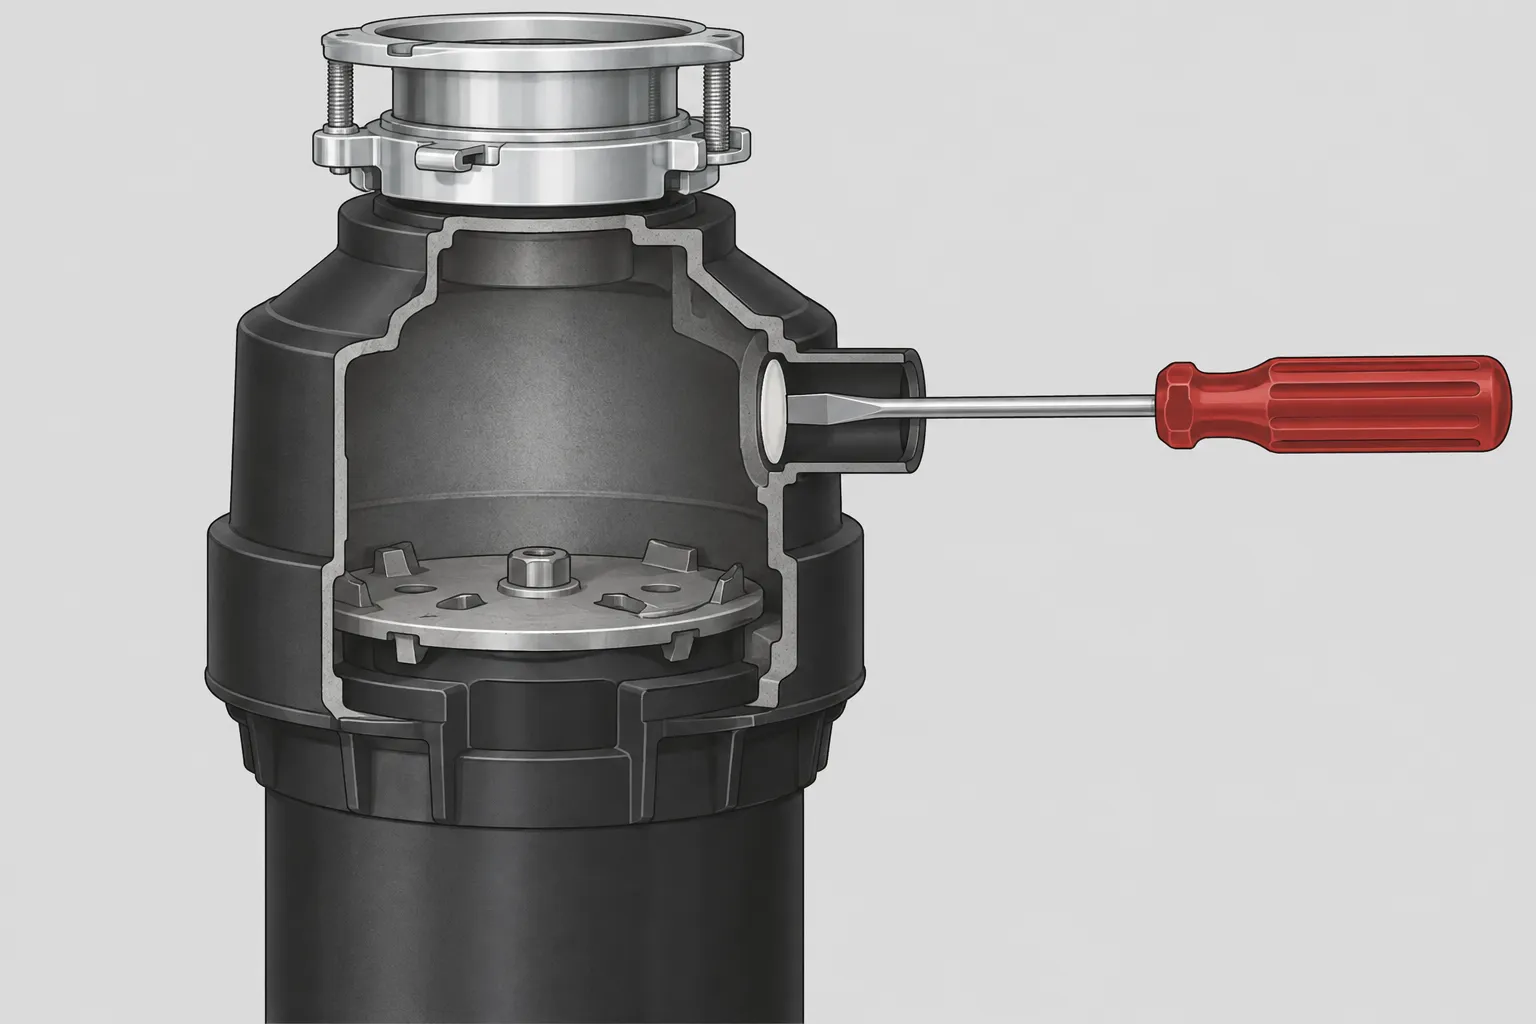
If your dishwasher drains through the disposal, knock out the plastic plug inside the dishwasher inlet with a screwdriver and hammer before you hang the unit. Fish the plug out of the chamber. A forgotten knockout plug is a classic cause of a dishwasher that won't drain after a replacement 3.
Step 5: Connect the power cord
Most new disposals ship without a cord, so attach a disposal power cord kit at the terminal plate: black to black, white to white, green to the ground screw. If you don't have a grounded outlet under the sink or you're unsure about any wiring, call an electrician.
Step 6: Hang the disposal and connect the drain
Lift the unit onto the mounting ring and turn the lower ring until it locks. Attach the discharge elbow, snugging plastic slip nuts hand-tight plus a quarter turn. Check that the new outlet lines up with the existing trap arm. A unit whose outlet sits at a different height than the old one can leave the trap misaligned and leaking 6. The disposal has to drain into a pipe of at least 1-1/2 inches through a proper trap, so an improvised or undersized drain is a code problem, not just a performance one 7. If the trap arm has to be cut or re-glued to line up, call a plumber.
Step 7: Reconnect the dishwasher hose
Run the dishwasher drain hose up to the underside of the counter and fasten it there in a high loop before it drops to the disposal inlet, unless your sink uses an air gap 8.
Step 8: Test for leaks
Restore power, run cold water and let the disposal spin while you watch every joint. Switch it off and keep checking. Leaks often only show up under running water 9.
Tools & materials: screwdriver, hammer, basin wrench, channel-lock pliers, non-contact voltage tester, plastic putty knife, flashlight, plumber's putty, disposal power cord kit (if not included), bucket and towels.
Troubleshooting Common Issues
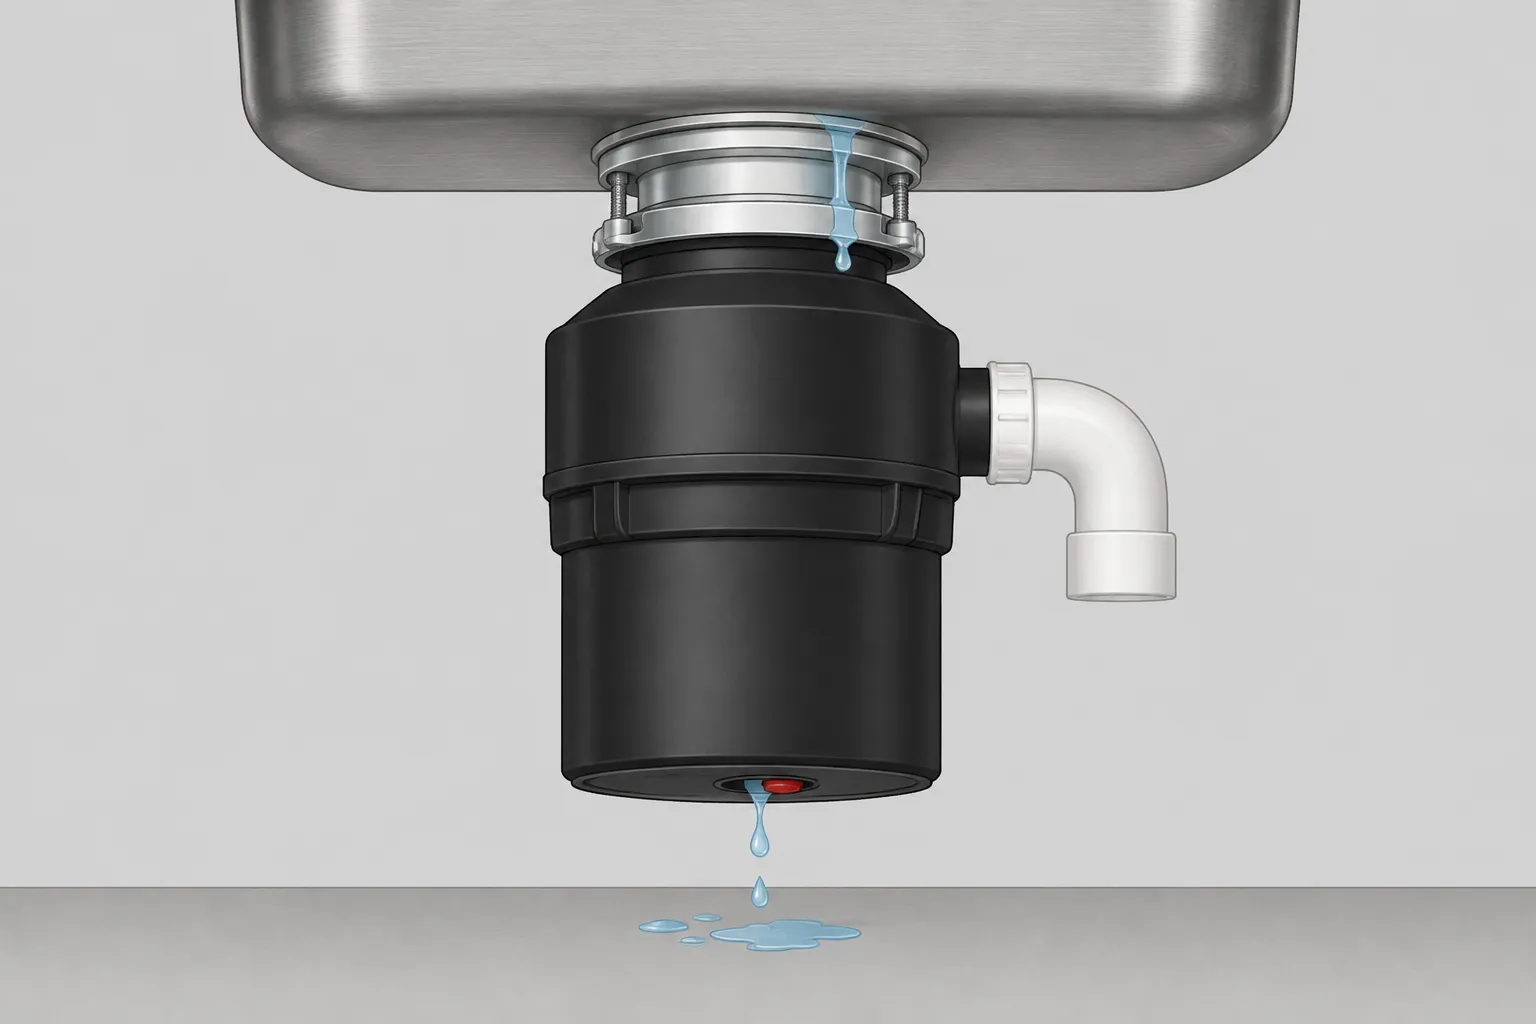
If the dishwasher won't drain after the swap, check the knockout plug first 3. Then make sure the hose still rises in a high loop before it reaches the disposal. If the unit hums but won't grind, switch it off and press the red reset button on the bottom.
A leak that keeps coming back is usually the sink flange, not the new unit. Reusing a corroded flange or leaving out one of the three mounting screws means the gasket never seals 1. Pull the flange, clean both surfaces, and reset it with fresh plumber's putty.
Where the leak shows up tells you what to do. A top or side leak is often fixable. Water dripping from the center bottom of the unit means the internal motor seal has failed and the unit needs replacing 10.
If the new disposal won't power on, check the outlet before you call an electrician. A switched or GFCI outlet that tripped is a common post-replacement failure 11. On a split duplex outlet, try the other half.
Gurgling drains are usually a vent problem, which is a separate issue from the disposal.
Pro Tips
Before you buy, look at how the old unit is powered. A lot of replacement failures trace back to a loose or miswired connection at the disposal itself rather than a faulty unit 11. If the old disposal was hardwired, don't assume the new one has to be too. Many newer models are set up for a cord and plug 2.
Keep a flashlight and a small mirror handy under the sink. You'll catch a misaligned mounting ring or pinched gasket before it turns into a drip. If you do get a drip after installation, check the sink flange seal and the dishwasher hose connection before you blame the disposal 1.
Run the disposal with cold water for a full minute after you're done. It flushes out manufacturing debris and lets you listen for vibration or odd noises before you put the cabinet back together.
Maintenance and Prevention
Run cold water for about 20 seconds after grinding. Keep grease, coffee grounds, and starchy peels out of it. Once a month, grind a few ice cubes to knock buildup off the grinding plate. Every few months, pull the rubber splash guard and scrub off the food film underneath.
Cost Analysis: DIY vs Professional
Replacing a garbage disposal yourself is mostly a parts-only job. A 1/2 HP unit runs $80–$250, and you'll spend about $25 on supplies like plumber's putty and a cord kit. That puts a DIY swap at roughly $105–$275 all-in.
Professional replacement typically runs $250–$625 including parts and labor 12. One homeowner reported a $700 quote for a 30-minute job. Another did the swap for about $80 in parts 12.
Before you decide, check where the problem is. If the unit is just clogged or jammed, a repair might be all you need. If it's leaking from the bottom, the seal has failed and replacement is usually the better call 12. Most homes do fine with a 1/2 to 3/4 HP unit 12. If noise matters in an open-plan kitchen, it's worth paying more for a model with better sound insulation.
This guide is built from manufacturer installation instructions, the plumbing code and experienced plumbers' reports, not from licensed plumbing work. Check your local code and electrical requirements before you start.
Related Plumbing Problems
If the disposal isn't the culprit, check for a clogged sink drain, a leaky sink strainer, a dishwasher that won't drain, or a leak that's started mold under the sink.
Frequently Asked Questions
Can I replace just the blades?
Usually not. Most home disposals are sealed units, and a new disposal often costs less than the labor to rebuild an old one.
Why does my sink leak after replacing the disposal?
Most of the time it's the sink flange. Make sure all three mounting screws are tight and even. If it still drips, pull the flange, clean off the old putty and debris, and reseat it with fresh putty 1.
What if my old disposal won't come off?
Put the end of a screwdriver against one of the mounting ring tabs and tap it counterclockwise with a hammer. A spray of penetrating oil on a corroded ring helps. If it still won't budge, the flange may need cutting out, and that's a good point to call a plumber.