Patio Drain Clogged? How to Clear It Yourself & Prevent Future Headaches
Frustrated by a flooded patio? Learn safe, step-by-step DIY methods to clear your patio drain, avoid common mistakes, and prevent future clogs. Save money & gain confidence!
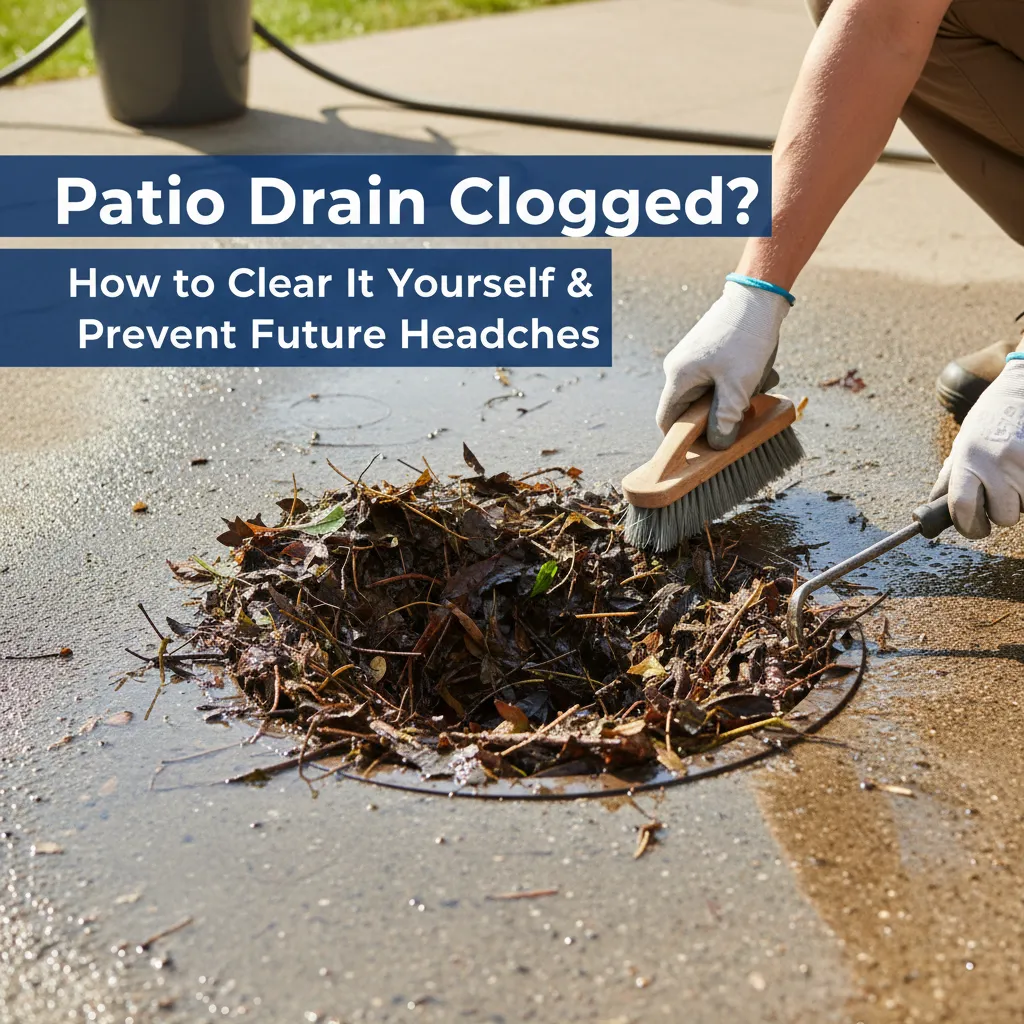
You step outside after a rainstorm only to find your patio transformed into a shallow wading pool. Water sits stubbornly around the drain grate, refusing to disappear. Maybe you hear a faint gurgle, or worse, a foul smell hints at trapped, decaying gunk. It's annoying, potentially damaging, and makes you feel powerless. The culprit? Leaves, dirt, moss, small stones, or even invading roots have formed a plug in your drain system, blocking the water's escape route.
That sinking feeling when rainwater pools around your patio instead of draining away? A clogged patio drain is more than a nuisance – it can damage your foundation and ruin your outdoor fun. Before you panic or call an expensive plumber, take a deep breath. Clearing a patio drain is often a straightforward DIY fix. This guide walks you through it safely and effectively, turning frustration into accomplishment.
Tools Needed
- Work Gloves (Heavy-duty rubber or nitrile - protects hands from debris and grime)
- Safety Glasses (Essential for eye protection from splashback and debris)
- Flashlight/Work Light (To see clearly into the drain grate and pipe)
- Flathead Screwdriver/Putty Knife (For prying up drain grates, scraping packed debris)
- Needle-Nose Pliers (Gripping small debris or roots near the surface)
- Garden Trowel or Small Hand Shovel (Scooping out loose debris from the basin)
- Plumber's Snake/Drain Auger (Manual 1/4" cable type - for breaking up deeper clogs)
- Garden Hose (With adjustable nozzle - for flushing before and after clearing)
Materials Needed
- Bucket (For collecting debris)
- Old Towels/Rags (For cleanup and containing mess)
- Plastic Trash Bag (For debris disposal)
- Baking Soda & White Vinegar (Optional, eco-friendly cleaning combo AFTER clearing)
- Drain Strainer/Cover (Recommended preventative item - fits your drain size)
Solution (Beginner - 30-60 minutes (depending on clog severity))
Step 1: Safety First & Prep Your Work Zone
Put on your gloves and safety glasses – non-negotiable! Clear any standing water around the drain with towels if possible. Gather your tools and place the bucket and trash bag nearby. Use the flashlight to inspect the drain grate and the immediate basin area for the obvious cause.
⚠️ Warning: Never start without eye protection! Debris and dirty water can splash unexpectedly.
Step 2: Remove the Grate & Clear the Surface
Use the screwdriver or putty knife to carefully pry up the drain grate. Set it aside. Reach in with gloved hands or use the trowel to scoop out all visible leaves, mud, pebbles, and gunk from the basin directly below the grate. Dump debris into the bucket. Use needle-nose pliers to pull out any stubborn, reachable roots or compacted material.
⚠️ Warning: Grates can be heavy or sharp. Lift carefully and watch your fingers.
Step 3: Flush with Water & Check Flow
Insert your garden hose nozzle gently into the drain pipe opening (below the basin). Set it to a strong, focused stream. Turn on the water full blast for 1-2 minutes. The goal is to blast loose any debris just beyond the opening. Watch where the water flows – does it quickly drain away, or does it back up immediately? If it drains well, the clog was likely shallow. If it backs up, the clog is deeper.
⚠️ Warning: Avoid forcing the hose too far down; you might compact the clog.
Step 4: Snake the Drain (If Needed)
If flushing didn't work, it's snake time! Feed the end of the manual drain snake cable slowly into the pipe opening. Crank the handle clockwise as you gently push. You'll feel resistance when you hit the clog. Keep cranking while applying steady, gentle pressure – don't force it violently. The coiled end should grab or break up the blockage. Once resistance eases, slowly retract the snake, cleaning off any gunk it brings back. Repeat if necessary.
⚠️ Warning: NEVER force the snake aggressively. This can damage pipes or kink the cable. If it won't go, stop and reassess.
Step 5: Final Flush & Cleanup
Perform another strong hose flush for several minutes to wash away any remaining debris dislodged by the snake. Listen for clear draining sounds. Reinstall the grate securely. Dump debris from the bucket into the trash bag. Rinse your tools. For a fresh feel, pour 1/2 cup baking soda down the drain, followed by 1 cup white vinegar. Let it fizz for 15 mins, then flush with hot water (if accessible).
⚠️ Warning: Ensure the grate is firmly seated to prevent tripping hazards.
Pro Tips
- Start with the hose before snaking. Sometimes water pressure alone does the trick!
- If the snake keeps hitting a wall, you might be at a pipe bend. Gently wiggle and rotate the snake to navigate it.
- Pour a bucket of water away from the drain onto the patio to test drainage speed after clearing.
- Take a quick phone pic of the drain setup before removing the grate - helpful for reassembly.
- Use enzyme-based drain cleaners monthly as preventative maintenance - they eat organic gunk safely.
When to Call a Professional
Call a pro if: The clog is deeper than your snake reaches (usually 15-25ft), you suspect collapsed or broken pipes, roots keep returning aggressively, multiple drains are backing up simultaneously (indicating a main line issue), or you simply don't feel comfortable proceeding safely. It's cheaper than fixing DIY mistakes!
Understanding the Problem in Detail
Patio drains are low points designed to catch rainwater. Debris washes towards them and gets trapped by the grate or accumulates in the pipe ('trap') just below. Over time, this layer builds up like a dam. Common causes include autumn leaves, wind-blown dirt/grass, moss growth, sediment from roof runoff, or small tree roots seeking moisture. Understanding this 'debris dam' concept makes solving it logical.
Tools and Materials Guide
Gloves: Nitrile resists punctures better than latex. Snake: A basic 1/4" x 25ft manual auger is perfect (under $20 at hardware stores). Avoid cheap 'zip strips' - they snap easily. Hose Nozzle: A pistol-grip nozzle with a 'jet' setting provides the best pressure. Alternatives: No snake? Try a straightened wire coat hanger with a small hook bent at the end, but it's less effective. No adjustable nozzle? Use your thumb to create a strong stream. Where to Buy: Big-box stores (Home Depot, Lowe's), hardware stores, Amazon.
Safety Considerations
Eye Protection is #1: Always! Dirty water and debris fly. Gloves: Protect from cuts, grime, and potential bacteria. Lifting: Bend knees, not your back, when lifting grates or buckets. Slips: Patios get slippery when wet. Wear sturdy shoes. Chemicals: Avoid harsh chemical drain openers! They rarely work on organic clogs this far out, can damage pipes, harm the environment, and create dangerous fumes. Stick to mechanical methods (snake/hose) or baking soda/vinegar for cleaning. Underground Hazards: Know where utility lines are before digging deeply around the drain.
Troubleshooting Common Issues
Snake Won't Go Down: You might be hitting a bend. Gently rotate and wiggle while feeding. If truly stuck, stop. Water Still Drains Slow After Snaking: Some debris might remain. Snake again or flush longer. Clog Immediately Returns: Check if the main pipe exiting the patio is also clogged or damaged. Roots might be the issue. Foul Odor Persists: Bacteria in decaying gunk. Flush thoroughly with hose, then use baking soda/vinegar. Consider a drain trap primer if dry. Grate Won't Budge: Apply penetrating oil (WD-40) around the edges, let it sit, then gently pry again. Tap lightly with a hammer.
Maintenance and Prevention
Cover Up: Install a fine mesh drain cover/strainer – the single best prevention! Clean it often. Sweep Regularly: Keep leaves, dirt, and mulch away from the drain area. Trim Plants: Keep vegetation, especially root-hungry plants, back from the drain line. Flush Monthly: Pour a bucket of water down the drain monthly to keep it flowing freely. Enzyme Cleaners: Use monthly to digest organic buildup before it becomes a clog.
Cost Analysis: DIY vs Professional
DIY Cost: Basic tools (gloves, glasses, snake) ~ $30-$50 (one-time). Baking soda/vinegar: pennies. Pro Cost: $150-$300+ depending on location and clog severity. DIY Savings: Significant! Buying tools pays for itself in 1-2 avoided service calls. Money Saving Tips: Borrow a snake from a neighbor/tool library. Use household items (baking soda/vinegar) for cleaning. Invest in a drain cover ($10-$20) to prevent future clogs and costs.
Related Plumbing Problems
Foundation Water Seepage: Chronic poor drainage can saturate soil near your foundation. Soggy Lawn/Garden Beds: Water overflowing from the patio. Mosquito Breeding: Standing water is a prime habitat. Ice Hazards: Pooled water freezing in winter. Foul Odors: From stagnant water and decaying matter. Downspout Issues: Often connected to or dumping near patio drains.
Frequently Asked Questions
Can I just use chemical drain cleaner?
Strongly discouraged. Most patio clogs are solid organic matter (leaves, dirt) that chemicals struggle to dissolve. They can damage older pipes, harm landscaping, create toxic fumes, and are bad for the environment. Mechanical clearing (snake/hose) is safer and more effective.
My drain cleared but now smells bad. What now?
This is common from decaying gunk left behind. Do a thorough final flush with the hose. Then, pour 1/2 cup baking soda down the drain, followed by 1 cup white vinegar. Let it fizz for 15-30 minutes, then flush with hot water (if available) or another strong hose blast. Repeat if needed. The drain trap might also be dry; flushing regularly helps.
How often should I clean my patio drain?
Inspect it seasonally (especially fall and spring) and clear visible debris from the grate and basin. Perform a preventative flush with the hose monthly. If you have lots of trees, check the grate weekly during peak leaf drop. Installing a cover drastically reduces the frequency of deep cleaning needed.
Water drains but very slowly. Did I fix it?
A partial fix. Slow drainage means some restriction remains. Try snaking again, focusing on feeling for resistance. Flush vigorously for a longer period (5+ minutes). If it's still slow, the clog might be deeper in the line or there could be pipe damage/root intrusion needing professional assessment.