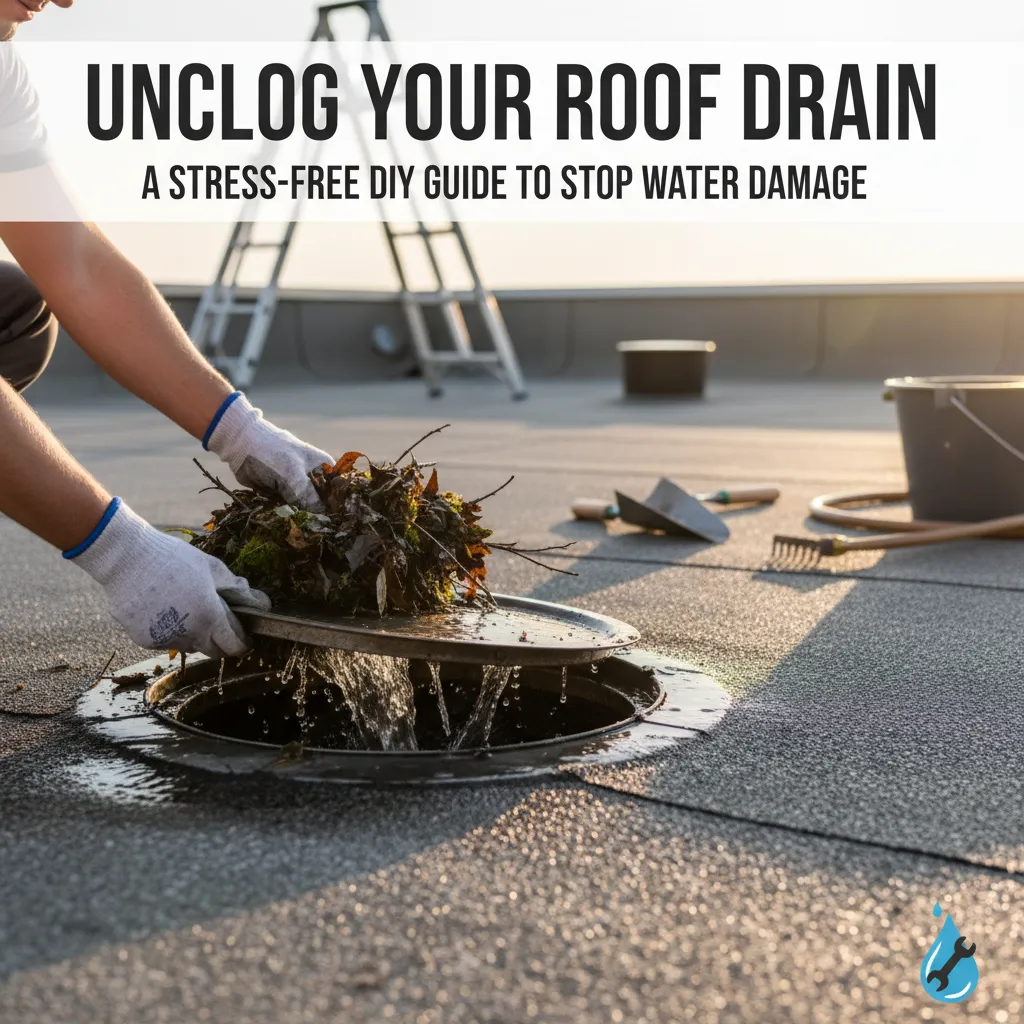
Unclog Your Roof Drain: A Stress-Free DIY Guide to Stop Water Damage
Frustrated by a clogged roof drain causing leaks or overflows? Learn safe, effective DIY steps to clear it fast & prevent costly water damage. Easy tools, clear steps, pro tips inside!
Your roof drain is like the emergency exit for rainwater. When leaves, pine needles, moss, dirt, or even old roofing gravel clog it up, water has nowhere to go. It backs up, pools dangerously on your roof (risking leaks into your home!), overflows gutters, or causes mysterious interior water stains. That sinking feeling when you see the water building? We get it. It’s urgent, messy, and stressful.
That ominous drip inside your house or the scary overflow on your flat roof? Yep, a clogged roof drain is likely the culprit, and it feels like a ticking time bomb. Don't panic! Clearing it yourself is totally doable. This guide cuts through the frustration, giving you the clear, step-by-step know-how to tackle it safely and effectively, saving you cash and giving you peace of mind.
Tools Needed
- Work Gloves (Heavy-duty, puncture-resistant)
- Safety Glasses (Essential for eye protection from debris)
- Sturdy Ladder (Type 1A or 1, properly rated for your roof height)
- Garden Trowel or Small Scoop (For scooping large debris)
- Plumber's Snake or Drain Auger (Manual 1/4" cable, 15-25 ft length - for tougher clogs deeper down)
- Stiff-Bristled Brush (Nylon or plastic, for scrubbing drain grate)
- Garden Hose with Spray Nozzle (Adjustable jet setting ideal)
- Bucket (For collecting debris)
- Flashlight or Headlamp (If drain is dark or working in low light)
- Rubber Mallet (Optional, for gently tapping stuck grates)
Materials Needed
- Roofing Sealant (Tube of high-quality, roof-compatible polyurethane or silicone sealant - for resealing if needed)
- Replacement Drain Gasket (If old one is cracked/brittle - specific to your drain model)
- Drop Cloth (Optional, to protect roof surface from debris)
Solution (Beginner to Intermediate - 30 minutes to 2 hours (depending on severity & access))
Step 1: Safety First: Gear Up & Assess
Put on your gloves and safety glasses. Carefully position your ladder on stable, level ground, ensuring it extends at least 3 feet above the roof edge. Have someone spot you if possible. Once safely on the roof, locate the drain(s). Clear any obvious debris around the drain opening. Visually inspect the grate – is it covered, sunken, damaged? Note any standing water depth.
⚠️ Warning: NEVER work on a wet, icy, or steeply sloped roof. Avoid walking near roof edges. Ladder safety is non-negotiable – use the 4-to-1 rule (base 1 ft out for every 4 ft up).
Step 2: Clear the Surface: Grate & Top Debris
Carefully remove the drain grate. It might lift off, unscrew, or have clips – avoid forcing it. Tap gently with a rubber mallet if stuck. Place it aside. Use your gloved hands, trowel, or scoop to remove all visible debris (leaves, twigs, sediment) from the drain opening and the bowl area directly below it. Dump debris into your bucket.
⚠️ Warning: Be mindful of sharp edges on the grate or drain pipe. Watch for wasp nests or spiders under the grate!
Step 3: Tackle the Pipe: Snake & Flush
Feed the tip of your plumber's snake carefully down the drain pipe. Slowly crank the handle clockwise as you push it down. You'll feel resistance when you hit the clog. Keep cranking gently to break it up or hook it. Slowly retract the snake, cleaning off any gunk. Now, grab your hose. Insert it a few inches into the pipe (if safe/possible) and blast water on a strong jet setting for 30-60 seconds. Listen for water flowing freely down the downspout below.
⚠️ Warning: Don't force the snake aggressively – you could damage the pipe lining or joints. Be cautious when inserting the hose; water pressure can splash debris back up.
Step 4: Clean Up & Reassemble
Use your stiff brush and hose spray to thoroughly clean the drain grate. Scrub off any stubborn grime or mineral deposits. Inspect the rubber gasket under the grate – if it's cracked, brittle, or missing, replace it now. Apply a thin, smooth bead of roofing sealant only around the outer edge of the drain flange if the old sealant is failing (don't seal the grate itself!). Carefully reposition the clean grate and secure it properly.
⚠️ Warning: Don't over-apply sealant. Sealing the grate down prevents future cleaning and can trap water.
Step 5: Test Your Success
Run water from your hose directly into the drain opening for a full minute. Watch how quickly it disappears. Go downstairs and check the corresponding downspout – is water flowing out strongly and consistently? No new pooling on the roof? Congratulations, you did it!
Pro Tips
- Pre-Wet Debris: Spraying dry leaves/moss with water before scooping reduces dust and makes them heavier/easier to remove.
- Snake Lubrication: A little dish soap on the snake cable can help it slide easier and grab debris.
- Downspout Check: Always clear downspouts after clearing the roof drain – the clog might have just moved down!
- Photograph First: Snap a pic of the drain assembly before disassembly for easy reference.
- Twice-Yearly Rule: Make clearing roof drains part of your spring and fall home maintenance routine.
When to Call a Professional
Call a roofer or licensed plumber if: the clog persists after snaking/flushing, you see cracks/damage in the drain pipe or roof membrane, the drain bowl seems sunken or separated, the roof structure feels unsafe to walk on, or you suspect a collapsed pipe. Don't risk roof damage or falls – pros have specialized cameras and tools for complex issues.
Understanding the Problem in Detail
Roof drains (common on flat/low-slope roofs, garages, porches) are vulnerable because they're the lowest point where gravity pulls water AND debris. Over time, organic matter breaks down into sludge, combining with sand, grit, or even roofing granules to form stubborn blockages. Water backup is the immediate problem, but long-term, it stresses roofing materials, causes leaks into your attic or ceilings, and can lead to costly structural rot or mold.
Tools and Materials Guide
Gloves: Mechanics' gloves offer great dexterity and protection. Snake: A basic 1/4" x 25ft manual auger from any hardware store ($15-$30) is sufficient for most homeowner clogs. Avoid cheap plastic 'drain sticks'. Sealant: Use ONLY roofing-specific sealants (like NP1, Quad, or Sikaflex) – regular caulk won't last. Gaskets: Take a photo of your drain model or bring the old gasket to a roofing supply store for a match. Alternatives: If you lack a snake, try a straightened wire coat hanger (carefully!) for shallow clogs after removing the grate. A wet/dry vac can sometimes suck out shallow debris if you create a tight seal around the opening.
Safety Considerations
Ladder Safety is #1: Inspect ladder for damage. Set on firm ground, not soft soil. Use leg levelers if needed. Secure the top if possible. Maintain 3 points of contact. Roof Safety: Wear shoes with non-marking, slip-resistant soles. Walk only on supported areas (joists/rafters if visible on flat roofs). Avoid walking near edges or on fragile surfaces like skylights. Debris Hazards: Assume debris is sharp or dirty. Protect your eyes and skin. Water Pressure: Be mindful of hose kickback. Weather: Only work in dry, calm conditions. Electricity: Be aware of overhead power lines near the ladder path.
Troubleshooting Common Issues
Water Still Drains Slowly: Clog might be deeper or in the downspout. Snake again or clear the downspout. Grate Won't Budge: Tap gently around the edges with a rubber mallet. Apply penetrating oil (like WD-40) around the threads/clips and wait 15 mins. Avoid excessive force. Leak After Cleaning: Likely a damaged gasket or failed sealant around the drain flange. Replace gasket/reseal properly. Snake Hits Solid Blockage: Don't force it. Could be a collapsed pipe or severe root intrusion – call a pro. Debris Keeps Coming Back: Increase cleaning frequency. Consider installing a larger or mesh-covered dome grate.
Maintenance and Prevention
Schedule It: Clear drains minimally twice a year (spring after pollen/seeds, fall after leaf drop). Grate Guards: Install dome-shaped screens or strainers specifically designed for your drain type to catch large debris while allowing water flow. Trim Overhanging Branches: Reduce leaf and twig fall directly onto the roof. Roof Sweeping: Periodically sweep around the drain area to prevent buildup before it washes in.
Cost Analysis: DIY vs Professional
DIY Cost: Primarily tools you might not own: Snake ($15-$30), Roof Sealant ($8-$15), Gasket ($5-$15). Total: ~$30-$60 one-time, then minimal for sealant/gasket replacements. Professional Cost: Typical service call: $150-$400+, depending on severity, access, and location. Savings: DIY saves $100-$350+ per cleaning. Preventing a single interior water damage repair (easily $500-$5000+) makes maintenance priceless.
Related Plumbing Problems
Clogged Gutters/Downspouts: Often the result of a blocked roof drain overflowing. Interior Ceiling Stains: Direct symptom of water backing up and finding a way in. Roof Membrane Damage: Pooling water degrades asphalt, rubber, or PVC roofing over time. Ice Dams: Clogged drains prevent proper winter drainage, contributing to ice dam formation on edges. Mosquito Breeding: Standing water in a clogged drain bowl is a prime breeding ground.
Frequently Asked Questions
Can I just use chemical drain cleaners on my roof drain?
Strongly NOT recommended. Most chemical cleaners are ineffective on organic sludge common in roof drains. More importantly, they can severely damage roofing membranes (especially PVC or rubber), corrode metal drain components, and create hazardous fumes in a confined space. Stick to mechanical cleaning (snake, scoop, flush).
How do I know if my roof drain is actually clogged and not just slow?
Signs of a significant clog: 1) Visible standing water pooling around the drain long after rain stops (more than an hour on a warm day). 2) Water overflowing over the drain grate during rain. 3) Gurgling sounds coming from the drain pipe. 4) Corresponding downspout has little or no water flow during rain, while gutters are full. 5) New water stains appearing on ceilings or walls inside directly below the roof drain area.
What if I can't safely get onto my roof?
Your safety is paramount. If roof access feels unsafe (too steep, too high, unstable surface), DO NOT attempt it. Options: 1) Hire a professional roofer or drain cleaner. They have the equipment and training. 2) If accessible from below: Some drains have cleanout plugs in the vertical downpipe inside the building (often in a ceiling). Opening this (with a bucket ready!) might allow you to snake upwards or flush downwards. This is less common and requires identifying the correct pipe.
Will cleaning the drain fix the leak in my ceiling?
Clearing the drain stops new water from pooling and causing further damage. However, it won't repair the existing leak path or water-stained drywall/plaster. Once the drain is clear and the roof is dry, you must address the interior damage: identify and seal the leak entry point on the roof (might be near the drain flange), and repair the damaged ceiling material to prevent mold.