Stop the Drip! Your Stress-Free Guide to Fixing a Leaky Shower
Frustrated by a dripping shower? Learn how to diagnose and fix common leaks with beginner-friendly steps. Save water, money, and your sanity with this practical DIY guide.
You turn off the shower... but the dripping continues. Maybe it's from the showerhead, the handle, or even behind the wall. That wasted water isn't just frustrating – it stains tiles, hikes bills, and hints at bigger issues. The good news? Most leaks stem from simple, fixable wear-and-tear.
That persistent drip-drip-drip isn't just annoying – it's wasting gallons of water and driving up your bills. As a fellow DIYer who's battled leaky showers, I know how overwhelming plumbing can feel. Take a deep breath! This guide breaks down shower leaks into simple, confidence-building fixes you can tackle today.
Tools Needed
- Adjustable wrench (for fittings and nuts)
- Screwdrivers (Phillips and flathead - non-marring types protect finishes)
- Channel-lock pliers (grips rounded parts without slipping)
- Allen wrench set (common in modern shower handles)
- Old toothbrush (cleans mineral deposits)
- Flashlight (illuminates dark spaces)
Materials Needed
- Plumber's tape (Teflon tape, 1/2" width - high-density for better seal)
- Replacement washers (Size-specific - usually #10 or #12 for stems)
- O-ring kit (Assorted sizes - nitrile rubber resists heat/chemicals)
- Cartridge puller (For stuck cartridges - optional but helpful)
- White vinegar (Descales showerheads)
- Replacement cartridge (Model-specific - note your faucet brand)
Solution (Beginner to Intermediate - 30 min - 2 hours (varies by leak type))
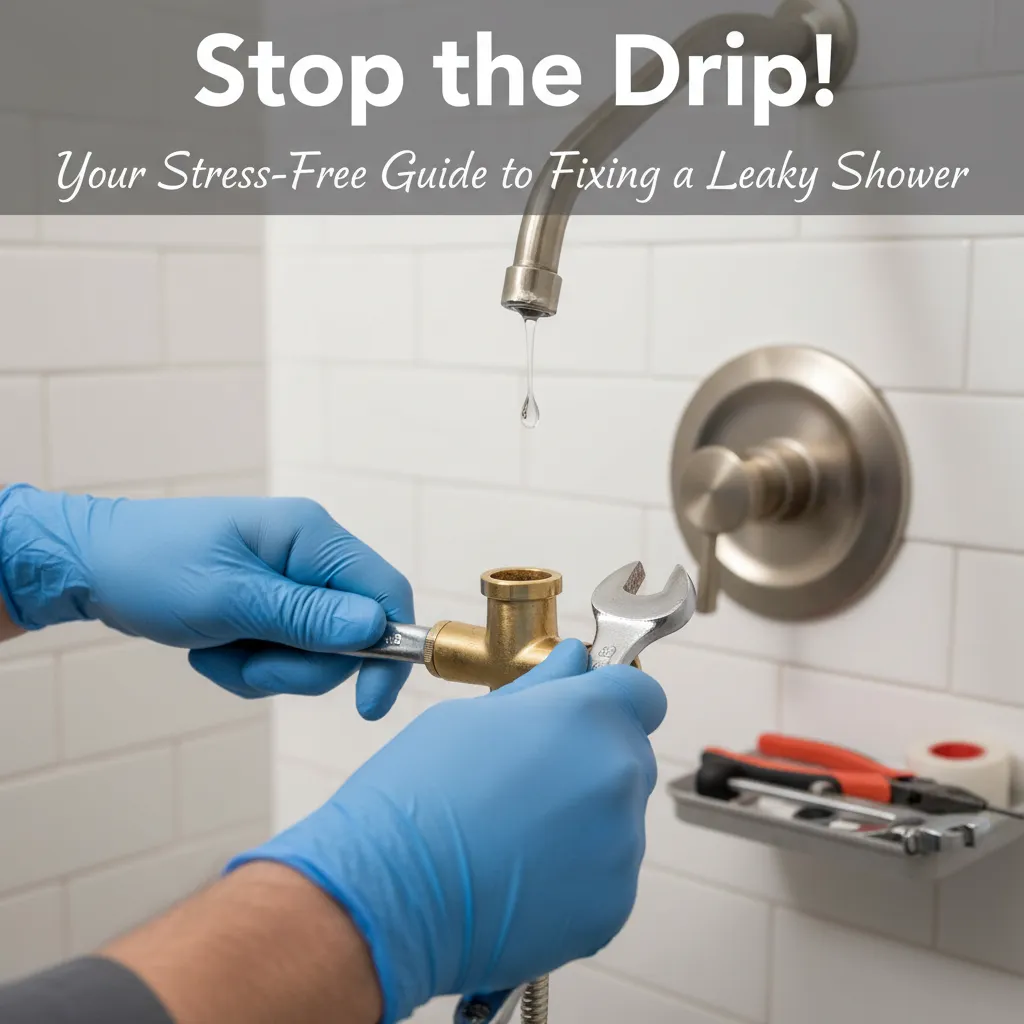
Step 1: Track the Leak & Shut Off Water
Identify where the drip originates: showerhead, handle, or spout. Turn off your home's main water supply (usually near the water meter). Open a lower faucet to relieve pressure. Insider tip: Take photos during disassembly – they're golden for reassembly!
⚠️ Warning: Never force valves – damaged pipes mean costly repairs. If valves won't budge, call a pro.
Step 2: Fix a Leaky Showerhead
Unscrew the showerhead by hand or gently with channel locks. Soak it overnight in vinegar to dissolve mineral clogs. Wrap 3-4 clockwise layers of Teflon tape on the shower arm threads. Reattach snugly by hand, plus a quarter-turn with pliers. Pro trick: Apply pipe joint compound over tape for stubborn leaks.
⚠️ Warning: Over-tightening cracks showerheads! Hand-tight plus slight wrench turn is enough.
Step 3: Repair Handle/Spout Drips (Washer or Cartridge)
Remove the handle screw (often hidden under a decorative cap). Pull off the handle and trim collar. For cartridge models: Note orientation, then pull straight out (use a puller if stuck). For stem models: Unscrew the stem bonnet nut to access the washer. Replace worn washers/o-rings with exact matches. Lubricate new parts with plumber's grease.
⚠️ Warning: Handle sets may have scald-guards. Note adjustment settings before removal!
Step 4: Reassemble & Test Strategically
Reinstall parts in reverse order, ensuring cartridges/stems seat fully. Turn water on SLOWLY at the main valve. Check joints for seeping water with a dry paper towel (reveals tiny leaks). Let water run 2 minutes to flush debris. Celebrate your drip-free shower!
⚠️ Warning: Sudden water pressure can damage new seals. Open valves gradually.
Pro Tips
- Use a magnet to catch screws dropped in overflow drains
- Tape wrench jaws with electrical tape to prevent scratches
- Replace all washers/o-rings in an assembly – they wear together
- Match cartridge model numbers exactly – take old one to the store
- Test with cold water first – fewer variables than hot water lines
When to Call a Professional
Call a licensed plumber if: leaks persist after repairs, you see water damage on walls/ceilings, pipes are corroded, or you lack shutoff valves. Don't risk structural damage for pride – pros have specialized tools for hidden leaks.
Understanding the Problem in Detail
Leaks happen when seals fail. Rubber washers harden over time, mineral buildup prevents tight closure, and O-rings shrink/crack. Cartridges wear out from sediment abrasion. Think of these parts as shower 'gaskets' – they need occasional replacement, just like car parts.
Tools and Materials Guide
Adjustable wrench: 8-10" size offers control. Teflon tape: Pink (thicker) for water lines. Washers: Neoprene lasts longer than rubber. Cartridge puller: Rent from hardware stores. Buy materials at big-box stores (HD/Lowe's) or plumbing suppliers. Pro alternative: Use Rectorseal #5 paste instead of tape for compression fittings.
Safety Considerations
- Confirm water is OFF before starting 2) Wear safety glasses when working under fixtures 3) Place a towel in the tub drain to catch small parts 4) Never stand in water while working 5) Use GFCI outlets for any electrical tools near water.
Troubleshooting Common Issues
Problem: Still dripping after washer replacement? Check for scored valve seats (use seat dresser tool). Leak behind handle? Tighten retaining nut behind trim. Showerhead leaks at swivel? Replace the ball O-ring inside. Low pressure after fix? Remove flow restrictor (check local codes first).
Maintenance and Prevention
Every 6 months: Remove showerheads for vinegar soak. Annually: Exercise shutoff valves (turn on/off) to prevent seizing. Post-repair: Listen for drips weekly – early detection saves money. Consider a whole-house filter to reduce mineral damage.
Cost Analysis: DIY vs Professional
DIY: $2-$25 (washers, tape, vinegar). Cartridge: $15-$75. Pro repair: $150-$500+. Savings tip: Rebuild kits ($10) are cheaper than whole cartridges. Always try cleaning before replacing parts!
Related Plumbing Problems
Low water pressure (often clogged showerhead), loose shower arm (requires wall access), tub spout drips (similar washer repair), mysterious wall moisture (may indicate pipe leaks behind tile)
Frequently Asked Questions
Can I just tighten the showerhead to stop leaks?
Sometimes! But overtightening cracks fittings. Always try cleaning and re-taping first – 90% of showerhead leaks fix this way.
How do I know if I need a cartridge or washer?
Older showers (pre-1990s) usually have washers. Modern ones use cartridges. Remove the handle – if you see a brass stem, it's washers; plastic/metal cylinder means cartridge.
Is a slow drip really that expensive?
Absolutely! One drip per second wastes 3,000+ gallons yearly – that's 180+ showers! At average rates, that's $40-$100 down the drain literally.