Stop the Sliding Shower Curtain Rod! Your Stress-Free DIY Fix Guide
Frustrated by a slipping, sagging, or fallen shower curtain rod? Learn easy DIY fixes for tension rods & mounted brackets. Save money & gain confidence with our step-by-step guide!
You step into the shower only to find your curtain rod drooping sadly, leaning precariously, or worse – lying on the floor after a dramatic fall. Water splashes everywhere, your shower liner is bunched up, and frustration levels are rising. Whether it's a tension rod that gradually lost its grip or a mounted bracket that finally tore out of the wall, the result is the same: a messy, inconvenient, and potentially damaging problem that needs fixing NOW.
That sudden crash in the shower? The constant battle to keep the curtain inside the tub? We've all been there. A malfunctioning shower curtain rod isn't just annoying – it can flood your bathroom and ruin your day. Take a deep breath! Whether it's a tension rod that won't stay put or a mounted bracket pulling loose, this guide will walk you through fixing it safely and confidently, often without needing a plumber.
Tools Needed
- Screwdriver (Phillips & Flathead): For tightening screws or removing brackets.
- Adjustable Wrench: For tightening nuts on some tension rods or mounted brackets.
- Stud Finder: CRITICAL for finding secure mounting points for brackets.
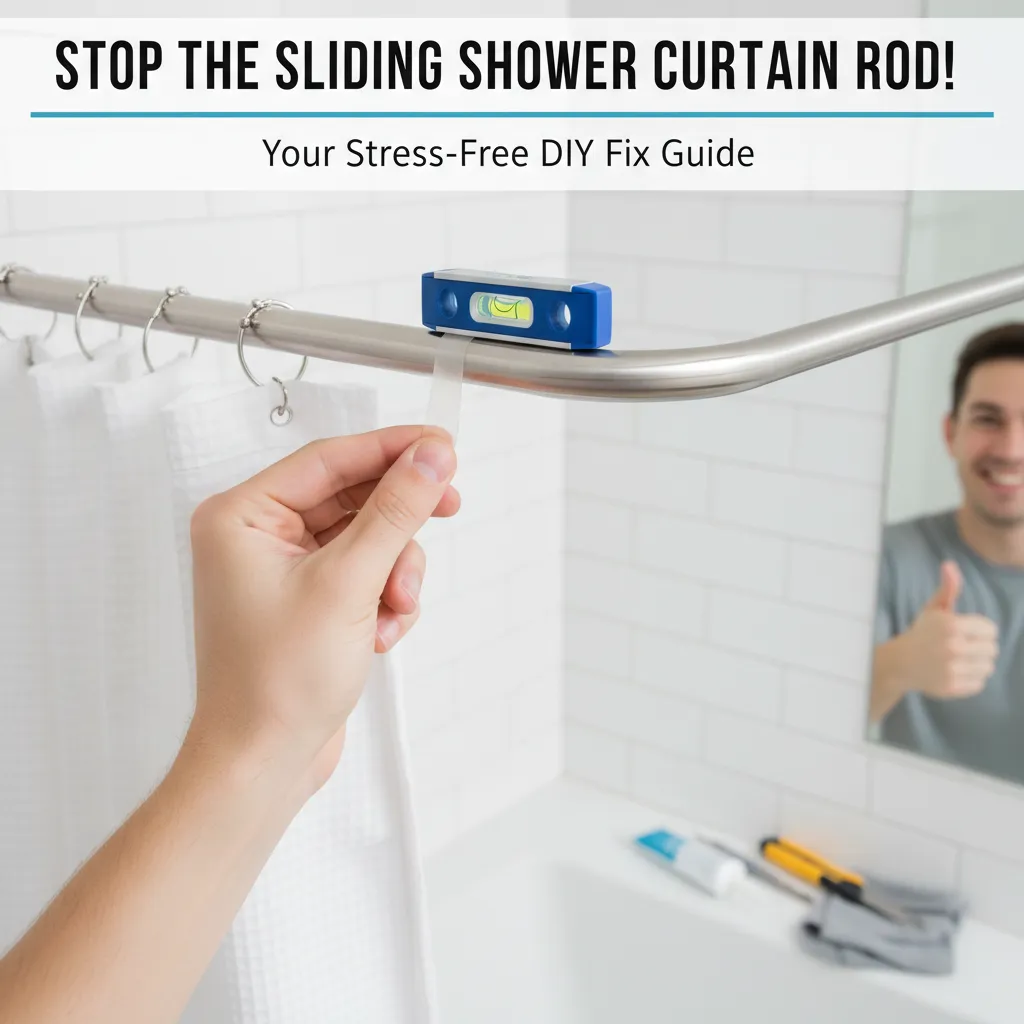
- Level: Ensures your rod is straight for proper curtain function.
- Pencil: For marking drill points accurately.
- Tape Measure: For precise placement and alignment.
- Drill (with appropriate bits): Needed if installing new anchors or brackets into tile/drywall.
- Safety Glasses: Protect your eyes from dust and debris.
Materials Needed
- Appropriate Wall Anchors (e.g., Toggle Bolts, Heavy-Duty Plastic Anchors): MUST match your wall type (drywall, tile, plaster) and weight load. Avoid cheap, flimsy anchors.
- Replacement Screws (if originals are stripped/bent): Slightly longer/larger gauge can provide better grip.
- Rubber Grip Pads or Felt Furniture Pads: For tension rod ends to increase friction and protect surfaces.
- Painter's Tape: Helps hold brackets in place while marking/drilling and protects surfaces.
- Mild Cleaner & Rag: To clean mounting surfaces for better adhesion/grip.
- (Optional) Replacement Brackets/Rod Sections: If existing hardware is broken or severely bent.
Solution (Beginner - 15 minutes to 1 hour (depending on the problem))
Step 1: Diagnose the Problem & Gather Intel
Is it a tension rod slipping? A bracket loose? A screw hole stripped? The rod itself bent? Carefully inspect everything. Check if the rod ends are clean and dry. See if bracket screws are tight or spinning uselessly. Feel if the rod is bent. Identify your wall type (drywall, tile, plaster) around the mounting points. This tells you what anchors you'll need.
⚠️ Warning: If screws are stripped or anchors pulled out, DO NOT just try to tighten them harder. This will make the hole bigger and the problem worse.
Step 2: Fix a Slipping Tension Rod (Quick Fix!)
Clean the rod ends and the wall/tub surfaces with mild cleaner. Dry thoroughly. Apply rubber grip pads or thick felt furniture pads to the rod ends. Extend the rod SLIGHTLY longer than the measured distance (1/4" to 1/2" over). Twist to extend, don't just pull. The twisting action engages the internal spring mechanism much more effectively. Ensure it's level.
⚠️ Warning: Avoid overtightening by twisting excessively. This can warp the rod or damage the internal mechanism.
Step 3: Tighten Loose Brackets (If Possible)
If the bracket screws are just loose, try tightening them firmly with the correct screwdriver. If they spin but don't tighten (stripped hole), skip to Step 4. Check the bracket itself isn't cracked or bent.
⚠️ Warning: If tightening a screw makes it spin freely without resistance, STOP. The anchor or drywall behind is likely stripped. Continuing will worsen the damage.
Step 4: Reinforce Stripped Screw Holes (The Secure Fix)
Remove the loose screw and bracket. Assess the hole size. Choose a high-quality wall anchor SIGNIFICANTLY larger than the existing hole (e.g., toggle bolt, snap toggle, heavy-duty plastic anchor rated for your wall type and weight). Drill a new hole to the exact size specified for your new anchor if needed (often necessary for tile). Insert the new anchor according to its instructions. Reattach the bracket using the screw provided with the new anchor or a suitable replacement.
⚠️ Warning: ALWAYS use a stud finder! If you can reposition the bracket even slightly to hit a wooden wall stud (the strongest point), DO IT. Drill into tile slowly with a masonry bit and light pressure to prevent cracking.
Step 5: Reinstall the Rod & Test Thoroughly
Place the rod back into the brackets or position the tension rod. For mounted brackets, ensure the rod sits securely. Hang the curtain and liner. Gently tug downward and outward on the rod to simulate the weight and movement of a curtain being pulled. Check for any movement, slipping, or instability. Make minor adjustments if needed.
⚠️ Warning: Test with the curtain AND liner wet! Wet fabric is significantly heavier and is the true test of your fix.
Pro Tips
- Friction is Your Friend: For tension rods, roughing up the very end of the rod sleeve (not the part touching the wall) lightly with sandpaper can increase grip.
- Tape is Temporary: Clear packing tape wrapped around tension rod ends can add grip in a pinch, but it's messy and not a long-term solution. Use grip pads!
- Double Up on Anchors: If using plastic anchors in drywall, using two anchors per bracket (even if only one hole is stripped) distributes weight better.
- Level Matters: A slightly unlevel rod puts uneven pressure on the ends, making slippage more likely. Take the extra 30 seconds to level it.
- The Twist Trick: Always TWIST tension rods to extend them against the wall/tub. Pulling straight out often doesn't engage the locking mechanism fully.
When to Call a Professional
Call a handyman or contractor if: 1) You have extensive tile damage around the mounting area. 2) The wall itself is crumbling or severely water-damaged. 3) You need to relocate the rod significantly and are uncomfortable drilling into plumbing/walls. 4) The rod is severely bent or broken and requires complex replacement beyond simple hardware. 5) You simply don't have the tools or confidence for drilling and anchoring.
Understanding the Problem in Detail
Shower rods fail for predictable reasons. Tension rods rely on spring pressure and friction; grime, smooth surfaces, or worn internal springs reduce grip. Mounted brackets fail when screws pull out of drywall/tile (weak materials) or anchors fail under the constant tugging weight of wet curtains. Bent rods happen from excessive force or cheap materials. Understanding 'why' helps prevent repeat issues!
Tools and Materials Guide
Must-Haves: Stud finder (find wood studs for ultimate strength), Quality anchors (Toggle bolts/Snap toggles for heavy loads in drywall; plastic anchors rated for 50+ lbs are minimum; special anchors for tile). Alternatives: No stud finder? Tap the wall – a solid 'thud' vs. hollow sound indicates a stud. No drill for anchors? If the existing hole is only slightly stripped, a larger screw might work temporarily in drywall, but anchors are far superior. Where: Anchors/screws: Hardware stores (Home Depot, Lowe's) or well-stocked big-box stores. Grip pads: Hardware, dollar stores, or online.
Safety Considerations
- Turn off power: If drilling near light fixtures or switches, turn off the bathroom circuit at the breaker. 2) Protect your eyes: Drilling creates dust and debris. 3) Beware of pipes/wires: Use a stud finder with wire/piping detection if possible. Avoid drilling above faucets or below lights without checking. Drilling into tile? Go slow to prevent cracking. 4) Weight Limit: Don't overload the rod with heavy multiple curtains. Know its limit. 5) Ladder Safety: Use a stable step stool, not a wobbly chair.
Troubleshooting Common Issues
Screw spins but won't tighten? Hole is stripped – use a larger anchor. Anchor spins in hole? Hole is too big – use a much larger anchor type (toggle bolt). Rod still slips after pads? Clean surfaces better, twist harder to extend, ensure rod isn't maxed out/bent. Bracket won't sit flush? Wall might be uneven; use small plastic shims behind the bracket. Tile cracking while drilling? Use a proper masonry bit, low drill speed, light pressure, and masking tape over the spot to start.
Maintenance and Prevention
- Monthly Check: Briefly tighten bracket screws and check tension rod grip. 2) Clean Ends: Wipe tension rod ends and wall/tub contact points periodically to remove soap scum. 3) Avoid Hanging: Don't hang heavy robes or towels on the curtain rod. 4) Gentle Use: Pull the curtain smoothly, not with sharp yanks. 5) Quality Matters: Invest in a sturdy rod and good liners that resist mold (less weight when clean).
Cost Analysis: DIY vs Professional
DIY Fix: $5 - $30. Anchors ($3-$10 pack), Grip Pads ($2-$5), Replacement Screws ($1-$5). Professional Fix: $75 - $150+ (service call + labor). Savings: DIY saves significant money on simple fixes. Spending $10 on good anchors vs. $1 on flimsy ones prevents future repairs. Replacing a cheap tension rod ($15-$30) is often smarter than constant fixes.
Related Plumbing Problems
- Shower Curtain Liner Replacement: A moldy liner adds weight and mess. 2) Shower Curtain Rings/Hooks: Sticking or broken rings make the curtain hard to move. 3) Fixing a Leaking Shower Faucet: Water pressure issues can cause splashing that tests the rod. 4) Preventing Bathroom Mold/Mildew: A poorly functioning rod leads to water escape and moisture problems. 5) Installing a New Shower Curtain Rod: If the old one is beyond repair.
Frequently Asked Questions
Can I just use longer screws if the hole is stripped?
Sometimes, but ONLY if you hit solid material behind the hole (like a stud). Longer screws into the same damaged drywall or plaster hole will likely just pull out again. Proper anchors spread the load in the weak material and are the reliable solution.
My tension rod falls constantly! Are some brands better?
Absolutely! Look for rods with thick, sturdy internal springs and wide, non-slip rubber ends. Avoid the absolute cheapest options. Brands known for bathroom accessories often make more reliable tension rods. The 'twist to extend' mechanism is generally better than simple push-pull.
I'm renting. What's the most landlord-friendly fix?
Focus on non-damaging solutions first: Clean surfaces thoroughly and use high-quality rubber grip pads on tension rods. If you MUST drill for a mounted rod, use high-quality plastic anchors that leave a relatively small hole (easy to patch later) and get permission if required. Avoid toggle bolts in rentals unless explicitly allowed, as they leave larger holes.
The bracket screw is stuck/rusted! How do I remove it?
Spray a small amount of penetrating oil (like WD-40 Specialist Penetrant) on the screw head and threads if accessible. Let it sit for 15 mins. Use the CORRECTLY sized screwdriver bit, press down firmly, and turn slowly. If the head is stripped, try using a rubber band between the screwdriver and head for extra grip, or carefully use locking pliers on the screw head if possible.
Will fixing the rod stop my shower curtain from blowing in?
A secure rod helps, but curtain blow-in is primarily solved by using a weighted shower liner or magnetic liner that sticks to the tub, or installing a curved shower rod that creates more elbow room.