Silence That Bang! How to Fix Water Hammer Like a Pro (Even If You're New to Plumbing)
Annoyed by loud pipe banging? Learn simple DIY water hammer fixes! Our step-by-step guide explains causes, quick solutions, & permanent repairs for quiet plumbing. Save money & frustration.
Water hammer feels like your pipes are throwing a tantrum! It's that loud, alarming banging or shuddering noise that happens right after you quickly shut off a valve – like on your washing machine, dishwasher, or even a sink faucet. It happens because the fast-moving water has nowhere to go when the valve slams shut, creating a damaging shockwave. It's annoying, can wake you up, and over time, it can actually damage valves, fittings, and connections. You're right to want it fixed!
That sudden, jarring BANG! or shuddering RATTLE in your pipes when you turn off a faucet or the washing machine stops? That's water hammer, and it's incredibly frustrating – not to mention potentially damaging. Take a deep breath. You're not alone, and fixing it is often much simpler than you think. This guide will walk you through exactly why it happens, quick checks you can do right now, and the permanent solutions, even if you've never picked up a wrench before.
Tools Needed
- Adjustable Wrench (or Basin Wrench for tight spots): For loosening/tightening fittings.
- Pipe Strap/Clamp & Screws: To secure loose pipes.
- Screwdriver (Phillips/Flathead): For pipe straps, opening panels, etc.
- Bucket & Towels: For catching water spills (safety first!).
- Flashlight: To see into cabinets and behind appliances.
- Level (Optional but helpful): To ensure pipes are straight when securing.
Materials Needed
- Water Hammer Arrestor(s) (1/2" or 3/4" NPT, Brass recommended): Sized for your pipe diameter (check existing fittings). Get one for each problematic fixture/appliance.
- Pipe Dope or Teflon Tape (Thread Sealant): For sealing threads on new arrestors. Use tape for compression fittings, dope for NPT threads.
- Extra Pipe Straps/Clamps (if needed): Foam-lined or rubber-coated for quieter hold.
- Replacement Washers (Optional): If faucet washers are worn and causing sudden stops.
Solution (Beginner to Intermediate - Quick Fixes: 15-30 mins | Permanent Solutions: 1-2 hours)
Step 1: Turn Off Water & Drain the Pipes (Essential Safety!)
Locate your main water shutoff valve (usually where the water enters your house or near the water meter). Turn it OFF. Now, go to the highest faucet in your house (like an upstairs bathroom sink) and turn on both the HOT and COLD taps. Then, go to the LOWEST faucet (like a basement sink or outside hose bib) and turn it on. Let all the water drain out completely. This relieves pressure and prevents messy accidents. Flush toilets too!
⚠️ Warning: NEVER work on pressurized pipes. Draining prevents flooding and injury. Keep towels and a bucket handy just in case.
Step 2: Listen & Locate: Find the Loose Culprits
With the water off, gently tap or push on pipes near where you hear the banging (under sinks, behind appliances, in basements). Listen for rattling or feel movement. Pay special attention to long horizontal runs and areas near washing machines/dishwashers. Look for pipes that aren't properly secured to studs or joists.
⚠️ Warning: Be gentle! Don't force pipes or put excessive strain on connections.
Step 3: Secure Loose Pipes (The Quick & Free Fix!)
This is often the solution! For every loose spot you found, install a pipe strap or clamp. Position it snugly (don't crush the pipe) against a solid wood stud or joist. Use screws long enough to bite securely into the wood. Add straps every 6-8 feet on horizontal runs and near valves/appliances. Foam-lined straps reduce noise transmission. Tighten just enough to stop movement.
⚠️ Warning: Avoid overtightening straps – you can deform copper pipes or crack plastic ones. Support the pipe while screwing to prevent stress on fittings.
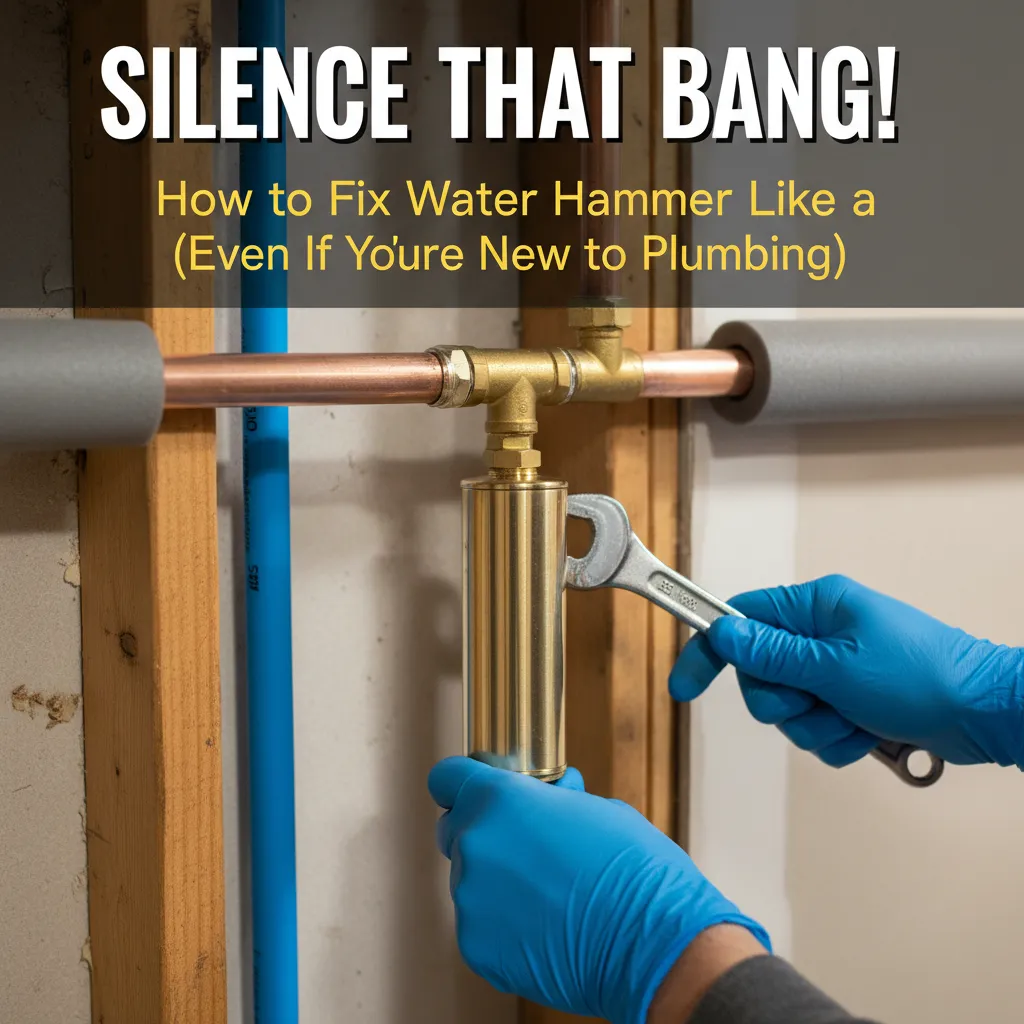
Step 4: Install Water Hammer Arrestors (The Permanent Solution)
If securing pipes didn't fully solve it (common for appliance shutoffs), install arrestors. Identify the shutoff valves for the noisy appliance (washing machine hoses are prime spots). Unscrew the supply hose from the shutoff valve using your wrench. Apply pipe dope or wrap Teflon tape (clockwise) 3-4 times on the arrestor's male threads. Screw the arrestor directly onto the shutoff valve. Hand-tighten first, then give it a firm 1/4 to 1/2 turn with the wrench. Reconnect the appliance supply hose to the other end of the arrestor. Repeat for both hot and cold lines if needed.
⚠️ Warning: Don't cross-thread! Start threads by hand. Overtightening can crack valves or arrestor bodies. Use two wrenches – one to hold the valve body steady, one to tighten the arrestor – to avoid twisting pipes.
Step 5: Slowly Turn Water Back On & Test
Close all the faucets you opened for draining. Slowly turn the main water shutoff valve back ON. Listen for hissing leaks – if you hear one, tighten the connection slightly. Go around and open faucets slowly to let air bleed out of the lines until water flows steadily. Finally, test the problematic fixture or appliance. Run the washing machine through a fill cycle or quickly turn a sink faucet on/off. Enjoy the silence!
⚠️ Warning: Turn the main valve on SLOWLY to avoid a sudden pressure surge. Check all new connections (arrestors) carefully for leaks over the next few hours.
Pro Tips
- Listen for water hammer immediately after an appliance fill cycle stops – that's the prime suspect.
- For washing machines, use braided stainless steel hoses with built-in arrestors for a super clean install.
- If you can't access pipes easily, install arrestors at the fixture itself (under sinks) using a tee fitting.
- Old-school air chambers (vertical pipe sections) can work but often fail as water absorbs the air. Arrestors are more reliable.
- Record the sound with your phone – it can help identify the location or type of noise later.
When to Call a Professional
Call a licensed plumber if: 1) Leaks persist after tightening. 2) You have no accessible main shutoff or it's stuck. 3) Pipes are severely corroded or damaged. 4) You need to solder pipes or modify main lines. 5) The problem persists after trying these fixes and you suspect complex issues like faulty pressure regulators or main supply line problems. Safety and preventing water damage are paramount!
Understanding the Problem in Detail
Imagine water flowing full speed through a pipe like a speeding train. When a valve slams shut instantly (like a washing machine solenoid), that 'train' crashes into a wall! The kinetic energy has to go somewhere, causing a shockwave (the 'hammer') that slams through the pipes. Air chambers or arrestors act like cushions, absorbing that shock.
Tools and Materials Guide
Wrenches: Adjustable is versatile; a basin wrench is essential for tight sink areas. Arrestors: Brass is more durable than plastic. Size matters – match the thread size (NPT) to your shutoff valve (usually 1/2" or 3/4"). Mini-arrestors fit under sinks. Find them at hardware stores (Home Depot, Lowe's) or online (Amazon). Straps: Use galvanized metal or plastic with rubber lining. Sealant: Teflon tape is cheap and easy; pipe dope (paste) can handle higher pressure but is messier. Alternatives: For very temporary relief, try turning down your main water pressure slightly (if you have a regulator), but this isn't a reliable fix.
Safety Considerations
- WATER OFF & DRAINED: Non-negotiable. Working on pressurized pipes risks flooding and injury. 2. Eye Protection: Debris or water spray. 3. Gloves: Protect hands from sharp edges and dirt. 4. Ladder Safety: If accessing high pipes. 5. Beware Electricity: Be cautious near electrical panels/appliances when accessing pipes. 6. Don't Overtighten: Damages fittings and causes leaks. 7. Know Your Limits: Complex valve work or soldering requires a pro.
Troubleshooting Common Issues
Leak at Arrestor: Did you use sealant? Are threads crossed? Tighten slightly more (carefully!). Still Bangs After Arrestor: Did you install it on both hot and cold lines for the appliance? Is the pipe still loose elsewhere? Is it the correct size? Can't Find Loose Pipes: Try having someone rapidly turn a faucet on/off while you listen/feel. Focus near appliances. Only One Faucet Causes It: Check washers in that faucet or install a mini-arrestor under that sink.
Maintenance and Prevention
- Secure New Pipes: Anytime work is done, ensure pipes are strapped. 2. Consider Arrestors Proactively: Install them when adding new appliances (ice makers, dishwashers). 3. Check Straps Occasionally: Vibration can loosen them over years. 4. Monitor Water Pressure: Excessively high pressure (over 80 PSI) worsens hammer. A pressure gauge (screws onto a hose bib) can check this.
Cost Analysis: DIY vs Professional
DIY: $20 - $80. Arrestors: $10-$25 each. Straps: $1-$5 each. Sealant: $3-$5. Basic tools you might already own. Professional: $150 - $500+. Hourly rates ($75-$150/hr) plus parts/markup. Installing 2 arrestors is often 1-2 hours labor. Significant savings doing it yourself if comfortable!
Related Plumbing Problems
Loose Pipes Rattling (Not Hammer): Securing fixes this too. High Water Pressure: Can cause hammer and stress pipes/faucets. Needs a pressure regulator. Faucet Squeal/Chatter: Often worn washers/cartridges, different from hammer. Water Pressure Drops Suddenly:* Could indicate a failing pressure regulator or other blockage.
Frequently Asked Questions
Is water hammer dangerous, or just annoying?
It starts annoying but can become dangerous! Over time, the repeated shockwaves can damage valves, crack fittings or pipes, loosen connections (causing leaks), and even damage appliances. Fixing it protects your plumbing system.
Can I just ignore it if it only happens sometimes?
It's not recommended. While it might seem minor now, the cumulative stress weakens your plumbing. Plus, it often gets worse over time. Tackling it early is easier and prevents potential water damage later.
Do water hammer arrestors need maintenance?
Generally, no. Unlike old air chambers that need draining to recharge air, modern piston-style arrestors are sealed units and maintenance-free. They should last for many years.
My pipes bang when the toilet fill valve shuts off. Can I fix that?
Absolutely! The process is the same. Install a water hammer arrestor on the toilet's cold water supply line. You'll find mini-arrestors specifically designed to fit between the shutoff valve and the toilet's fill valve hose.
I tried securing pipes and installed arrestors, but I still hear a slight knock. What now?
Double-check for any missed loose pipe sections – even small movements can transmit sound. Ensure arrestors are installed correctly and tightly. If it persists, the issue might be more complex (like pressure spikes or failing regulator) and warrant a professional assessment.