Bathroom Vanity Installation Made Simple: Your Stress-Free DIY Guide
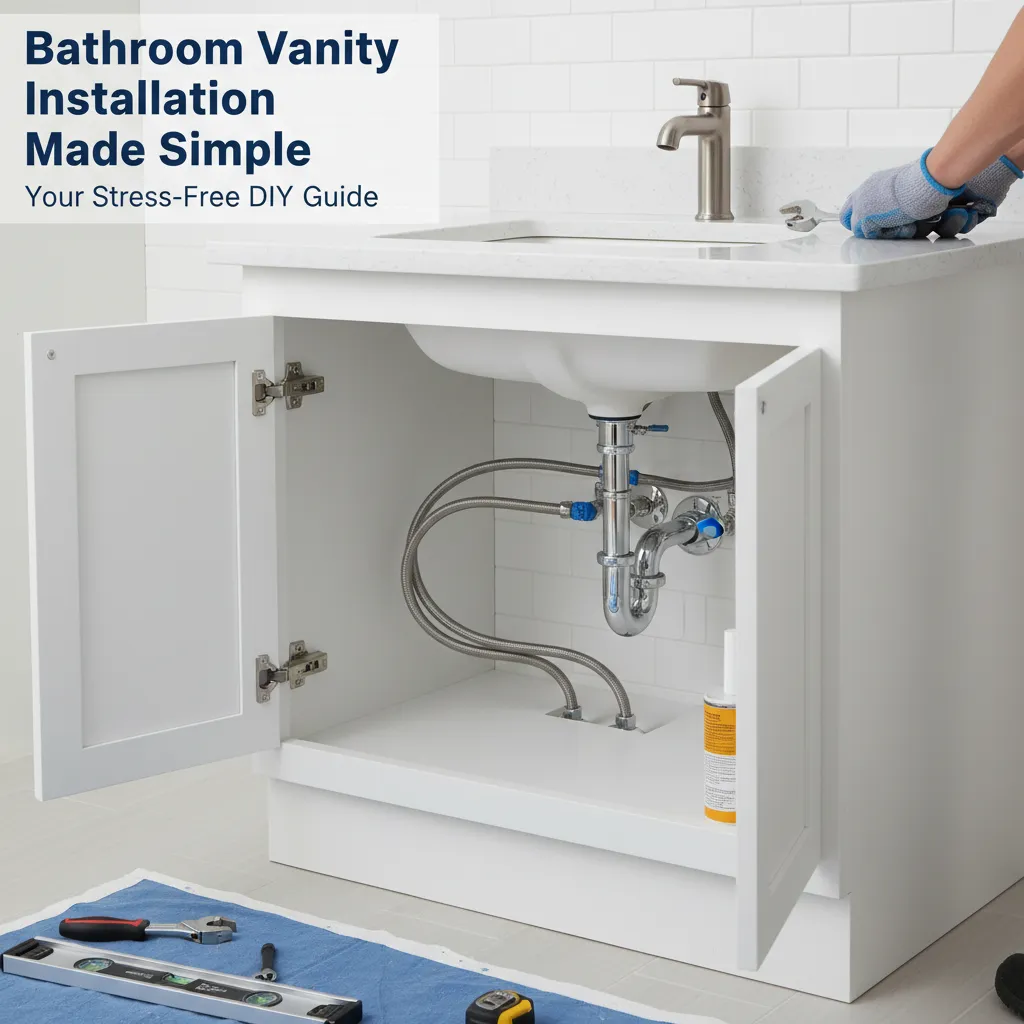
Learn how to install a bathroom vanity like a pro with our step-by-step guide. Avoid common mistakes, save money, and transform your bathroom with confidence. Perfect for beginners!
That outdated vanity is dragging your whole bathroom down, but hiring a pro costs a fortune. You worry about water leaks, uneven cabinets, or accidentally flooding the room. And let's be honest – plumbing terms can sound like a foreign language. I get it. But most installation stress comes from not knowing where to start or what pitfalls to avoid.
Staring at that new vanity box and feeling overwhelmed? You're not alone. Between plumbing worries and installation fears, it's easy to panic. But take a deep breath – I've helped hundreds of DIYers conquer this exact project. By the end of this guide, you'll have a beautiful, leak-free vanity installed and the pride that comes with doing it yourself.
Tools Needed
- Adjustable wrench (for water line connections)
- Level (24-inch for accuracy)
- Cordless drill/driver (with assorted bits)
- Screwdriver set (flathead and Phillips)
- Pliers (channel locks for stubborn nuts)
- Tape measure (25-ft laser recommended)
- Utility knife (for cutting caulk/sealant)
- Safety glasses (eye protection is non-negotiable)
- Carpenter's pencil (for marking)
Materials Needed
- New bathroom vanity (measure twice, buy once!)
- Plumber's putty (for sink drain seal)
- Silicone caulk (100% silicone, mildew-resistant)
- Teflon tape (for threaded pipe connections)
- Shims (composite or cedar, for leveling)
- Mounting screws (2.5-inch #10, often included)
- P-trap kit (if reconfiguring drain)
- Supply lines (braided stainless steel, 12-20 inches)
Solution (Intermediate - 4-6 hours (depending on plumbing complexity))
Step 1: Kill the Water & Demolish the Old Vanity
Locate your home's water shutoff valves (usually under the sink or in the basement). Turn them clockwise until tight. Open faucets to drain remaining water. Disconnect supply lines with your wrench – keep a bucket handy! Remove mounting screws and gently pry the old vanity away from the wall. Tip: Take photos of existing plumbing before disconnecting – it's your cheat sheet for reassembly.
⚠️ Warning: Wear gloves! Old pipes can have sharp edges. If valves won't budge, call a pro immediately to avoid snapping pipes.
Step 2: Dry Fit & Mark Your Battle Plan
Place the new vanity exactly where it'll live. Check for wall obstructions (outlets, pipes) using a stud finder. Mark the top edge on the wall with a pencil. Measure and mark where plumbing lines meet the vanity back panel. Pro tip: Slide shims under legs if your floor slopes – you'll adjust them later for perfect leveling.
⚠️ Warning: Never assume walls are straight! Always verify with your level.
Step 3: Mount Like a Pro (No Crooked Cabinets!)
Drill pilot holes through the vanity's mounting rail into wall studs (find them with your stud finder). Secure with 2.5-inch screws, but don't fully tighten yet. Place your level across the front and sides – slide shims under the base until perfectly level. Now tighten screws completely. Secret move: Use trim-head screws for shims to avoid splitting them.
⚠️ Warning: Hitting electrical/plumbing in walls can be disastrous. Know what's behind drywall before drilling!
Step 4: Connect Plumbing Without the Drips
Apply Teflon tape clockwise to faucet threads. Install the faucet through the sink hole, securing from below. Roll plumber's putty into a rope and press around the drain flange before inserting into the sink. Connect supply lines to faucet tails first, then to water valves. Attach the P-trap to the drain tailpiece. Turn water on SLOWLY and check every connection with a paper towel for leaks.
⚠️ Warning: Over-tightening cracks fittings! Hand-tighten plus 1/4 turn with wrench only. If leaks persist, re-tape threads – don't crank harder!
Step 5: Seal the Deal & Add Finishing Touches
Run a continuous bead of silicone caulk where the vanity meets the wall and floor. Smooth with a wet finger for a pro look. Attach doors/drawers and hardware. Turn on water fully and test all connections again. Do a happy dance – you did it! Insider trick: Leave the caulk tube notch uncut for 24 hours – if you find a leak, you can easily remove the bead without damage.
Pro Tips
- Buy extra braided supply lines – they're cheap insurance against mismatched threads
- Use painter's tape to mark drill points – prevents cabinet finish scratches
- Install the sink BEFORE mounting if it's a tight space – your knuckles will thank you
- Place a towel inside cabinets during plumbing work – catches drips before they stain
- Cut access panels in the back of the vanity for future shutoff valve access
When to Call a Professional
Call a plumber if: 1) Your main water valve won't shut off, 2) You discover corroded pipes that crumble, 3) You need to relocate plumbing more than 6 inches, or 4) You're uncomfortable with electrical near water (like moving light switches). $150-$300 for pro help beats $5k in water damage!
Understanding the Problem in Detail
Vanities fail due to water damage, outdated styles, or poor storage. Installation seems scary because water + electricity + expensive materials = anxiety. But modern vanities are designed for DIY with adjustable legs and pre-drilled holes. Plumbing connections are simpler than you think – it's mostly threaded nuts and compression fittings.
Tools and Materials Guide
Rent tools you'll rarely use (like a laser level) from hardware stores. Buy silicone caulk in 'almond' or 'white' – it hides better than clear. Choose braided supply lines over rigid copper – they flex during installation. For vanities, solid wood > MDF for wet environments. Bring faucet specs to the store – not all fit standard sink holes!
Safety Considerations
ALWAYS shut off water at the main if local valves are stiff. Wear cut-resistant gloves when handling broken ceramic. Use GFCI outlets or a portable GFCI adapter for power tools. Never stand inside the vanity frame. Check for lead pipes in homes built pre-1980 – don't sand them!
Troubleshooting Common Issues
Vanity won't level? Shim thicker at the wall side – floors often dip forward. Leaky P-trap? Disassemble and re-wrap threads with fresh Teflon tape. Gap at the wall? Use paintable caulk, not silicone, if adding trim later. Drawers scraping? Adjust the metal glide screws behind the drawer front.
Maintenance and Prevention
Wipe spills inside cabinets immediately – MDF swells when wet. Re-caulk every 2 years. Check under-sink connections annually for moisture. Install a leak detector alarm ($15) that screams at first sign of water.
Cost Analysis: DIY vs Professional
DIY Total: $300-$1,500 (vanity) + $75 (supplies). Pro Install: $300-$800 labor. Save by: Choosing stock sizes (no plumbing moves), watching for floor model sales, reusing existing faucets if compatible, and buying supply lines/valves online.
Related Plumbing Problems
Fixing wall damage behind old vanity, replacing bathroom flooring, installing a new faucet, upgrading sink drains, or adding backsplash tile. These often get tackled together during renovations.
Frequently Asked Questions
Can I install a vanity without shutting off the water?
Absolutely not! Even a small drip can cause major damage. If your shutoff valves are stuck, call a plumber to replace them before starting – it's cheaper than emergency flood repairs.
How do I know if my floor can support a heavy stone-top vanity?
Most standard joists handle 300-400 lbs. If your vanity + top exceeds this (check specs), reinforce the floor by screwing plywood under the joists or adding blocking. When in doubt, consult a structural engineer.
What if my new vanity is smaller than the old one?
You'll likely have gaps in flooring or wall finish. Plan to install a matching floor patch or extend the backsplash. Drywall repairs may be needed – keep leftover paint for touch-ups!