Conquer Cold Showers: Your Step-by-Step Guide to Installing a Tankless Water Heater (Safely!)
Tired of cold showers & high bills? Learn how to install a tankless water heater yourself! Our detailed DIY guide covers gas/electric, tools, safety, & mistakes to avoid. Save money & gain endless hot water.
You're fed up with the limitations of your old tank heater: running out of hot water just as you rinse shampoo, watching your energy bill climb to keep 40+ gallons hot 24/7, or dreading the inevitable replacement of a bulky, leaking tank. The promise of endless hot water, space savings, and energy efficiency from a tankless unit is incredibly appealing. But the installation process – involving gas lines, water connections, venting, and potentially electrical work – feels like a maze designed for professionals. The fear of making a costly or dangerous mistake is real. We get it. This guide is designed to cut through that overwhelm.
That icy shock mid-shower? The dread of guests using all the hot water? Or maybe those frustratingly high energy bills for a tank that's always 'on'? If you're dreaming of endless hot water and lower costs, installing a tankless water heater is a game-changer. But the process can feel daunting. Take a deep breath! This guide breaks it down step-by-step, turning complex plumbing and electrical work into a manageable DIY project. We'll cover everything from choosing the right unit to firing it up safely, giving you the confidence to tackle this upgrade.
Tools Needed
- Pipe Wrenches (2 - for gripping and turning pipes)
- Adjustable Wrenches (Multiple sizes)
- Tubing Cutter (For clean copper cuts)
- Deburring Tool (To smooth cut pipe ends)
- Propane Torch & Solder/Flux (For copper joints, if applicable)
- Pipe Thread Sealant (Gas-rated Teflon tape or pipe dope)
- Gas Leak Detector Solution (Soapy water works, commercial spray is better)
- Voltage Tester/Non-Contact Voltage Detector (ESSENTIAL for electrical safety)
- Screwdrivers (Phillips & Flathead)
- Drill & Bits (For mounting unit and venting)
- Hole Saw Kit (For vent pipe through walls/roof)
- Level (To ensure unit is mounted straight)
- Tape Measure
- Safety Glasses & Gloves
Materials Needed
- Tankless Water Heater Unit (Correctly sized for your home's GPM/BTU needs)
- Vent Kit (Type specified by manufacturer - concentric, PVC, stainless AL29-4C)
- Gas Line Upgrade Pipe/Components (If needed - typically 3/4" black iron pipe, fittings, shut-off valve)
- Water Supply Lines/Fittings (Correct type/size - copper, PEX, CPVC, flex connectors)
- Gas Flex Connector (Appliance connector, length as needed)
- Dielectric Unions or Brass Nipples (To prevent galvanic corrosion between dissimilar metals)
- Sediment Filter (Highly recommended for inlet water line)
- Pressure Relief Valve & Discharge Tube (If not integrated, check local code)
- Mounting Hardware (Lag bolts/screws suitable for wall type)
- Pipe Insulation (For hot water lines)
- Condensate Drain Line & Trap Kit (For condensing gas units)
- Electrical Cable & Breaker (If electric unit - gauge/type per unit specs & code)
Solution (Advanced - 6-10 hours (spread over 1-2 days, highly dependent on complexity))
Step 1: Plan & Prep: Your Blueprint for Success
This is THE most crucial step! Read your unit's manual thoroughly. Choose the installation location near existing gas/water lines and with proper clearance for venting and service access. Calculate your home's peak hot water demand (Gallons Per Minute - GPM) to ensure unit sizing is correct. Check local plumbing, gas, and electrical codes – permits are often required. Gather ALL tools and materials beforehand. Turn OFF main water supply, gas supply (at meter/appliance valve), and electrical power to the old heater at the breaker.
⚠️ Warning: NEVER skip permit research or code checks. Gas and electrical mistakes are serious fire/hazard risks. If your gas line needs upgrading, this is often a pro job.
Step 2: Remove the Old Tank Heater (If Applicable)
Drain the old tank completely via the drain valve (connect a hose!). Disconnect water lines (hot & cold), gas line (using two wrenches), electrical (confirm power is OFF!), and vent pipe. Carefully remove the old unit. Cap the open gas line IMMEDIATELY with a proper fitting. Cap water lines if not connecting immediately. Clean and prep the area.
⚠️ Warning: Tanks are HEAVY when full. Drain completely first! Wear gloves – edges are sharp. Beware of residual hot water/sediment when draining.
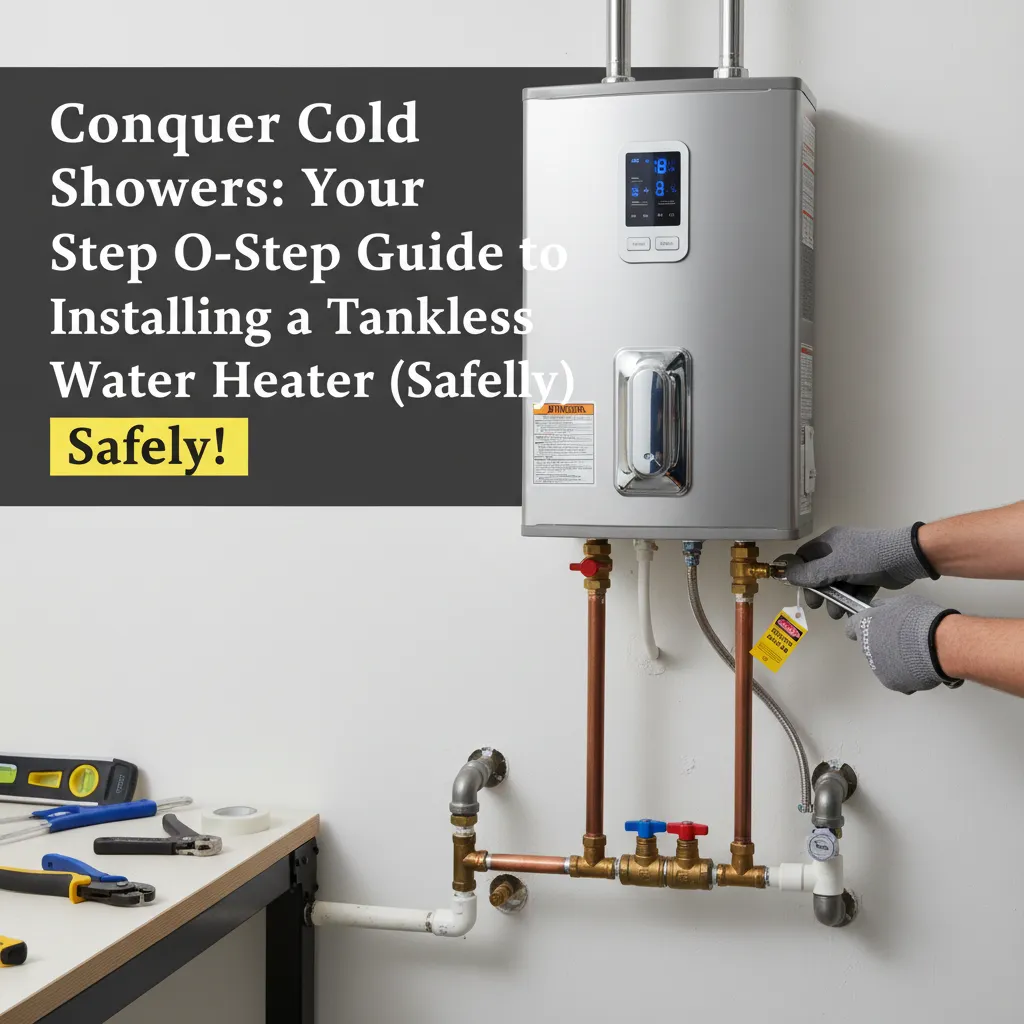
Step 3: Mount the Tankless Unit Securely
Position the mounting bracket according to the manual, ensuring it's level and secured firmly into wall studs with appropriate lag bolts. The unit must be perfectly level for proper operation and drainage. Carefully lift and hang the unit on the bracket. Double-check stability.
⚠️ Warning: Units are heavy! Get help lifting. Mounting only to drywall without hitting studs is unsafe and will likely fail.
Step 4: Install Venting (Critical for Gas Units!)
Follow the manufacturer's venting instructions EXACTLY. Use ONLY the specified vent material (stainless steel, PVC). Maintain required clearances from combustibles and proper pitch (usually 1/4" per foot downward towards termination for condensation). Seal all joints per instructions. Run vent pipe through the wall/roof using the hole saw. Install the termination cap outside, ensuring proper clearances from windows, doors, and air intakes. This is non-negotiable for safety and performance.
⚠️ Warning: IMPROPER VENTING IS A MAJOR CAUSE OF CARBON MONOXIDE POISONING AND UNIT FAILURE. Never mix vent types or exceed max length/elbow limits. Roof terminations require proper flashing.
Step 5: Connect Water Lines (Hot & Cold)
Install the included isolation valves or sediment filter on the cold water inlet. Use dielectric unions or brass nipples between the unit's copper connections and your home's pipes (steel/galvanized) to prevent corrosion. Connect cold water supply to the unit's inlet (marked 'Cold' or 'In'). Connect the hot water line to the unit's outlet (marked 'Hot' or 'Out'). Support pipes properly. Use pipe dope or Teflon tape on threaded fittings.
⚠️ Warning: Mixing metals (copper to steel) without dielectric protection causes rapid corrosion and leaks. Ensure inlet/outlet are correct – reverse connection damages the unit.
Step 6: Connect the Gas Line (Gas Units Only - Proceed with Extreme Caution)
This is where most DIYers should strongly consider a pro. If proceeding: Connect a new gas shut-off valve within sight of the unit (code requirement). Use a new, correctly sized and rated flexible appliance connector. Apply gas-rated pipe thread sealant (Teflon tape yellow for gas or pipe dope) ONLY to the male threads. Tighten fittings securely with two wrenches. DO NOT OVERTIGHTEN. Connect to the unit's gas valve.
⚠️ Warning: GAS LEAKS ARE EXPLOSIVE HAZARDS. If you smell gas, STOP immediately, evacuate, and call the gas company. Test ALL connections meticulously with leak detector solution after pressurizing. Never use standard white Teflon tape on gas.
Step 7: Connect Electrical (If Required)
Electric units need dedicated circuit(s). Run appropriate gauge wire in conduit (if required by code) from a new, correctly sized breaker in your main panel to the unit. Connect wires to the unit's terminals per the wiring diagram (usually L1, L2, L3, Ground). Double-check voltage requirements (120v/240v).
⚠️ Warning: ELECTRICAL WORK CAN BE LETHAL. Power MUST be OFF at the breaker. Ensure breaker is correctly sized for the unit's ampacity. If unsure, hire a licensed electrician.
Step 8: Prime, Purge, Power & Test
Open the main water supply SLOWLY. Open the cold and hot isolation valves on the unit. Open several hot water faucets in the house to purge air from the lines – let them run until smooth. For gas units, turn on the gas supply and meticulously re-check EVERY gas connection for leaks with detector solution (bubbles = leak!). Plug in the unit or turn on the breaker. Follow the manufacturer's startup procedure (often involves setting temp/dip switches). Test hot water flow at multiple fixtures. Check for leaks again!
⚠️ Warning: Purging air is vital to prevent sensor lockouts. SLOWLY open water valves to avoid water hammer. Re-test gas leaks AFTER pressurizing and during initial firing. Monitor closely for the first hour.
Pro Tips
- Flush the unit annually with vinegar using a service kit to prevent mineral buildup (CRITICAL for longevity!).
- Install an isolation valve kit with service ports – makes future flushing MUCH easier.
- Insulate ALL hot water pipes within 5-10 feet of the unit for faster delivery.
- Take pictures of your plumbing/gas before disassembly for easy reference.
- Use pipe dope AND gas-rated Teflon tape on gas fittings for a more secure seal (check local code).
- Consider a WiFi module for remote monitoring/temperature control.
When to Call a Professional
Call a licensed plumber or HVAC technician if: Your gas line needs significant modification or upsizing; You're uncomfortable with ANY gas or electrical work; Your venting requires complex routing or a long chimney; Local codes mandate licensed installation; You encounter unexpected problems like corroded pipes or structural issues; You simply don't feel confident. Gas and electricity are not areas to guess. Safety is paramount.
Understanding the Problem in Detail
Tank water heaters constantly heat a large reservoir of water, wasting energy when not in use. They also run out. Tankless heaters heat water ONLY when you need it (on-demand), passing cold water over a powerful heat exchanger (gas burner or electric element). This saves energy (up to 30%+) and provides endless hot water. The complexity comes from the high power demand (BTU for gas, Amps for electric) needing proper fuel supply, venting combustion gases safely (gas), and managing water flow.
Tools and Materials Guide
Pipe Wrenches: 14" & 18" cover most needs. Tubing Cutter: Get a quality one for clean, square cuts on copper. Vent Kit: MUST match unit specs (e.g., 3" AL29-4C stainless for high-efficiency gas). Buy complete kits. Gas Pipe: Black iron is standard; ensure diameter supports BTU demand (usually 3/4"). Water Connections: Use braided stainless flex connectors or hard pipe (copper/PEX) with dielectric protection. Gas Sealant: Yellow gas-rated Teflon tape or RectorSeal #5. Sediment Filter: 50-micron spin-down type is ideal. Find most items at hardware stores (Home Depot, Lowe's) or plumbing supply houses. Rent specialty tools like large pipe wrenches.
Safety Considerations
Gas: Leaks are catastrophic. Smell gas? Evacuate, call 911 or gas company. Test ALL fittings with leak detector. Electricity: Turn power OFF at breaker, verify with voltage tester. Water: Turn main supply OFF. Venting: Incorrect venting causes deadly CO poisoning. Follow manual EXACTLY for material, clearances, slope. Mounting: Secure firmly to structural studs. Work Area: Keep clean, well-lit, ventilated. Personal: Wear safety glasses, gloves. CO Detector: Install one near bedrooms! Pressure Relief: Ensure functional and piped to drain.
Troubleshooting Common Issues
No Hot Water: Check power/gas supply, breaker tripped? Gas valve on? Water valves open? Air in lines? Purge faucets. Error code? Consult manual. Fluctuating Temperature: Likely a flow issue – check inlet filter for debris, ensure unit sized correctly for simultaneous fixtures. Error Codes: Refer to manual – common ones relate to ignition failure (gas supply, vent blockage), flow sensor issues, or overheating. Low Flow: Check inlet filter, sediment in aerators, ensure pipes aren't kinked. Vent/Alarm Error: Check for vent blockage, proper termination clearance, condensate drain blockage (condensing units).
Maintenance and Prevention
Annual Flushing: Non-negotiable! Use a recirculating pump kit with white vinegar to dissolve scale. Takes 45-90 mins. Inlet Filter: Clean every 3-6 months. Visual Checks: Periodically inspect for leaks, soot (bad combustion), or vent damage. Check Error Logs: Many units store history. Monitor Performance: Note changes in flow or temp consistency.
Cost Analysis: DIY vs Professional
Unit Cost: $300-$600 (Electric Point-of-Use), $600-$1,500 (Gas/Electric Whole Home). DIY Installation: $200-$800 (Vent kit $150-$400, Pipe/Fittings $50-$300, Misc $50-$100). Pro Installation: $1,500-$4,500+ (Labor + Materials). Savings: DIY saves $1,000-$3,000+, BUT only if done safely/correctly. Hidden Costs: Gas line upgrade ($500-$2,000), Electrical panel upgrade ($1,000-$3,000), Permits ($50-$300). Long-Term Savings: Expect 20-30%+ reduction in water heating energy bills.
Related Plumbing Problems
Insufficient Hot Water Flow: Often due to undersized unit or clogged filter. Cold Water Sandwich: Brief cold burst between hot uses; a recirculation pump can help. Mineral Buildup (Hard Water): Requires diligent flushing, possibly water softener. Vent Condensation/Icing: Poor termination location/design. Gas Pressure Issues: Requires pro assessment. Water Pressure Drop: Could indicate undersized pipes or unit flow limitations.
Frequently Asked Questions
Can I really install a tankless water heater myself?
Yes, it's possible for experienced DIYers comfortable with plumbing, gas (if applicable), and electrical work. However, it's an Advanced project. Gas line modifications and complex venting are strong reasons to hire a pro. Be brutally honest about your skills, prioritize safety, check codes, and get permits. If in doubt at any point, call a professional.
Do I need to upgrade my electrical panel for an electric tankless?
Very likely, yes. Electric tankless units demand HUGE amounts of power (often 80-150+ Amps at 240V). Most standard home panels (100-200 Amp service) cannot handle this added load without significant upgrades, potentially costing thousands. Always calculate the total amperage requirement and consult an electrician before purchasing an electric unit.
Why is my new tankless heater giving lukewarm water?
This usually means the unit isn't getting enough flow to activate properly, or it's undersized. Check: 1) Is the inlet water filter clogged? Clean it. 2) Are the water isolation valves fully open? 3) Are you trying to run too many hot fixtures at once (exceeding the unit's GPM capacity)? 4) Is the temperature set point too low? Increase it slightly. 5) Is the gas supply sufficient (for gas units)?
How close can I mount the unit to my shower?
While you can mount it close, it's not always ideal. Mounting too close (especially gas) might mean longer vent runs or noise concerns. Focus on proximity to existing gas/water lines and proper venting access. The key is minimizing the time for hot water to arrive, best achieved by insulating pipes and potentially adding a recirculation system, not just proximity.
Is a tankless water heater worth the cost?
For most homeowners, yes, but the payback period varies. You save significantly on energy bills (20-30%+) by not heating standby water. You gain endless hot water and free up floor space. The higher upfront cost (unit + install) is offset over time by savings, especially if you live there 10+ years. Factor in your hot water usage, energy costs, and how long you plan to stay.