Stop Water Damage Before It Starts: Your Stress-Free Guide to Installing Water Sensors
Tired of leak worries? Learn exactly where and how to install water sensors in 30 minutes. Prevent costly damage with this beginner-friendly DIY guide.
You're not imagining things - that drip sound at 2 AM is real. Whether it's a failing water heater, frozen pipe burst, or slow leak under the dishwasher, water damage strikes 1 in 50 homeowners annually. The worst part? By the time you see visible damage, it's often too late. That panic you feel is justified, but totally preventable.
That heart-sinking moment when you spot a puddle under the sink - we've all been there. Water damage costs homeowners thousands yearly, but you're about to learn how a $20 sensor and 30 minutes can save your sanity and wallet. I'll guide you through every step like we're working side-by-side in your utility room.
Tools Needed
- Smartphone (for app-based sensors)
- Drill with 1/8" bit (if screw-mounting)
- Stud finder (to avoid pipes/wires when drilling)
- Rubbing alcohol & cloth (for surface prep)
Materials Needed
- Water sensor (basic alarm $15-$30, smart sensor $30-$70)
- AA/AAA batteries (check sensor requirements)
- Mounting tape (3M VHB recommended for wet areas)
- Zip ties (for securing wires if needed)
Solution (Beginner - 20-45 minutes (depending on sensor type))
Step 1: Find Your Leak Hotspots
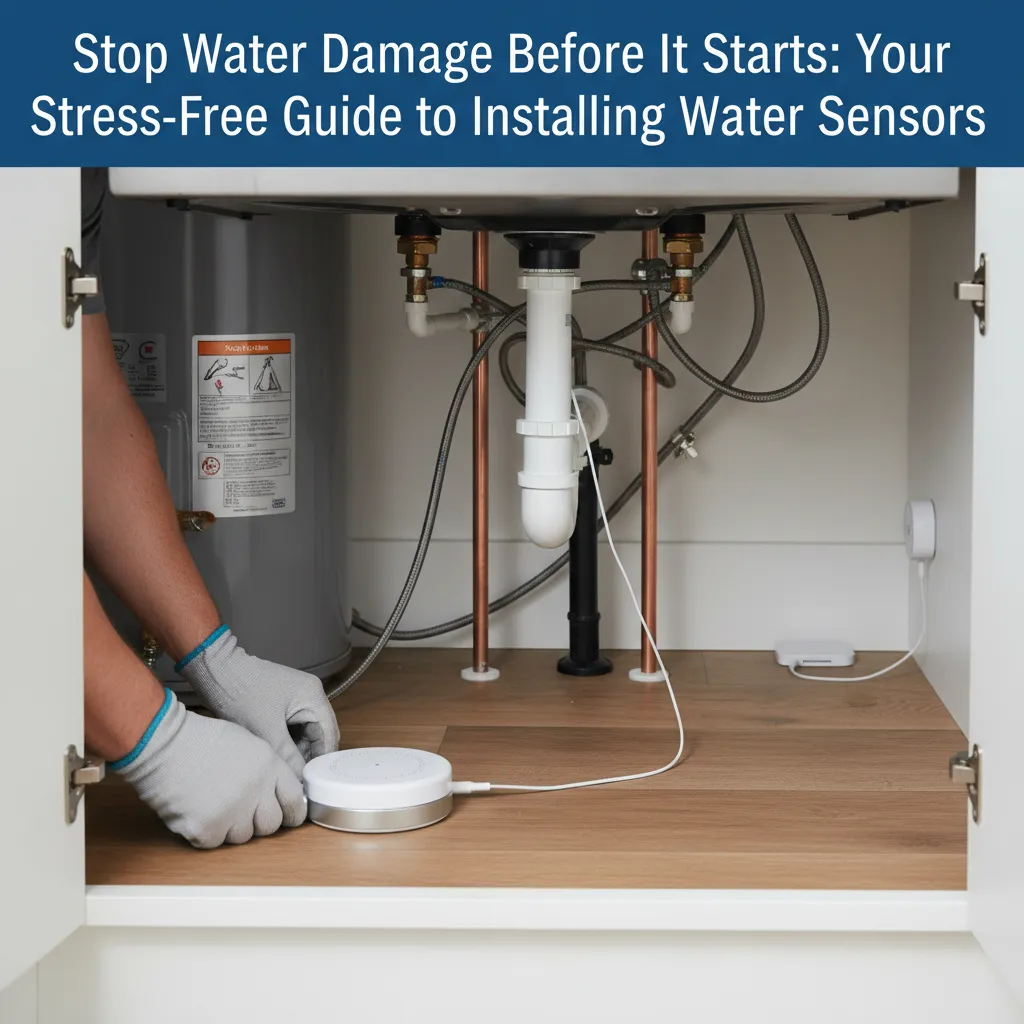
Grab a flashlight and identify where water pools FIRST during leaks: under sinks (place near P-trap), behind toilets (against wall flange), by water heaters (on drain pan edge), near washing machines (front center), and basement floor drains. Pro tip: Place sensors where pipes enter the house and below ice maker lines.
⚠️ Warning: Avoid placing directly where condensation forms (like AC units) to prevent false alarms.
Step 2: Prep Your Sensor & Surface
Insert batteries before mounting. Clean mounting surfaces with rubbing alcohol - dust and grease weaken adhesive tape. For screw-mount models, use stud finder to avoid drilling into pipes or wires. Insider trick: Place a nickel under sensors if your floor isn't perfectly level.
⚠️ Warning: Turn off nearby electrical breakers if drilling near outlets.
Step 3: Secure Without the Struggle
For adhesive models: Peel backing slowly, press firmly for 30 seconds while applying heat with a hairdryer (activates adhesive). For screw mounts: Drill pilot holes first to prevent plastic casing cracks. Can't drill? Use industrial velcro for renters. Position sensors so both metal contacts touch the floor.
⚠️ Warning: Never mount where standing water could submerge electrical components.
Step 4: Test Like a Pro
Dip a cotton swab in water and touch it to the sensor contacts - you should hear an alarm within 5 seconds. For smart sensors, verify app notifications work from another room. Troubleshooting tip: If alarm doesn't sound, check battery orientation and contact cleanliness.
⚠️ Warning: Never pour water directly onto sensors - moisture can damage internal components.
Step 5: Connect & Customize Alerts
Follow manufacturer's app instructions (usually involves scanning QR code). Set up multiple notification methods - both phone alerts and email. Critical step: Assign locations to each sensor ('Basement Sump Pump' vs 'Kitchen Sink'). Enable battery level warnings!
⚠️ Warning: Avoid placing Wi-Fi sensors more than 30 ft from router without range extender.
Pro Tips
- Double-stick tape sensors to plastic coasters for easy repositioning
- Use smart sensors with automatic water shutoff compatibility for future upgrades
- Test monthly when paying utility bills - makes it a habit
- Place sensors horizontally under dishwashers - leaks often start at door seals
- In freezing climates, prioritize sensors near exterior wall pipes
When to Call a Professional
Call a plumber immediately if your sensor alerts and you: 1) Can't locate the source, 2) Smell gas (near water heater), 3) See electrical hazards. For whole-house automatic shutoff systems, hire a licensed plumber for installation.
Understanding the Problem in Detail
Water sensors work via exposed metal contacts that complete a circuit when water bridges them, triggering alarms. Most damage occurs from slow leaks (toilet flappers, pipe joints) rather than floods. Just 1/8" of water can ruin flooring and drywall.
Tools and Materials Guide
Best budget pick: Govee Water Detector ($19/3-pack). Smart choice: Moen Smart Flood Detector ($45, integrates with shutoff systems). Renters: Choose peel-and-stick models. Avoid 'universal' sensors if you have uneven floors. Buy at hardware stores for easy returns.
Safety Considerations
Critical: Never install near electrical panels or submerged outlets. Wear knee pads when working under sinks. Check for mold/mildew during installation - stop and remediate if found. Keep sensor wires away from drain pipes to prevent condensation trips.
Troubleshooting Common Issues
False alarms? Move sensors away from HVAC vents. No alarm? Clean contacts with rubbing alcohol. App disconnects? Change Wi-Fi channel to reduce interference. Weak alarm? Replace batteries immediately - they drain faster in humid environments.
Maintenance and Prevention
Test monthly, replace batteries yearly (mark calendar). Vacuum sensor vents quarterly. Update app firmware bi-annually. After any leak, recalibrate sensors. Rotate sensors between dry locations every 2 years to prevent adhesive failure.
Cost Analysis: DIY vs Professional
DIY cost: $20-$70 vs water damage average: $2,700-$10,000. Insurance bonus: Many providers offer 5-10% discounts for leak detection systems. Smart sensors pay back in 18 months via early leak detection on water bills.
Related Plumbing Problems
Frequently paired issues: running toilets (wastes 200+ gallons daily), corroded supply lines (replace every 5 years), poor pipe insulation (causes freezing bursts), clogged drain pans (under water heaters).
Frequently Asked Questions
Will sensors work if my power goes out?
Battery-powered sensors will still sound local alarms but smart features require Wi-Fi. For power outage protection, choose cellular-connected models or battery-backup sump pumps.
Can I install sensors under laminate flooring?
Yes! Use low-profile sensors slipped under edges near appliances. Avoid trapping moisture - leave slight air gap. Consider point sensors for subfloor installation during renovations.
How many sensors do I really need?
Start with 3-5: kitchen, 2 bathrooms, water heater, basement. Add more if you have: laundry on upper floors, multiple refrigerators, or a home older than 20 years where pipes are aging.