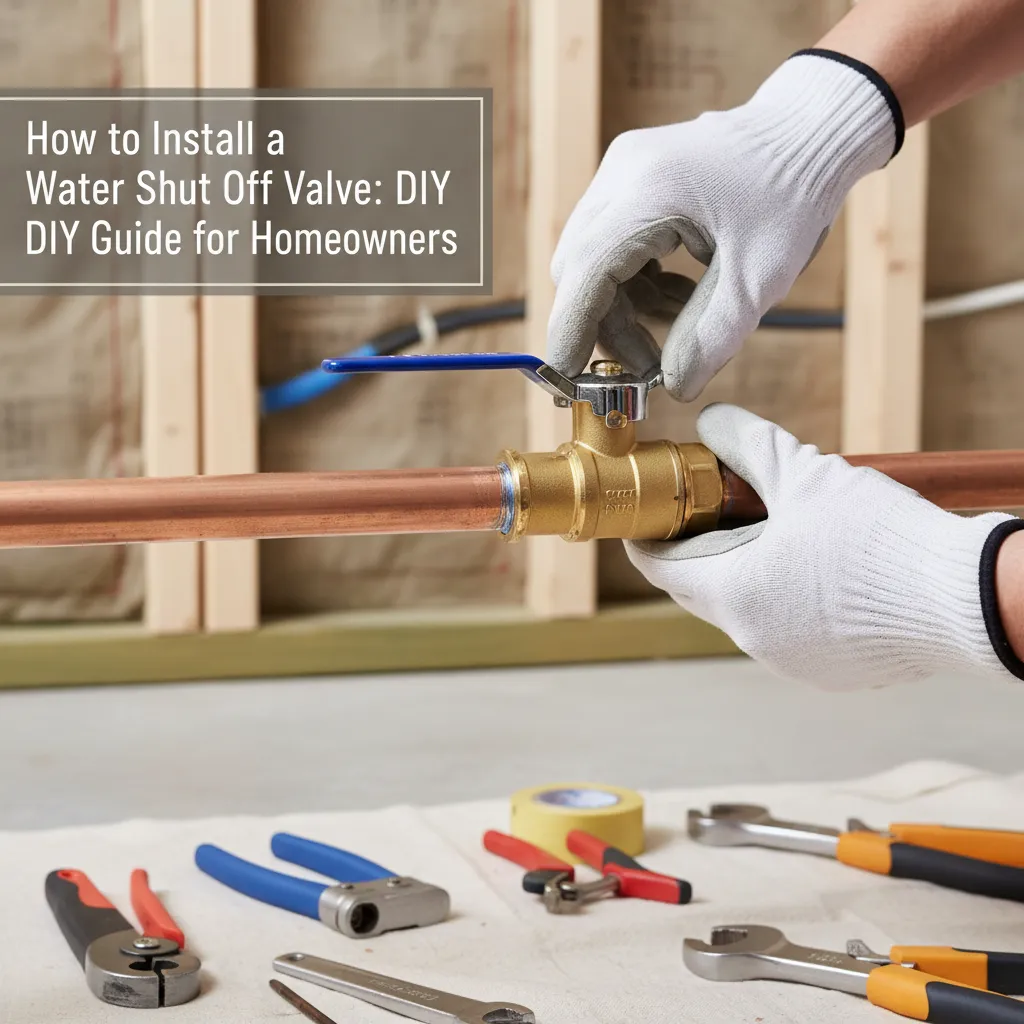
How to Install a Water Shut Off Valve: DIY Guide for Homeowners
Stop panicking over plumbing emergencies! Learn to safely install or replace water shut off valves with step-by-step instructions, common mistake alerts, and when to call a pro. Save money & gain peace of mind.
You're staring at an ancient valve that won't budge, a pipe with no valve at all, or worse – a slow drip that's becoming a flood. Maybe you're installing new appliances and need dedicated shutoffs. That feeling of helplessness when water sprays everywhere? We get it. But here's the truth: This is one plumbing task every homeowner CAN master with the right guidance.
That moment when you're frantically searching for a shut off valve during a plumbing leak? We've all been there. Whether you're replacing a corroded valve or adding one where it's missing, this guide turns panic into confidence. You'll gain essential skills to control your home's water supply safely – no prior plumbing experience needed!
Tools Needed
- Adjustable wrench (for tightening connections)
- Tubing cutter (cleaner cuts than hacksaws)
- Bucket & towels (for inevitable drips)
- Flashlight (visibility in tight spaces)
- Safety glasses (protect from pipe debris)
- Channel-lock pliers (alternative to wrench)
Materials Needed
- Shut off valve (1/4-turn ball valve type, matching pipe size - usually 1/2" for homes)
- Pipe thread tape (high-density PTFE tape for water lines)
- Compression fittings (if adding valve to copper pipe without threads)
- Pipe cleaning cloth/sandpaper (for smooth connection surfaces)
Solution (Beginner - 30-60 minutes per valve)
Step 1: Kill the Water & Prepare Your Workspace
Locate your main water shutoff (usually near water meter or street entry) and turn it clockwise until tight. Open ALL faucets in your home to drain remaining water – including tubs and outdoor spigots. Place buckets under your work area. Pro tip: Take photos of pipe layouts before starting for easy reassembly reference!
⚠️ Warning: ⚠️ Never work on pipes under pressure! Confirm water flow stops at faucets before proceeding.
Step 2: Remove Old Valve or Prep Pipe Surface
For replacements: Use your wrench to loosen the compression nut connecting the old valve. If stubborn, apply penetrating oil and wait 10 mins. For new valves: Clean the pipe end with sandpaper/cloth until shiny. Deburr cut pipe edges with the tubing cutter's reamer tool – rough edges cause leaks!
⚠️ Warning: ⚠️ Support pipes when wrenching – older copper can bend easily.
Step 3: Apply Tape & Assemble New Valve
Wrap PTFE tape clockwise around pipe threads (2-3 layers max). For compression valves: Slide compression nut then brass ferrule (ring) onto pipe. Align valve with pipe and hand-tighten nut first. Pro tip: Position valve handle for easy access – it should rotate freely without hitting walls/cabinets.
⚠️ Warning: ⚠️ Over-taping can crack fittings. Never use tape on compression fittings!
Step 4: Tighten Strategically & Test for Leaks
Make 1/4 turn with wrench after hand-tightening. Over-tightening is the #1 beginner mistake! Turn main water back on SLOWLY. Place a paper towel under connections and watch closely for drips. If leaking, tighten incrementally – 1/8 turn at a time. Check again after 24 hours as fittings settle.
⚠️ Warning: ⚠️ Sudden water pressure surges can burst pipes! Open main valve gradually.
Pro Tips
- Buy extra ferrules – they deform during tightening and can't be reused
- Use a valve with a stainless steel ball – plastic internals fail faster
- Label valves with appliance names using waterproof tape
- Exercise valves every 6 months to prevent seizing
- Keep a valve wrench accessible near main shutoff during emergencies
When to Call a Professional
Call a plumber if: Pipes are badly corroded or fragile, you need to solder near flammable materials, water pressure remains low after reopening main valve, or if you have galvanized steel pipes (special tools required). If uncertain, $150 for a pro is cheaper than $5k in water damage!
Understanding the Problem in Detail
Shutoff valves fail due to mineral buildup, corrosion, or cheap plastic parts. Older homes often lack valves at individual fixtures because codes evolved. A working valve isolates problems so you don't have to turn off water to the entire house during repairs.
Tools and Materials Guide
Compression valves (no soldering) are ideal for beginners. For copper pipes, use quarter-turn ball valves. PEX pipes require crimp or clamp tools. Buy valves at hardware stores – avoid big-box store bargain bins. Quality brands: BrassCraft, SharkBite (push-fit), Apollo.
Safety Considerations
Wear gloves to protect from sharp pipe edges. Shut off water heaters BEFORE draining pipes to prevent element damage. Beware of lead in pre-1980 pipes – wash hands after handling. Never stand directly under pipes when reopening main valve.
Troubleshooting Common Issues
Leaking compression joint? Try tightening incrementally. Still leaking? Disassemble and inspect ferrule alignment. Valve won't turn? Tap handle gently with wrench to break mineral deposits. Low water flow after? Check for crushed pipes or debris in aerators.
Maintenance and Prevention
Operate valves twice yearly. Install pipe sleeves in unheated spaces to prevent freezing. Add leak detectors under sinks. Replace plastic valves every 5-7 years; brass lasts 10+ years.
Cost Analysis: DIY vs Professional
DIY: $8-$25 per valve + $20 tools. Pro installation: $150-$300 per valve. Savings tip: Install valves during other plumbing projects to minimize service fees. Insurance bonus: Some insurers offer discounts for emergency shutoff systems!
Related Plumbing Problems
Frozen/burst pipes, low water pressure, leaky faucet repairs, appliance hose failures, water hammer noises – all become manageable with proper shutoff valves installed.
Frequently Asked Questions
Can I install a valve without shutting off main water?
Absolutely not! Attempting this will flood your home. Always shut off main supply first – no exceptions. If main valve is stuck, call a pro immediately.
Why does my new valve leak after installation?
90% of leaks come from: 1) Under-tightening/over-tightening compression nuts, 2) Forgetting the ferrule, 3) Debris on pipe surface, or 4) Cross-threaded connections. Disassemble, inspect, and redo the connection carefully.
Are push-fit valves (like SharkBite) reliable?
Yes, when installed properly on clean, cut pipes. They're perfect for tight spaces or temporary fixes but cost 3x more than compression valves. Follow insertion depth marks exactly!