Stop Toilet Leaks Fast: Your Stress-Free Guide to Replacing a Toilet Supply Line
Frustrated by a leaking or stiff toilet supply line? Learn how to replace it safely & permanently in under an hour. Step-by-step guide for beginners with pro tips to avoid common mistakes.
You see water pooling near the base of the toilet, hear a faint hissing, or notice the rubber/plastic supply line is cracked, bulging, or covered in green corrosion. Maybe you're remodeling and the old line just looks ancient and scary. That constant drip-drip isn't just annoying; it wastes water and can damage your floor. You want it fixed NOW, but calling a plumber feels like overkill. You're capable, you just need clear, no-nonsense steps to get it done right without causing a bigger flood. I get it!
That telltale drip under your toilet tank? Or maybe the supply line feels stiff as cardboard? Don't panic! A leaking or aging toilet supply line is one of the most common (and fixable) household plumbing issues. As a DIY plumber who's been there, I know it feels urgent and maybe a bit intimidating, but I promise – with the right guidance, you can tackle this confidently and stop the water worry in less than an hour. This guide walks you through it simply and safely.
Tools Needed
- Adjustable Wrench (or Basin Wrench for tight spaces): For loosening/tightening nuts.
- Old Towels or Rags: For soaking up water.
- Bucket or Small Container: To catch residual water in the tank.
- Flashlight: To see connections clearly.
- Safety Glasses: Protect your eyes from drips and debris.
Materials Needed
- New Toilet Supply Line: Braided stainless steel (recommended for durability and flexibility). Size: Measure from shut-off valve to tank inlet; common lengths are 12" or 16". Ensure matching ends (usually 7/8" compression nut for tank, 1/2" compression nut or 3/8" compression for valve).
- Optional: New Tank-to-Bowl Gasket & Bolts: If the old ones look cracked/worn while you're there.
- Optional: Penetrating Oil (like WD-40): If shut-off valve is stubborn.
Solution (Beginner - 20-45 minutes)
Step 1: Shut Off the Water & Drain the Tank
Locate the shut-off valve on the wall pipe behind your toilet. Turn it clockwise (righty-tighty!) slowly until it stops. Now, flush the toilet and hold the handle down to empty as much water as possible from the tank. Use your towel to soak up any remaining water in the tank bottom. Place your bucket under the supply line connection at the tank.
⚠️ Warning: Turn the valve OFF gently! Forcing a very old valve can break it. If it won't budge or leaks around the stem, STOP. See the 'When to Call a Pro' section.
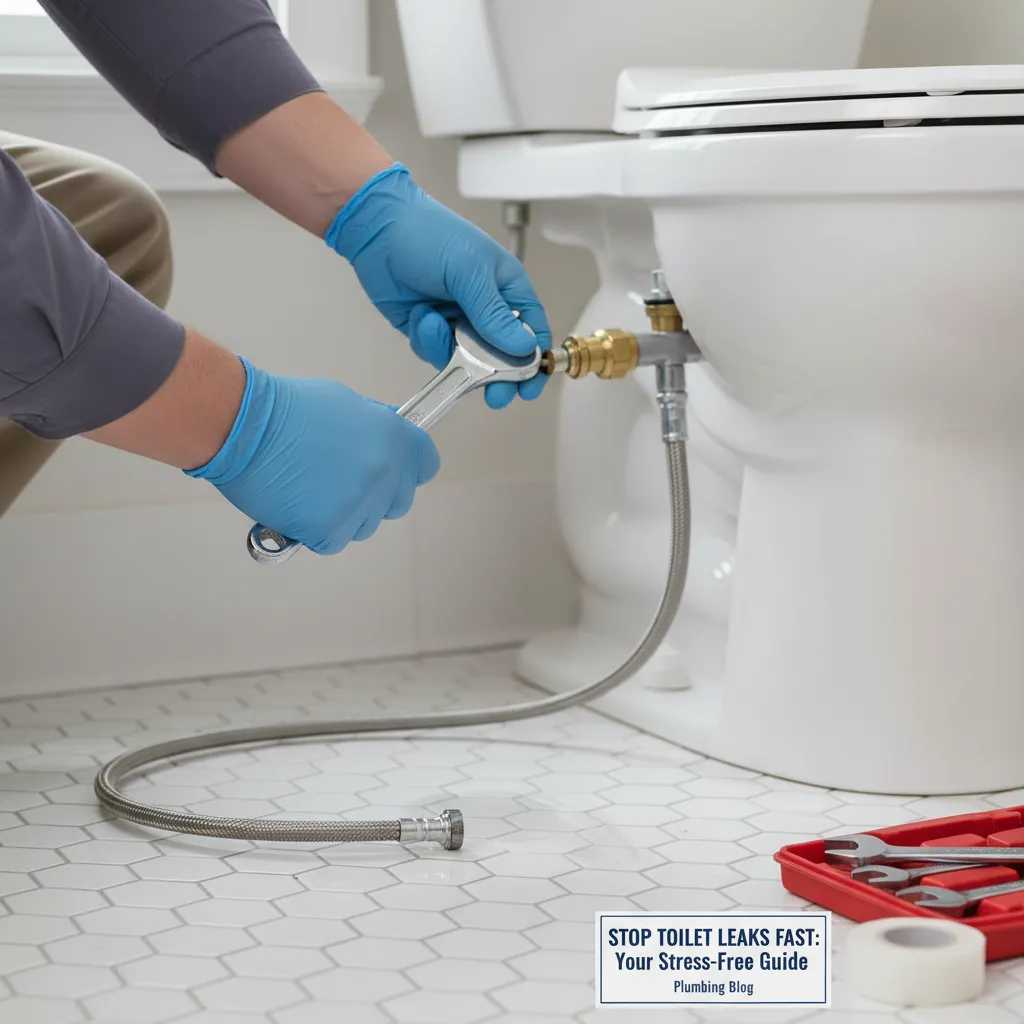
Step 2: Disconnect the Old Supply Line
Place a towel under the valve connection. Using your adjustable wrench, grip the flat sides of the supply line nut connecting to the bottom of the toilet tank. Hold the tank's fill valve shank (the brass piece sticking out) steady with your other hand or another wrench to prevent twisting. Unscrew the nut counter-clockwise. Repeat this process at the shut-off valve end, unscrewing the nut connecting to the valve. Remove the old line.
⚠️ Warning: DO NOT use pliers directly on the plastic tank fill valve shank - it cracks easily! Use the wrench ONLY on the nut's hex flats. Support the valve body.
Step 3: Inspect & Prep the Connections
Wipe the threads of the shut-off valve outlet and the tank fill valve shank with a clean rag. Check for any old gasket material, corrosion, or damage. Ensure the threads look clean and intact. This is a good time to check the tank bolts/nuts and the rubber tank-to-bowl gasket for leaks or wear if you have replacements handy.
⚠️ Warning: If the shut-off valve threads are heavily corroded or damaged, replacing the supply line might not be enough. See troubleshooting.
Step 4: Connect the New Supply Line (Tank First!)
Take your new braided stainless steel line. Hand-tighten the larger nut (usually 7/8") onto the tank fill valve shank first. Ensure the rubber washer inside the nut is present and seated correctly. Once hand-tight, use the wrench to give it one additional quarter to half turn – snug is good, gorilla-tight is bad! Do NOT use Teflon tape here – the washer creates the seal.
⚠️ Warning: Over-tightening is the #1 beginner mistake! It crushes the washer, cracks plastic parts, or strips threads. Tighten just enough to stop the initial drip when water turns on later.
Step 5: Connect to the Shut-Off Valve
Now, connect the other end of the supply line to the shut-off valve. Hand-tighten the smaller nut (usually 3/8" or 1/2" compression) onto the valve outlet. Again, ensure the washer is in place. Use the wrench to give it the same gentle quarter to half turn beyond hand-tight.
⚠️ Warning: Avoid kinking or sharply bending the new braided line. Allow a gentle curve between connections.
Step 6: Slowly Turn Water On & Check for Leaks
Keep towels handy! Slowly turn the shut-off valve counter-clockwise (lefty-loosey!) to reopen the water. Listen and watch carefully at BOTH connections (valve and tank) and along the line itself. Let the tank fill completely and flush once. Double-check for any drips, especially where the nuts connect. If you see a drip, try tightening the nut for that connection just a tiny fraction more.
⚠️ Warning: Turn the water on VERY slowly to avoid a water hammer (loud banging in pipes). If a leak persists after a tiny snug, turn water off and check washer seating/threads.
Pro Tips
- Buy a braided line slightly LONGER than you think you need. A gentle loop is better than a tight pull.
- Wrap the jaws of your wrench with masking tape to prevent scratching chrome fixtures.
- Take a photo of your old supply line connections before disconnecting as a reference.
- Keep the old supply line until the job is done successfully, just in case you need to match size/type.
- If the tank fill valve shank spins when trying to loosen the nut, use a second wrench to gently hold its base flats.
When to Call a Professional
Call a licensed plumber if: 1) The shut-off valve itself leaks when you try to turn it or won't turn off completely. 2) The valve body or tank fill valve shank is badly corroded, cracked, or breaks. 3) You see significant water damage on the floor or wall. 4) You've tightened connections gently but leaks persist. 5) You simply don't feel comfortable. It's cheaper to call a pro for a valve replacement than to pay for water damage!
Understanding the Problem in Detail
Supply lines fail due to age, wear, and material breakdown. Rubber washers dry out and crack. Plastic lines become brittle and crack. Braided lines can fray or corrode at the nuts. Mineral buildup can weaken connections. Even slight vibrations over years cause fatigue. Understanding it's normal wear helps reduce panic!
Tools and Materials Guide
Adjustable Wrench: 8" or 10" is ideal. Basin Wrench: Only needed if the shut-off valve is tucked deep against the wall. Supply Line: Braided Stainless Steel: Flexible, durable, burst-resistant. Avoid cheap plastic. Sizing: Measure center-to-center from valve outlet to tank inlet. 12" is most common; 16" for wider setups. Ends: Tank end is almost always 7/8" compression. Valve end: 3/8" compression (most common for standard angle stops) or 1/2" compression. Take your old one to the store! Buy from hardware stores (Home Depot, Lowe's) or plumbing supply shops.
Safety Considerations
- Water Off is Non-Negotiable: Confirm water is OFF before touching connections. Test by briefly trying to flush after turning valve off. 2. Protect Your Eyes: Drips, debris, or a sudden spray from a loose connection can happen. 3. Mind the Tank: Plastic toilet tanks crack easily. Support the fill valve shank firmly when loosening/tightening nuts. Never force plastic. 4. Avoid Over-Tightening: This causes more leaks and damage than under-tightening. Snug + 1/4 turn is the mantra. 5. Clean Up Spills: Wet floors are slip hazards.
Troubleshooting Common Issues
Leak at Tank Connection: Most likely over-tightened (cracked washer or plastic) or under-tightened. Turn water off, disconnect, inspect washer and shank. Replace washer or line if damaged. Reconnect and tighten gently. Leak at Valve Connection: Same as tank leak - check washer and nut. Valve Won't Turn/Leaks: Stop! Don't force it. You likely need a plumber to replace the shut-off valve. Line is Too Short/Long: Buy the correct size! A slightly long line is okay with a gentle loop. A short line puts stress on connections. Water Hammer (Banging): Turn water on slower next time. Persistent hammer may need an air chamber check by a pro.
Maintenance and Prevention
- Visual Check: Look at your supply lines (toilet, sinks, washer) annually for cracks, bulges, or corrosion. 2. Feel Test: Gently flex plastic lines (if still installed) – if they feel stiff, replace them! 3. Operate Valves: Turn shut-off valves on/off gently every 1-2 years to prevent them from seizing. 4. Upgrade: Replace old plastic or vinyl lines with braided stainless steel during any plumbing work or if they look old.
Cost Analysis: DIY vs Professional
DIY Cost: $8-$25 (New Braided Supply Line). Professional Cost: $100-$200+ (includes service call + labor). Savings: Significant! DIY avoids the service call fee. When DIY Isn't Saving: If the valve needs replacing too, a pro can do it efficiently ($150-$300 total). Factor in potential water damage cost if DIY goes wrong!
Related Plumbing Problems
- Faulty Toilet Shut-Off Valve: The valve itself leaks or won't turn. Requires valve replacement. 2. Leaking Toilet Tank: Could be tank bolts, tank-to-bowl gasket, or fill valve, not the supply line. 3. Leaking Toilet Base: Wax ring seal failure. 4. Running Toilet: Fill valve or flapper issue. 5. Low Water Pressure: Could be clogged supply line (less common) or valve not fully open.
Frequently Asked Questions
Can I reuse my old toilet supply line?
Absolutely not! Supply lines degrade internally and the washers lose their seal. Reusing it is asking for a leak. Always install a brand new line.
Do I need Teflon tape for the connections?
No, and using it can actually cause leaks on compression fittings! These connections rely on the rubber washer inside the nut to create the seal. Teflon tape prevents the nut from tightening properly against the washer.
My shut-off valve is really hard to turn. What should I do?
First, apply a small amount of penetrating oil (like WD-40) to the valve stem and let it sit for 5-10 minutes. Try turning it slowly and gently back and forth just a little bit first to break the corrosion, then try turning it off. If it still won't budge, feels like it will break, or leaks around the stem when you try, STOP. You need a plumber to replace the valve before proceeding.
How tight is 'snug'? I'm scared of breaking something!
This is the biggest worry! Hand-tighten the nut as firmly as you can using just your fingers. Then, use the wrench to turn it only about 1/4 to 1/2 of a full rotation more. Think 'firm handshake,' not 'Hulk smash.' The initial water pressure test will show if it's tight enough (no drip) or too tight (cracked part).
How often should I replace my toilet supply lines?
Inspect them visually and by feel annually. Replace braided stainless lines every 5-8 years as preventative maintenance, or immediately if you see any damage, stiffness, or corrosion. Replace cheap plastic lines immediately with braided stainless – they have a much shorter lifespan and are more prone to failure.